Flash: HSS or “auto-fp” flash.
auto-fp flash power tests
I aimed to get the same histogram in each shot and it was interesting how much difference a few cm made when I made adjustments .
This is what I aimed for :

After each change in settings I moved the camera until I got the same histogram and then measured the distance to the flash head so I could calculate the power difference compared to normal flash .
F25 1/200th normal flash 195cm
F22 1/250th auto-fp mode 68cm = 1/8th of normal flash power
F16 1/500th 88cm = 1/5
F11 1/1000th 120cm = 1/2.6
F8 1/2000th 136cm = 1/2
F6.3 1/3200th 120cm = 1/2.6
F5.6 1/4000th 112cm = 1/3
My conclusion is that due to the way auto-fp works even though the flash head suggests the same working distance at any of these settings when in auto-fp mode it appears that the combination at 1/2000th sec yields the greatest output , after which the curve drops off again .
Since auto-fp flash behaves as a continuous light the slower the speed the more energy it requires ! So faster shutter speeds mean that light is 'switched on' for shorter times , not counting the short period before the shutter opens and after it closes that it will need to be on . This should also result in faster charge times .
In other words , when you revert to auto-fp mode stay away from the the slower speeds and aim for 1/2000th sec and the aperture that gets you the results you want to get the most flash power possible in this mode .
.
The results :
Auto-fp power loss
This weekend I will devise a test to see what results I get .
The distance info reported on the flash head suggest you have a little over 25% of the power of normal flash [ 2 stops less ] but many are reporting 2.3 to 2.6 stops less power .
New Casio FH100 compact
I'm really enjoying this video mode !
Fuji F31fd high iso samples
Tonight I did some test images at varying iso's which shows why the newer 14 meg compact sensors still can't catch up - they have too many megapixels and the dots are so small they can't gather enough light at high iso's .
Unfortunately "megapixels sell" or rather "A lack of megapixels doesn't sell " so they have to keep making compacts with more megapixels because people think the bigger numbers mean better image quality and the manufacturers exploit this idea to make people think they need to replace their camera because a 'better' model with more megapixels must be better .....
These images are slightly underexposed which exaggerates their noise .


And a few with different lighting



Nightclub photography
But basically whatever gets the results you want is the right way and "Jr" - 'Mike Petrie Jr' of nikoncafe has allowed me to copy and paste his thoughts and experiences on nightclub photography :

I wanna start off by saying I by no means consider myself a guru of nightclub shooting. This is just going to be some information that I've learned along the way and some of my techniques. Please feel free to contribute, ask questions or flat out disagree with me. I think this should be a good learning process for any and all involved.
Nightclubs - Starting off
Before you even step into a club, you need to be savvy with a camera. Your non-professional modes aren't going to get you far. Generally speaking, you're always or should always find yourself in manual mode. If words like aperture, shutter speed, ISO, exposure bias, etc... all seem like foreign vocabulary, I recommend picking up a few books and getting more hands on training before considering this. Understanding Exposure is a great book to start you off. The newest edition can be found on Amazon.
Equipment
Camera Body
Shooting in a dark club is difficult, walking in and using on board flash, a D40
 and a kit lens may seem fine - but it's going to be a stressful night. Don't get me wrong, you can "make it work" if you know what you're doing... but your pictures are going to be noisy, flash exposure will be poor and your shots won't look very professional. The better your camera deals with noise and high ISOs, the better your pictures will be without needing to spend tons of time post editing. You don't need to be shooting FX (it wouldn't hurt) but I recommend at least using a camera that has an internal motor.
Lenses
The faster, the better. The wider, the better. For the most part, you won't be shooting wide open, but being able to work with a fixed aperture throughout the focal range makes life A LOT easier and having the capability of dialing down to f/2.8 is always a plus. If you have the itch to shoot prime, make sure it's wide. That nifty fifty won't do you much good in a tight club. I rarely even use my 35mm f/2.
*For DX cameras, I recommend something beginning around the 17mm or 18mm range. I personally shoot with a 3rd party Tamron 17-50 2.8.
 FX shooters, I hear the 24 - 70mm f/2.8 works wonders in the club.
Flash
Lighting is THE MOST important aspect of club photography (in my opinion). Invest in at least one flash unit. There are many different techniques for shooting clubs and utilizing Nikon lighting, but that will be covered later in the thread. For now, you need to understand that some sort of flash unit is essential.
Extras
Pick up a lens hood and a filter for your lens. I call it "the drunk guard". You'd be surprised how much that small investment will help you out in the long run from people smashing into you and spilling drinks.

The basics - Every club is different, but here are general club settings.
Shutter Speed
I tend to shoot anywhere from 1/2 - 1/40th depending on the club and effect I'm trying to achieve. Dragging the shutter is very common in clubs so that you pull the right amount of ambient light into your lens. If you shoot too fast, your subject(s) will look like they are in a dark room... that's kinda boring.

Aperture
As a general rule of thumb, when shooting with my flash unit, my aperture stays between 4.5 - 5.6 respectively. This DOES vary, but this is a nice starting ground.
ISO
More expensive Nikons handle light sensitivity better than others. I keep my D90
 between 500 - 800 depending on my shutter speed. I've heard of FX users shooting much higher in their camera's ISO range.
Flash/Exposure Bias/Flash Power
Good luck. This will change every few minutes if you have a lot of strobes and are flipping from portrait to landscape style shots. There are SO man factors that play into these adjustments... the list is endless. One thing I can recommend is a diffuser.
A diffuser will soften light - the pure physics of something sitting between a light source and it's projected path will obviously scatter or hinder the light output in someway (think of clouds) and in turn will help your pictures. The biggest problem with a flash unit (on the hot shoe) is having such an intense amount of light coming from one super small area/on the same plane as your lens, so it's always going to have a little bit of the deer in headlight effect.

Now, shooting on the hot shoe is pretty normal and economical in these types of settings. I say economical because room is sometimes really tight. If you're shooting portrait on the shoe, you're going to get some type of side shadow no matter what you do. Even if you have a Gary Fong
 or some type of fancy shmancy diffuser, the location of the light source is still going to be coming from the side of the camera, period.
If you want to shoot with your flash in your hand, you have three options. Get yourself a TTL cord or wireless trigger and fire the flash that way. You'll still get to use your precious AF on flash assist light if it's not a slave. Another option is mounting a more expensive Nikon flash (SB 800
 +) on your hot shoe and firing another flash in slave mode in your other hand. This is a great option - but a pain in a hot crowded club. Lastly, shooting Nikon commander is always an option... but you don't get to use the luxury AF assist light on your flash unit. You need to depend on the in camera illuminator. Womp Womp.
So, how do you fix harsh portrait sidelights with a single flash? Answer = flash bracket
 .
.Post Production
Do yourself a favor, shoot in JPEG. Raw is incredible, but after thumbing through 200+ photos a night and not be able to batch process... you will be hating your job.

My Letter to George
Perhaps that's why they say " How do you make a small fortune in photography ? ..... start with a large fortune !"
Did this guy have one eye bigger than the other , head tilted to the side , drool out one side of his mouth and a twitching eye-lid ? Perhaps a "Nikon rep" card on his jacket ? Just kidding , he probably meant well but he made some huge assumptions that you would
1.) stay with your hobby for a long time ,
2.) actually want to go full frame ,
3.) be prepared to sell one of your kidneys to finance the purchase or go into debt , and
4.) be willing to lug around a heavy camera with two lenses that he likes rather than perhaps what may be right for your needs .
[ To be honest I wouldn't swap my D90 and 18-200VR lens for a D700 with any prime lens - that's a personal preference though ]
My advice - for $400 you could get a good used Nikon D50 and 18-55mm lens plus perhaps a used SB24 flash that will give you good image quality and superior flash synch speeds to a D700 and the equivalent of 6X the flash power of a D700 in high-fp mode using what I call realsynch flash . Until you understand what the heck I am talking about it is pointless for you to get a D700 unless by some unlikely chance you will start making money from low-light photography in a few weeks.
The D50 is 6 megapixels which is more than enough for most of us -[ they printed a 3 storey high image from 12 meg ], has decent high iso performance and the 18-55 lens will provide you with a reasonable wide angle for landscapes along with a usable 55 mm at the long end .
Think about it , if you buy that D700 brand new it will be worth less than half what you paid for it after three years . The used D50 will still get you at least half what you paid for it in that time and you will only have lost $200 for its use compared to $3200 plus the interest you would have to pay on the loan along with insurance costs of the D700 kit [ perhaps $3500 total ?] .
Invest in last year's technology , don't waste money on today's latest gadgets unless you are making a living from your hobby . When these companies bring out a new sensor it goes into their latest pro camera . After they resolve the initial teething problems with the camera they release a semi pro model with an improved sensor . Then they bring out the advanced-amateur version with further refinements . lastly they bring out a beginners camera with a perfected sensor while they release a sensor with more [unnecessary] megapixels in their latest pro body .... and repeat the process .
You end up with a camera like the D40 with a 6 meg sensor and image quality that puts the first professional 6 meg cameras to shame ..... while everyone clambers for the latest 10 meg sensor with all it's new teething problems - and someone wants you to buy a D700 as a beginner ?
The sad fact is that there are still professional photographers out there that seem to believe the latest gear takes better pictures while the reality is that you can do a lot with an entry level camera and nobody will know what camera the image was taken with anyway .
So my advice is to get the used D50 kit , learn to use it and as you advance you will know where you want to go from there - whether you need to spend more money on newer gear or still need to learn the basics .
Maybe next year you can buy a good used D90 from someone who upgrades because their D90 "doesn't take good pictures" , if your finances allow for it . If the D50 is still serving you well invest in lenses rather than another body , they maintain their value .
Take advantage of the people that seem to think they need a D700 to start with and then sell it cheap later because they either aren't interested in the hobby any more or realize how hard it is to make money from photography .
Buy the old technology cheap and cut your losses .Who knows , maybe in 5 years time if you are still keen on it the D700 will cost you $400 :) .
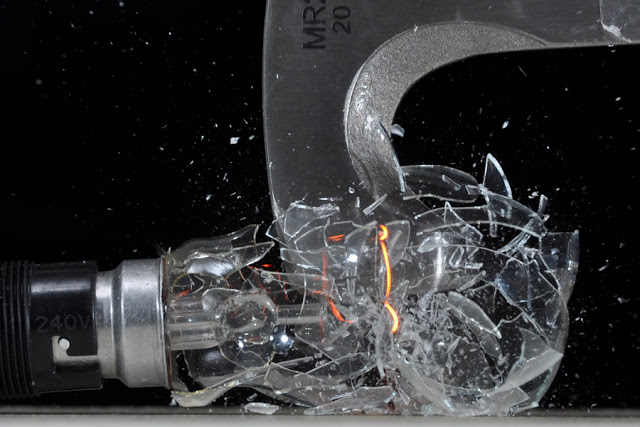
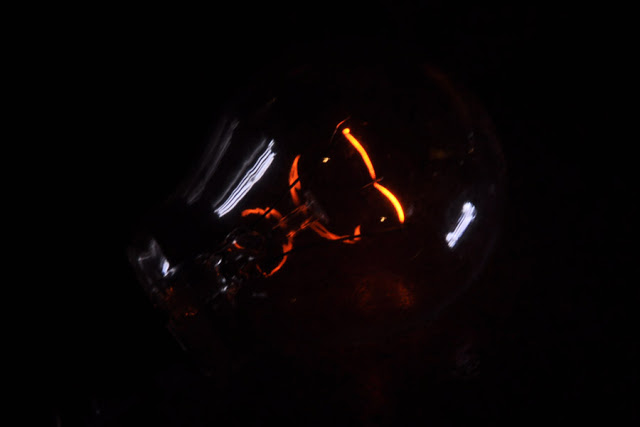
Glowing filament
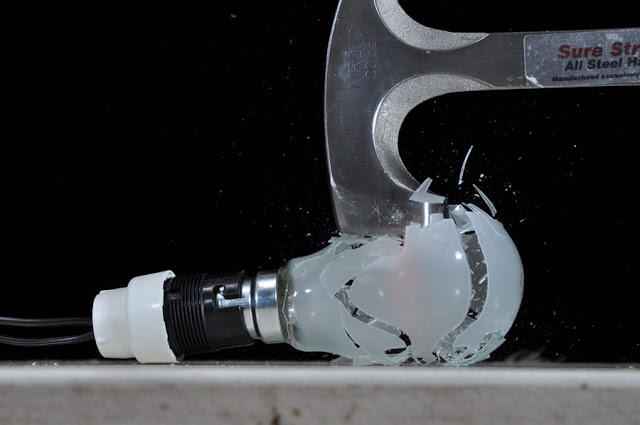
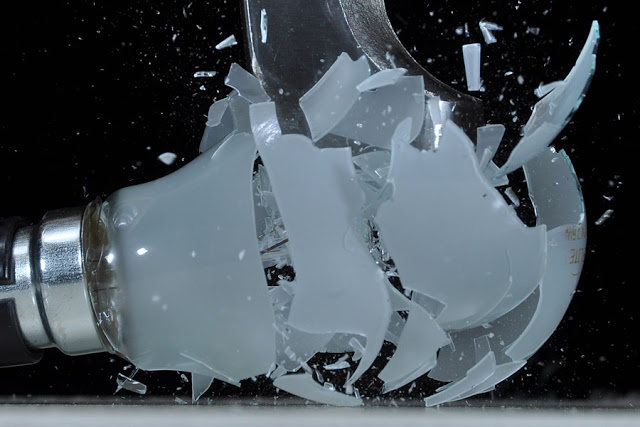
Now I have a more subtle glow that I can control easier when I do my next set of 'breaking light bulbs' shots .
If I work at iso 200 and F16 this is the glow I will get .
17 July 2010 .
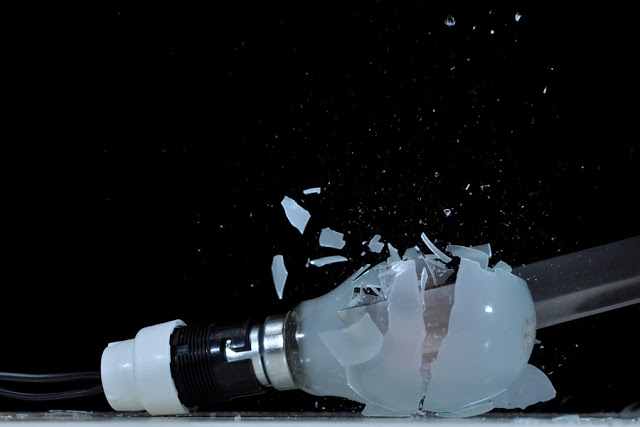
I bought some cheap light bulbs but unfortunately they only had frosted bulbs . I managed one ok shot with the one clear bulb I had .
and a few of the frosted bulbs ....
The Flash-bulb
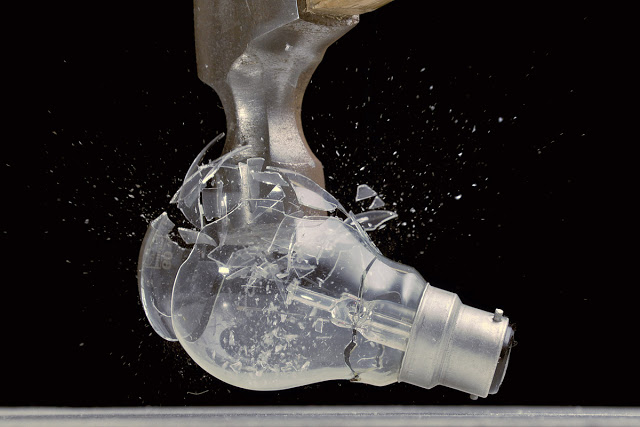
When I have the old flash on low output the flash fires weakly but there is no response from the filament .
When I switch it over to high power I get a reaction - but a little too much . I need to get the right amount of power to have the filament glowing without blowing out the exposure .
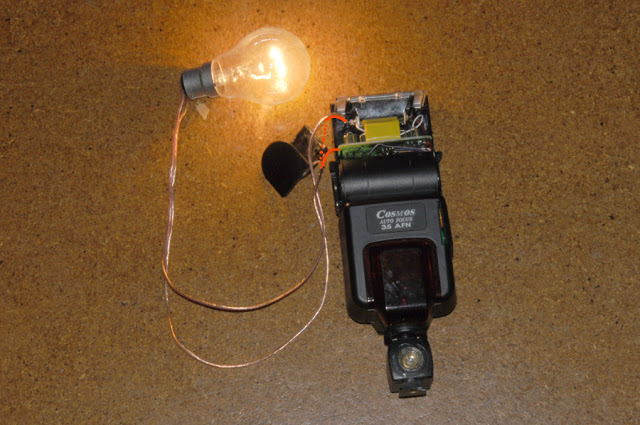
More 'experiments ' to follow :)
15 minutes later and I had opened another older flash with thyristor control - in the hopes that I could get the flash to turn off sooner for a dimmer glow . Not to be !
I faced the sensor toward a white surface to help it detect the flash and hopefully turn off quickly . It still gave out too much power .
At first I was confused as to why the optic flash trigger would not fire this flash but then I remembered that when I checked its trigger voltage it was "-8 v" , the earth pin was in the centre which was not normal - the electronics of the optic trigger could not switch a 'backward voltage' .
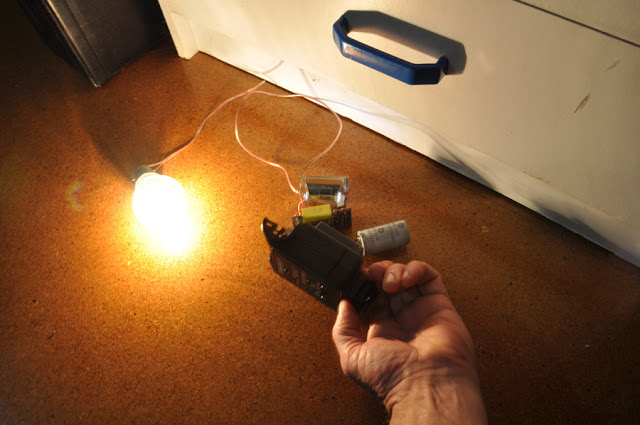
13/07/2010
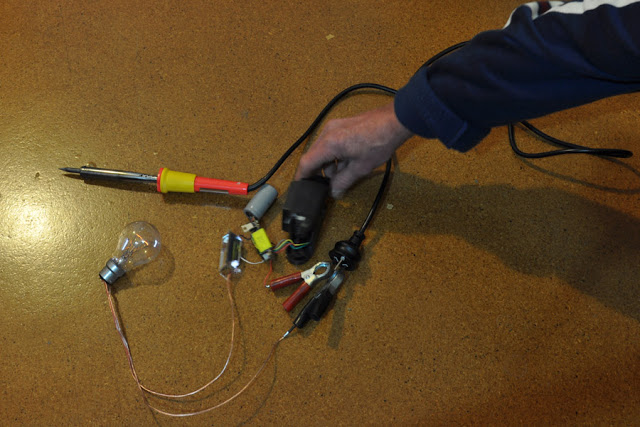
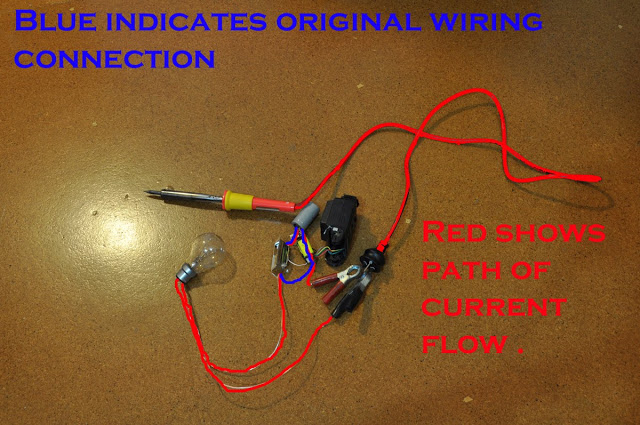
Tonight I ran the wiring through a soldering iron as well to waste some of the energy . Now I have a controllable glow that will look right at iso200 and F16 .


This 'diagram' shows the path of the the current flowing through the circuit . The blue lines show where the wires were originally connected . The lower blue wire was cut and connected to the red clip going into the soldering iron . The current flows through the soldering iron and back down through the black clip which is connected to one of the terminals of the light bulb . The circuit is completed as it flows back from the other terminal and through the flash tube . Each item represents a volt drop of some sort and the coil of the soldering iron probably adds an inductance to slow things down a bit . The voltage drop across the light is just enough for a light glow and the rest of the energy is wasted in the soldering iron and across the flash tube .
17 July 2010 .
I bought some cheap light bulbs but unfortunately they only had frosted bulbs . I managed one ok shot with the one clear bulb I had .
and a few of the frosted bulbs ....
24 July 2010 .
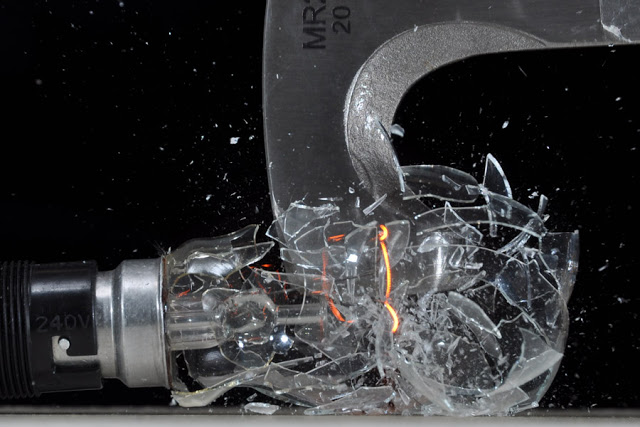
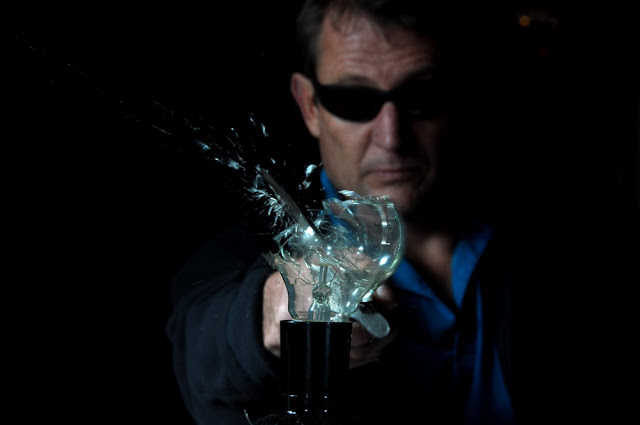
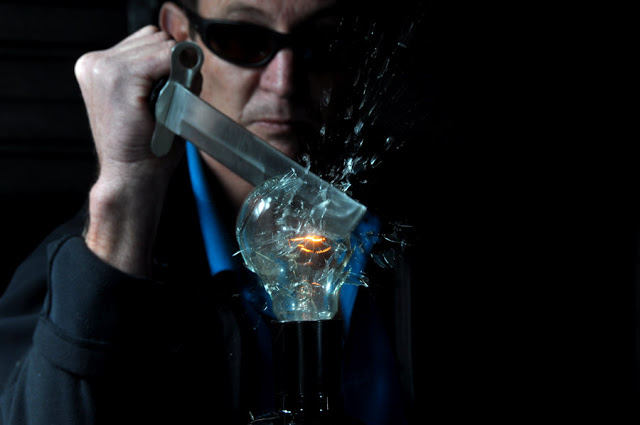
I got hold of 10 clear light bulbs finally . I tried various 'devices' to destroy them and got some pretty decent results .
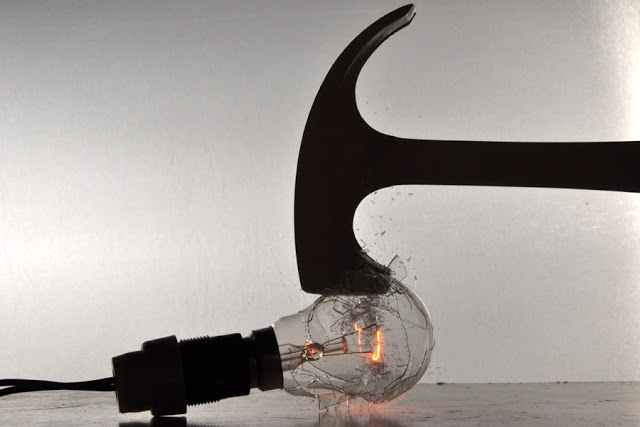

and a couple with the sword ....


And then I noticed my axe leaning up against the wall and decided to do a few with it .
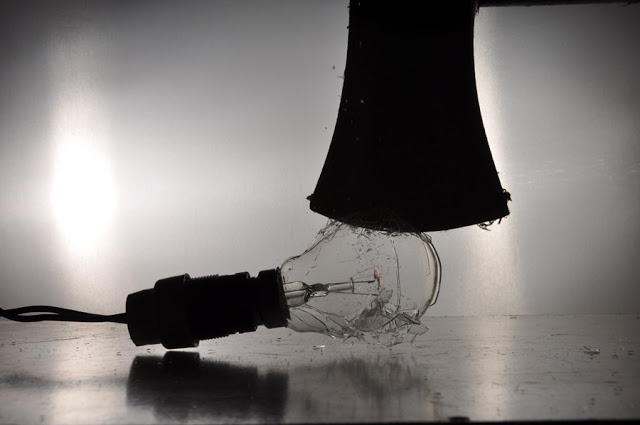
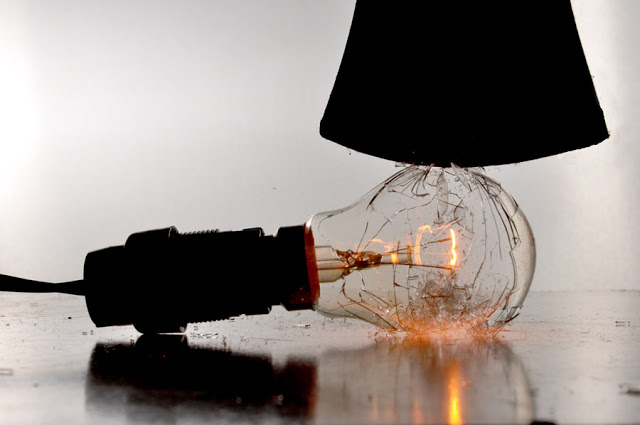
Perhaps when I get exactly what I want I will spend some time processing the images to look better but I would really like to get it right in camera rather :)
Analyzing Canon ETTLii
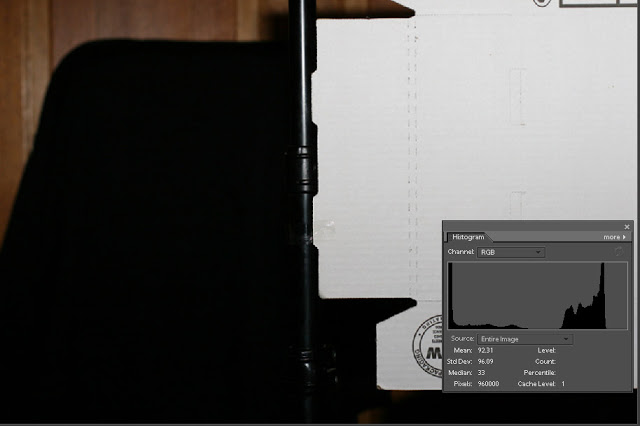
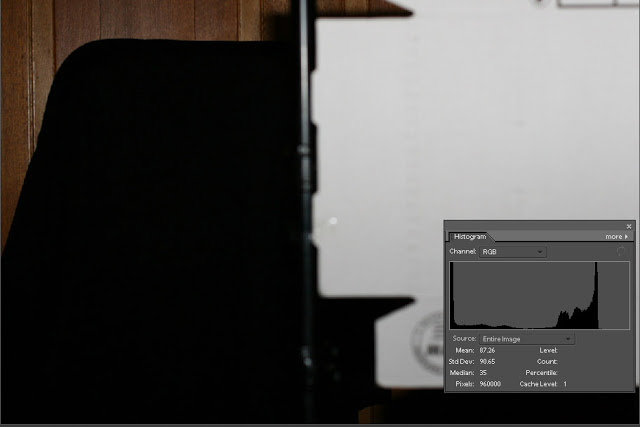
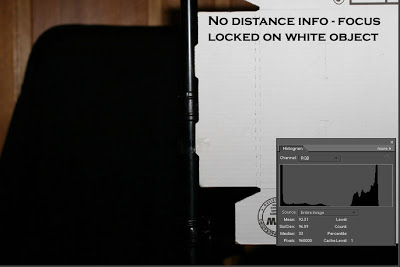
That's a little crazy ! When you focused on the white object toward the front it exposed pretty well considering the subject was highly reflective .
But when you focused on the object behind it , a black object at a greater distance it under-exposed in comparison ?
The way I see it , one option is that for the background focus the camera did not register focus confirmation or it exposes any out of focus objects as average grey regardless of where they are and in this case the white object fooled the meter - strange ?
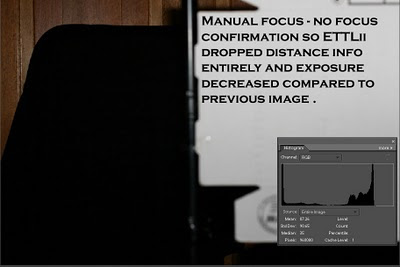
Update : I was just informed that the second shot was in fact manual focus and the camera did not confirm 'focus lock' which means we are back to square one - the point where we worked out that ETTLii drops the distance info and resorts to average gray metering when it doesn't confirm a focus lock- regardless of how far the subject is behind the white object .
Two more tests , this time auto-focus locked .... almost identical histograms due to the distance info being used .
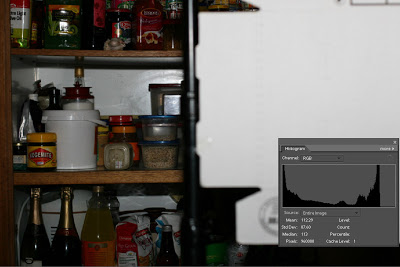

I don't see any sense in Canon dropping the distance info when there is no focus-lock . I mean if a subject
is so badly out of focus why bother with changing the equation anyway ? If it is only out by a small percentage and could be a keeper when why not use the distance info anyway for a more accurate exposure ?
Canon vs Nikon flash studies .
So far Stefan on photocamel has provided me with these images from the 7D and a 430 EX flash and the results are interesting .
Test 1.)
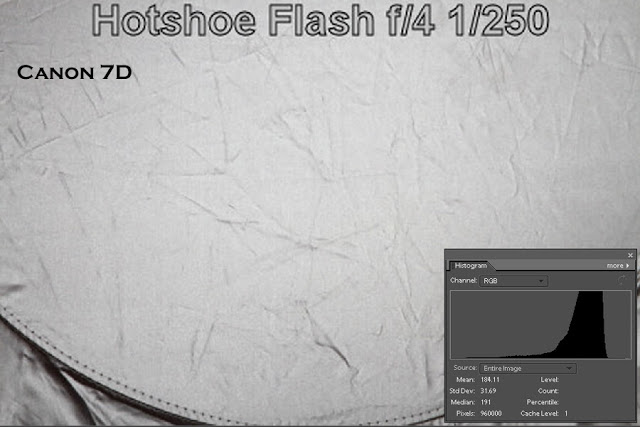

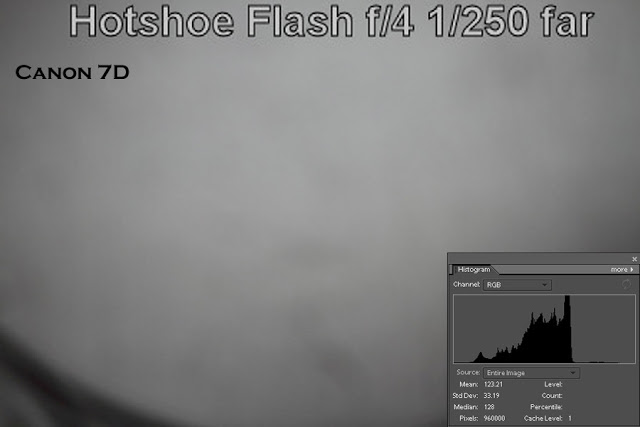
The histograms of both the 'near' focus and 'far' focus both went down instead of the 'far' focus increasing exposure as with TTL-BL mode . I was expecting the distance info from the lens to tell the flash system to increase output when the focus was changed to infinity but the opposite happened ?
Perhaps when the camera doesn't detect anything in focus it reverts to plain "average gray" metering for the flash ?
Now we are in the really early stages of doing these tests and nothing has been double checked by others yet so I still welcome input . I would like to go through all the tests as shown in my TTL-BL blog to see what we can work out and compare Canon and Nikon flash systems just for interest and for those who would like to learn the 'nuts and bolts' of the systems .
This is how Nikon's TTL-BL handled the situation .


When the flash system detected that focus distance was at its maximum it increased exposure without showing too much regard for the out of focus white in the foreground .
Compared to what Canon ETTLii does for the moment I see this as an advantage .
There are probably very few people who use manual focus indoors but for anyone who does manually select a focus distance the Canon flash system will instantly lose any advantage distance information from the lens would have given it if the camera doesn't agree that anything is in focus .
However with the run of problems with canon auto-focus who know what the camera may deem to be 'in-focus' ;) .
So the question now is " Does Canon ETTLii totally drop the distance information when it doesn't detect 'focus confirmation ?"
Anyone interested in doing the tests , this is the scenario we need :
Test 2.)

Please excuse the creepy looking baby but "Stinky" was my model back then .
Have a white object close to the camera and covering half the frame . Place the subject next to the reflector , take a picture , and then quite a distance behind it and take some pictures .
Nikon's TTL-BL ignored the white object and concentrated on what was in focus at the right distance .
Then set focus on infinity and take another picture .
This will tell us if ETTLii uses the lens distance info when the subject is in focus and whether it totally drops it if it does not confirm focus on a distance object .
I'll list the tests I would like samples of for those interested in participating , we'll call this test number 3.)
A comparison between TTL and ETTLii with a black and white subject and varying degrees of 'centrality' of the subject .... like this ....


The point of this test is to show how TTL meters differently to ETTLii . Normal TTL meters off a central circle while ETTLii should meter almost equally for the white subject as long as part of it is under the focus points . if the white leaves the focus point 'diamond' then it will probably blow out .
The metering pattern sits under the focus points and , if it can select the size of the subject it meters off like TTL-BL , should give reasonably consistent results compared to TTL flash .
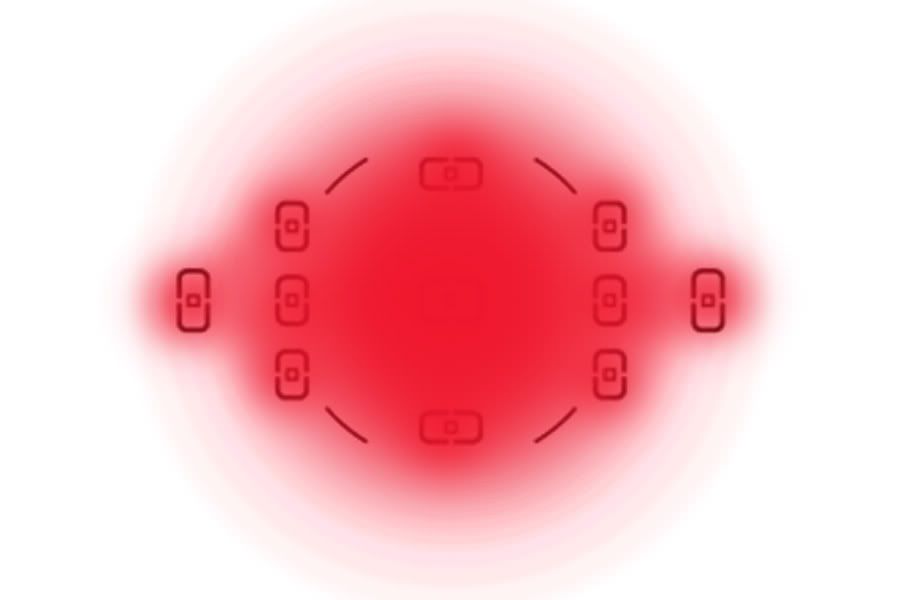
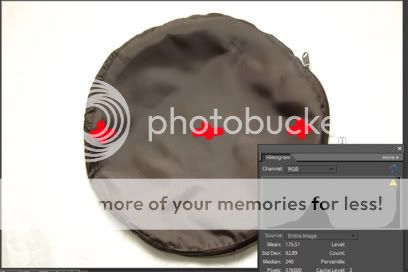

As you can see the focus point diamond plays a very important role in how TTL-Bl meters .... how does canon flash compare ?
Test 4.) A basic test that should give the same results in TTL and ETTLii mode .
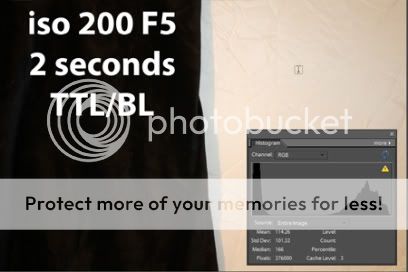
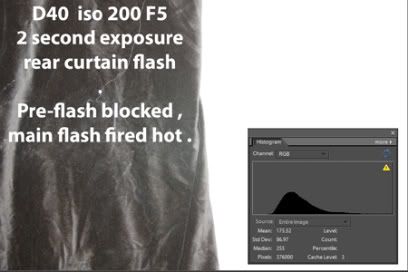
Take a picture indoors where it is dark . iso 100 , F16 and 2 seconds [ the ambient must still be underexposed ] , use rear-curtain flash . Put your hand in front of the flash and take the picture - as you press the shutter the pre-flash will fire on your hand ..... move your hand away before the main flash fires - just before the shutter closes .... it should fire brighter than normal since it couldn't detect the pre-flash reading .
Something like this ......
Test 5.) This is where it gets a little more complicated .
Set up your camera in manual on a tripod [ as you should have been doing ] . Take a picture of a subject with the ambient under-exposed by 4 stops using TTL mode and then in ETTLii mode .
they should look similar .
Then with the camera in manual mode still find the point where the meter shows correct exposure .
Take another picture in TTL mode and ETTLii mode . Most likely the picture in TTL mode will be much brighter than ETTLii which should register the fact that you have the ambient correctly exposed and compensate by backing off the flash .


Test 6.) [Similar to test 5 ] Slightly more complicated .
Find a situation where CW metering and pattern metering give different readings - look at the following images ....
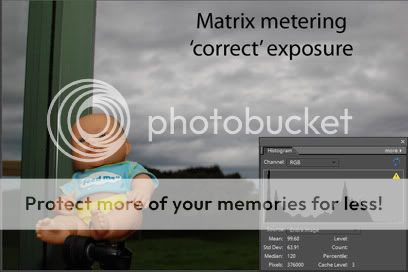
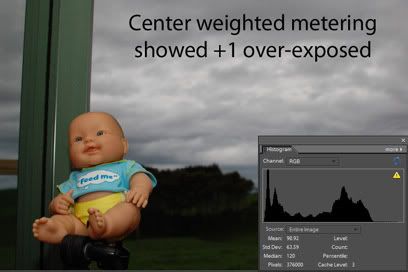
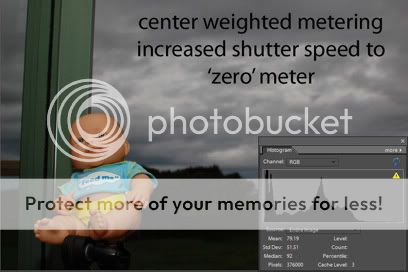
What we are trying to do in this test is establish how ETTLii decides how well you have the ambient metered . With TTL-BL the evidence suggests that TTL-BL is 'watching the meter ' and as soon as the meter moves to show underexposure the flash output increases to compensate - even if the the settings haven't changed !
I was told that TTL-BL measures the 'RAW data' to determine what the lighting is like .... obviously this can't be the way it does it because regardless of what the light looks like the final exposure depends on the settings you have chosen and how you decide to expose the image .
So : Find a setting similar to my example where CW and Pattern metering give different readings . Set the camera so you are correctly exposed for the one mode and when you change to the other mode you get under-exposure [ according to the meter ] . Take a picture with ETTLii at 'correct' exposure and then simply switch to the other exposure mode , that tells you it is now underexposed , and without changing any other settings take another picture with ETTLii and see if the output has changed .
These images were submitted recently - both taken with a lens that does not provide distance information ....
The histograms are almost identical showing that the flash output was the same even though the focus distance changed - obviously ETTLii couldn't use distance info in the equation .


There was a difference in the images when manual focus was used and the camera did not confirm a focus-lock .... it then appears to simply expose for average gray on the brightest object in the scene .
Fake high speed photography
Then I put my subjects on a wooden table and hit it from beneath with a hammer .....

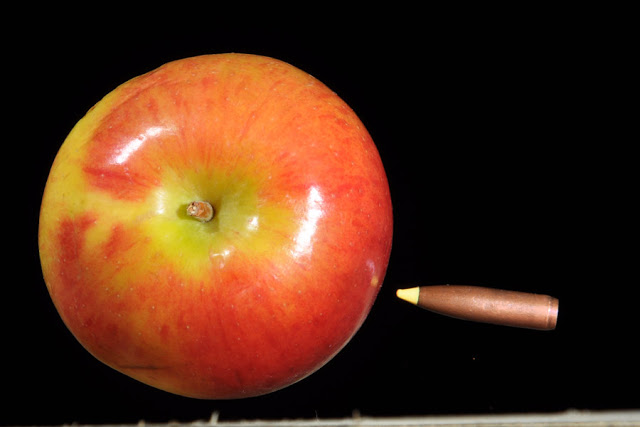

It's nothing amazing but to someone who doesn't know how it was done it could look like really high speed photography :)
Flash : Yongnuo RF-602 wireless transmitter
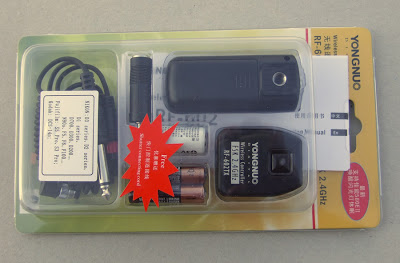
Today I tested my new Yongnuo RF602 wireless flash transmitter , this is what you get in the package .
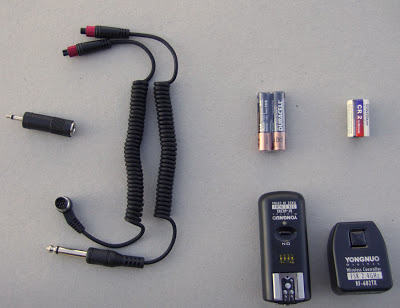
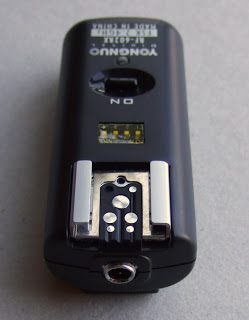
This is a close up view of the transmitter and receiver


Then I set up the tripod with my old SB24 so I could test the fastest trigger time
[ which they advertise as being 1/250th sec - mainly because that's the fastest time most cameras can synch flash ] , and the furthest distance it could work at .
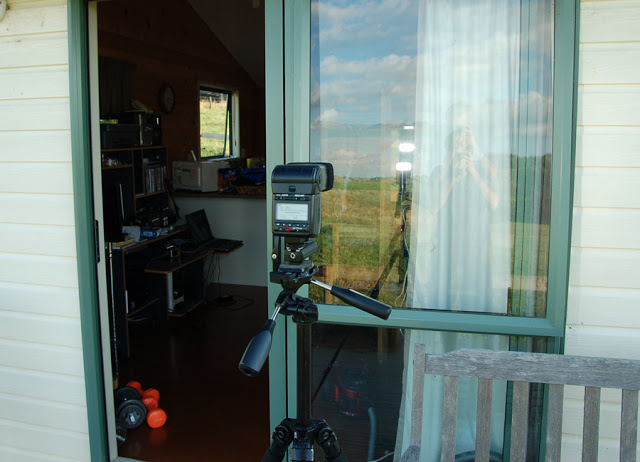
I used the D50 because it has an electronically switched sensor/shutter so it can synch flash at 1/500th sec normally and if it doesn't know there is a flash connected - as with a wireless trigger - there is no limit to the shutter speed you can use with flash .
I explain this in my blog on realsynch flash
Standing next to the flash I managed to trigger it at 1/800th second .
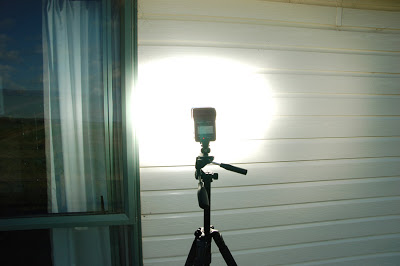

And these are the results from those positions , all at 1/800th sec !
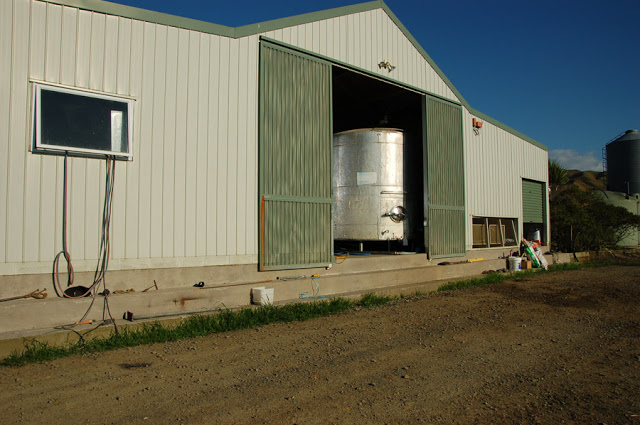
Tamron 17-50mm lens at 50mm .

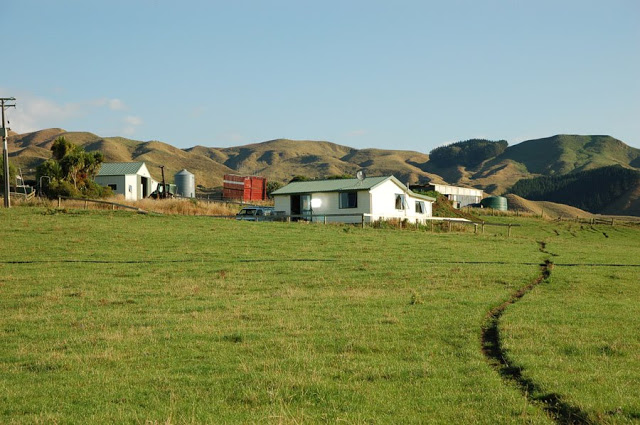
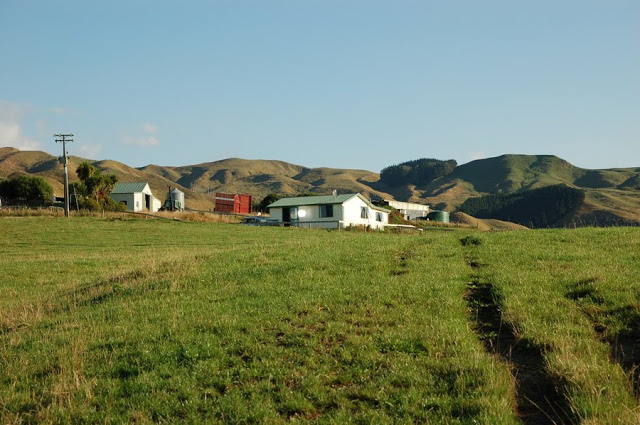
As a side issue we were discussing the possibility of transmitting wireless TTL on nikoncafe . This has been done with the radiopoppers but we also spoke about the fact that the RF 602's wake up the SB800 flash from standby mode with a half press of the button but can't wake the SB600's and won't let the SB900's go into sleep mode so we did some measuring and this is what mike66 of nikoncafe came up with ....
" Here is what I found on the left rear contact of the speedlights. When active, each contact had a DC component with a negative going square wave pulse. When in standby, the contact was zero Volts.
SB-900:
3.75V DC with a negative pulse of 40mV. The pulse width is 8ms and the period is 130ms.
SB-800:
4.00V DC with a negative pulse of 100mV. The pulse width is 8ms and the period is 250ms.
SB-600:As we learn more about the RF 602 wireless flash triggers perhaps we will find a way to make them work properly with the SB600 and SB900 . Perhaps Yongnuo will just make the next product work properly ? They probably took a D200 and SB800 and reverse engineered the contacts thinking that it would work with any flash . For now anyway they are still a pretty powerful product considering what they can do compared to other cheaper flash triggers .
4.00V DC with a negative pulse of 80mV. The pulse width is 60ms and the period is 260ms.
The SB-800 had another interesting surprise on the front right contact, which neither of the other speedlights shared. When the speedlight was active, this contact had a positive going square wave pulse train of 2.5V. The pulse width is 2.5ms and the period is 250ms. When the SB-800 went into standby, the voltage on this contact was zero with no pulse train. "
Flash : "Realsynch flash "
First off two samples to whet your appetite comparing what I call "realsynch" to the high-FP trick mode that modern cameras use in bright sunshine with high shutter speeds .
This is the best a Nikon D90 and SB800 can do at a distance of 5 metres ....
taken indoors at night .

And this is what "realsynch" does ....

I used a modified SB24 flash for my "realsynch" flash . Because the cameras mentioned fire electronically with their sensors they have a 1/500th flash synch speed meaning that since the SB800 , for example , fires at full power for around 1/1000th of a second the camera will be able to capture that entire flash in 1/500th of a second without any overlap in the timing of the electronics .
With a D90 this time is only 1/200th of a second and after that it changes to FP mode where the shutter slides across the frame in a slit - then it has to resort to a weak continuous light so the whole frame receives the same amount of light .... more on that later .
First we have to make sure the D40/50/70/S we are using doesn't know there is a flash connected and there are two options , either slide a piece of paper under the two back pins as you slide the flash into the hotshoe or do what I did - open the base of the flash and cut the two wires to the back two pins -BUT : be careful of high voltages , you could get zapped !
Now if you have an SB600/800/900 the paper trick is the safest if you are not 100% sure of what you are doing , also you don't want to damage a newer flash .
And this is a picture I took a while back to show the flash pins .
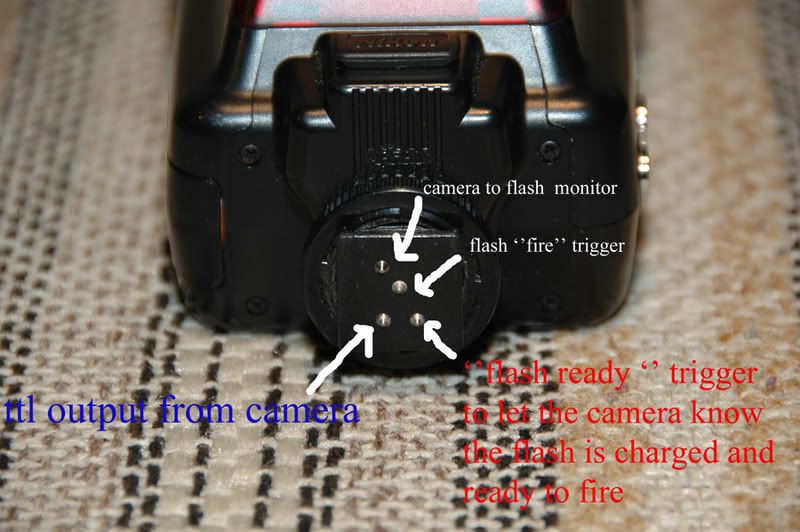
The centre pin gets earthed to the 'ground' contact on the side of the hotshoe when the camera wants it to fire . The single pin at the top is the 'camera to flash' communication pin .
The two at the bottom are for the flash to communicate with the camera so I disconnect them so the camera doesn't know the flash is connected and can't default to maximum synch speed .
In any case it doesn't speak the same language as the newer cameras so I have found that with my D40 and D50 I can fit an older flash without bypassing or blocking any of the pins and it still works at any speed , however I can't guarantee that there won't be any mis-communication between the camera and flash so I generally use my SB24 with the wires cut ....
I leave the one at the top connected because it is useful in that you can switch the SB24 to "standby " mode and when the camera is switched on that pin wakes the flash up - so the flash knows a camera is connected but the camera doesn't know a flash is connected !
Of course this means you have to input the aperture , iso and zoom of the head manually - but you can still leave the flash in 'auto' mode and it will use its sensor to control the flash output accordingly - based on the settings you have told it to use .
The advantage ? Well you can see that from the two pictures at the top ! Just a warning about the electrics in a flash ....
If we go by the 'sunny 16' rule : Bright sunlight at F16 gives you iso 200 and 1/200th max for the D90 . The SB800 tells me I have 2.7 metres working distance at this setting but when I open the aperture - F8 1/800th , F4 1/3200th ... the flash has to go to high fp mode and tells me I have 1.4 metres working distance .
Now the SB24 : F16 on the D50 allows me 1/500th sec at iso 500 , full power - which gives me 4 metres . f8 iso 200 1/800th full power is cutting it a bit fine to prevent overlap but as we drop in flash power it fires much faster . At 1/4 power it fires at 1/2700th sec and at 1/8 it fires at 1/5500th sec so at F4 1/3200th and iso 200 I can leave it on 1/4 and still catch a high percentage of the flash and have 4 metres working distance .
These distances are at 24mm wide angle on the zoom head and increase [ on both flashes ] as I zoom in and the power used would be enough to light a subject in total darkness as shown by the first two pictures . Of course outside in bright sunlight we would not need all that power and could use the flash as fill only , bounce it off a reflector , or close the aperture without changing the settings on the flash thereby fooling the flash to think it doesn't need to fire so strong [ increasing the iso setting on the flash will also reduce its power ] .
Here are two more pictures illustrating the power you have outside in bright sunlight .
Just remember one thing though , you have so much power available you may need to make sure you don't get too close to your subject/s since the flash may not be able to fire weak enough !


Now the 'rough' maths . Due to the inverse square law when you are twice as far from the subject - the light from the flash going forward in a 'rectangular' pattern means that the length and breadth of that 'rectangle' double and twice the length times twice the breadth = 4 times the area . So if you are getting twice the working distance it actually means you have 4 times the flash power ! The results may not agree 100% with the maths but they look close enough to prove that there is a huge advantage in 'realsynch' compared to high-fp mode .
So if the SB800 tells me I have 1.4 metres working distance and the SB24 tells me I have 4 metres then 4/1.4 = 2.85 X the working distance . 2.85 squared gives just over 8X the power !
That's 3 stops more powerful than a D90 and SB800 combination achieved with a lowly D40 and SB24 flash !
After doing some tests in manual mode without flash to get the same histograms as the first pictures [ not 100% but close ] it appears I am getting 2 1/3 to 2 2/3 stops more power than high fp mode .
I just did some calculations on the difference between normal flash and High fp on the SB800 , hopefully they are correct ;
When I set my camera manually to iso 200 , F16 and 1/200th sec the flash tells me I have 0.6-2.7 metres working distance available . As I take it to F8 1/800th or F4 1/3200th it goes into high-fp mode and tells me I have 0.6-1.4 metres . Now 2.7m/1.4m gives us 1.928X the distance . 1.928 squared tells us we have 3.72X the flash power when we are not in high-fp mode .
1/3.72 = 0.2688 which is the power we have in fp mode compared to normal flash mode .
That's less than 27% of normal flash power with a D90 and SB800 flash , when in high-fp mode .
At iso 100 and 35mm the SB800 has a GN of 38m and the SB24 a GN of 36m . By my calculations the SB24 has less than 90% of the power of a SB800 .
But when we start comparing "realsynch" to high fp mode the SB24/D40 combination has almost 8X more power at higher shutter speeds due to the faster flash synch speed !
Today I did some tests to try to turn "day into night " .
First a picture without flash .

Under expose the background by increasing the shutter speed ...

And with the D40 , [35mm 1.8 lens] and SB 24 we still have enough power at 4 meters to make the picture look like a bad 'direct flash' shot at night !

Flash : Nikon's "New" TTL-BL
Note: There are many similarities between TTL-BL and Canon's E-TTLii so much of this is comparable .
Update December 2013:
During some 'discussions' on the forums disputing my claims as to the fact that TTL-BL uses the matrix metering pattern we found that the newer cameras were giving different results to my D90 tests.
This led to more tests which actually ended up proving that TTL-BL is as reliable as the matrix metering of your camera. The test results below are from my D40 and D90 - in the link provided I added some tests from my newer D5100 and they changed quite a bit - in fact exactly the same as the change in matrix metering modes of both cameras. Basically TTL-BL will be slightly different between different model cameras so keep in mind the fact that unless your camera is a D90 you will get different results to what you see below.
Short version :- " The 'new' TTL/BL selectively meters off the focus point diamond and exposes for the brightest object in that area , taking ambient into account regardless of the background . The subject does not need to be central , it does not need a bright background to work ".
Long version : -
First of all why should you care about how TTL/BL works if you only use TTL flash ?
For one thing your built in speedlight works and meters in TTL/BL mode .
The SB400 defaults to TTL/BL mode . Note : When using forward flash with the SB400 , SB800 and the built in speedlight no compensation should be needed as the distance info is being used .
And as soon as you start using Nikon's wireless flash features in "TTL" mode it is actually using TTL/BL [minus the distance info] whether you like it or not and that is a good thing as I'll explain later [ basically because it is a superior metering system to TTL ]
The confusing part is the manual that suggests that TTL/BL tries to balance the subject with the background - that's only true for cameras older than the D200 . This means it measures the back-lighting and determines how much flash to add to the subject to make it as bright as the background . The manual's description is so ambiguous that it has even caught out top photographers . In a popular book on flash the author , who uses Nikon flash extensively , makes the incorrect statement "It means the camera is now in balance mode , trying with all its might to make the foreground and background roughly equivalent exposure zones " ... his description of the results shows that he thinks the flash will try to light the background as well as the subject . This statement is totally wrong and what he doesn't realize is that when he is using wireless CLS he is in fact using TTL/BL mode so his advice not to use TTL/BL is contradictory !
The correct term for the newer cameras is "balanced fill flash" which doesn't care about the background , it concentrates on correct exposure of the subject taking ambient "on the subject" into account and compensating accordingly - REGARDLESS OF THE BACKGROUND ! .
I did my tests with a Nikon D40 and 18-105VR lens and a Nikon D90 with a Tamron 17-50 F2.8 . This model lens [Tamron 17-50 ] has been known to give incorrect distance info - my copy gave equal results to the 18-105 lens so it must be good !
My tests were duplicated by Mike who is an ex-pro photographer and software engineer using his D3 and D300 . His two cameras varied quite a bit in TTL flash mode but gave consistent results in TTL/BL+1/3 according to his tests .
First we need to get get some myths out of the way . There are many sites out there stating that
1.) the subject needs to be central , and
2.) you need some ambient for the flash to balance with .
Those statements are as obsolete as a D100 because that is generally the model camera/time-period that it applies to . So those statements are correct for anything older than a D200 but after that they are wrong !
I've done a series of tests where I break down the different 'elements' of TTL/BL flash compared to TTL flash and dismiss these myths that are so widespread .
In summary before you view the results this is my conclusion :
1.) TTL flash only uses the matrix or Centre Weighted pattern , whichever you select , for its metering so the subject needs to be central or you need to use '' flash value " lock when recomposing .
TTL/BL uses the FOCUS POINT DIAMOND as well which makes it superior . I have not seen it overexpose unless all the focus points are on a black subject . Even if one focus point is on a white subject it will make the blacks 'black" as they should be while TTL would try to brighten them .
2.) TTL flash is similar to normal camera metering in that if there is a dark background or a lot of black it overexposes by concentrating on brightening the shadow areas .
TTL/BL concentrates on the lighter areas and tries to preserve highlights mainly with 'pure bounce and no forward flash . This often leads to under-exposure when there is a lot of white in the background and good exposure if there is a lot of black in the background - setting the flash to TTL/BL + 1/3 fixes a lot of this and produces a much more consistent batch of pictures that might only need a slight tweak of the levels to be good compared to TTL which often clips highlights beyond recovery .
3.) When you use Nikon's CLS "creative lighting system" wireless flash the camera/flash defaults to TTL/BL which is another nail in the coffin of the theory that you need ambient for TTL/BL to work [ on newer cameras that is ] .
4.) TTL thinks it is the only light source which is why you need varying degrees of compensation in daylight and cloudy weather .
TTL/BL also takes the camera's metering for the ambient into account and then adds the amount of flash it deems necessary for a correct exposure .
I'll start with these pictures ...


They prove that TTL/BL does not use the centre of the frame , it does not need ambient to balance with [ it was taken at night ] and as long as the subject is under the focus point diamond , not necessarily the active focus point , TTL/BL will do its best to preserve highlights - and it also means that you don't need to use Flash value lock " FV lock " . It also shows that when you use wireless 'TTL' the camera meters the same as TTL/BL !
TTL , on the other hand , is a simple exposure based on the centre of the frame , it does not use the focus points in its calculations and doesn't care how much ambient already exists , so you need to be able to use negative compensation more often when using TTL . TTL/BL does this for you .
An interesting aspect of TTL/BL is that it uses the focus distance from your lens to calculate direct flash exposure , as well as the TTL reading . Try this experiment , take a flash picture with direct flash [ We avoid direct flash when possible but it is useful in bright sunlight ] .
Then manually move the focus distance and watch the flash exposure change !


Then try this , take a 'normal ' picture in TTL/BL mode [ or TTl for that matter ]

Now try again but block the pre-flashes using second curtain and 2 seconds exposure [ as in the first picture ] then move your hand away before the flash fires .....

This proves that TTL/BL uses focus distance with direct flash but also takes the TTL reading into account .
When the subject is central there is not much difference between TTL and TTL/BL but when a tricky situation arises , like a highly reflective subject , TTL/BL shines above TTL because it also uses the focus point diamond for its metering even though tilting the flash head lessens the effect of the distance info it receives , the extra info from the focus point diamond gives it that edge . [ It ''maps out'' the subject and rejects bright highlights 'recognizing them as reflections ' ]

As you can see I have found that TT/BL + 1/3 gives me a much more consistent exposure than plain TTL flash . When there is a lot of white in the frame TTL/BL +1.3 has a certain 'consistency' as you can see in the link at the top right in my "TTL/BL consistency theory "

It would appear from my tests that TTL flash [ and TTL metering ] looks more at the shadows and darker areas and tries to light them sometimes resulting in blown highlights while TTL/BL uses the focus points and tries to control highlights often resulting in slight underexposure which in fact results in more 'keepers' because it is easier to tweak the levels up than recover blown highlights ! [ As mentioned simply using TTL/BL+1/3 gives a better average than plain TTL ]
I'll be doing more tests with wireless flash but so far it is evident from my results that when using wireless flash and "TTL" mode the flash is in fact resorting to TTL/BL metering using the superior focus point info as well . [ compare this to the first two pictures ] .
The focus point theory ? Have a look at these pictures - [my D40 only has three focus points .]
All focus points on the black surface ....

Then I slowly moved until just one focus point was touching the white surface - it's not the in-camera metering ! I have tried this in many situations .

As long as the focus point 'diamond' finds contrast the meter does its best to preserve highlights resulting in slight underexposure when there is white in the scene but it remains consistent so one flash exposure compensation covers you .
Here's an extreme example of what I am talking about - since the white area was small and in shadow it wasn't as if it spot metered that area but it shows how well the system 'manages' differences in contrast .

I eventually worked out a test to illustrate the concept of TTL/BL compensating for the ambient . Basically TTL/BL doesn't really know what the ambient is , it relies on the meter reading from the exposure mode you have selected which is important to remember - I'll show you why ...
Since many people shoot in manual mode when using flash I thought I would illustrate the concept by having an off centre subject to exaggerate the issue a bit . First I set the meter to zero in matrix metering and took a picture using TTL/BL and bounce flash . It fired rather weakly because the meter told it the subject was already correctly exposed .
Then I changed to centre weighted metering and the meter said "+1" with regard to exposure but the flash output stayed the same ....[ note : I never changed any settings besides metering mode ]
It doesn't seem to care if you want to over-expose the subject with the ambient - it fires the same strength by the look of the results .
Now I increase the shutter speed , still in centre weighted metering mode so that the meter goes back to zero - the background changes but the flash output stays the same ....
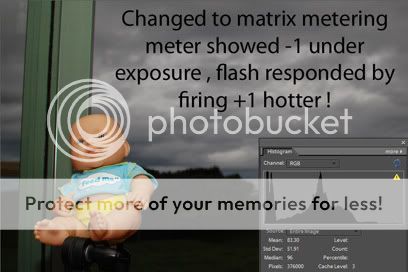
Now see what happens when I simply change the metering mode - all the settings were the same as the previous shot in this picture except for the fact that I changed to matrix metering and suddenly the meter showed "-1" because matrix metering is strongly weighted toward the active focus point - which was on the doll .... TTL/BL responded by firing one[?] stop brighter !
So ...... it would appear from this test that TTL/BL uses the focus point diamond for its pre-flash reading and watches the built in meter to see what your shutter speed setting is doing with the ambient . Matrix metering decided the subject was under-exposed when we moved the focus point , the camera told the flash the meter was saying "-1" and the flash decided it needed to fire stronger .
That would mean that in a rather round-about way its output is affected by the shutter speed you select but that reading will also be affected by the metering mode you have chosen and its characteristics in different situations . If you are in an auto mode outdoors TTL/BL will always fire weakly [ Although if the subject is back-lit it will equalize it with the background lighting and fire accordingly ] - once you are in manual mode , the metering mode you have selected will affect how strongly TTL/BL fires as it watches your meter to determine where you have the ambient exposure .
Once you are indoors , F5.6 iso 200 1/30th sec for example , the ambient will show up as so badly under-exposed that TTL/BL will realize it is the only light source and push out the required amount of flash .
It has been confirmed that the 'new' TTL-BL is programmed into the newer camera bodies to recognize when the ambient is so far under-exposed that flash must be the only light source - The camera body lies to the flash and tells it "the background is perfect , just do the same with the subject " .
Now on to wireless CLS which is easier to understand once you know how TTL/BL meters - because wireless CLS uses TTL/BL by default !
I set up my model " Stinky " with a black background and had one SB800 to my left on channel 3a and the other on my right on channel 3b

As with TTL/BL bounce flash it doesn't matter where the subject is in the frame as long as it is under the focus point diamond .


When we introduce a white object on the right channel 3a fires normal while 3b sees the white and "underexposes" that side [You could dial in compensation , depending what you want it to do of course ]

and exactly the opposite if we move the reflector to the other side ...

When we look at an image taken with a single on-camera flash bounced off the ceiling it looks ok until we introduce the reflector .


So the pattern we see is underexposure when there is white anywhere in the frame . This is still more consistent than TTL flash which meters only off the matrix pattern . With TTL/BL also using the focus points we have a more consistent exposure as long as at least one focus point is on the white object - easily fixed with exposure compensation .
I have found that TTL/BL + 1.3 [ dialed in to the flash head ] has much more consistency than plain TTL flash . Just remember that when you use wireless flash with Nikon's CLS you are using TTL/BL metering so in the examples above , as soon as there is white in the frame you need to add around +1.3 to the exposure !
When the background is black TTL/BL meters of the subject as the brightest object in the frame .
Tonight I walked around the house with this concept in mind - I have been trying to work out the concept of TTL/BL with bounce flash indoors for a few weeks now , taking lots of pictures and trying to solve the riddle . Well I think that's basically it now : With TTL/BL and bounce flash , as with the SB400 in bounce mode - and when using wireless CLS :- "TTL/BL meters off the focus points and adjusts exposure for the brightest part of a scene under any one of the focus points ." And these were my test pictures based on that theory :
I looked at this kettle and decided " That's white enough to be a +1.3'' [ To be able to keep the camera to my eye I dialed it in with the Ev [+-] compensation button ] .

I looked at "Stinky" and decided his face was a +0.3 - and made sure a focus point wasn't on that white bit on his shirt .

I decided the phone was a little dull to be called 'white' so went for +1 only .

This bulb looked a little grey so I went for +1 , but by the look of it I could have made it a +1.3 considering all the light objects in the frame .

Regardless of the rest of the scene I knew my shiny new manual warranted a "+1.3" ...

and just about anything that has some white in the frame seems to do well with +1.3 ....

Once again , I'm not saying TTL/BL is perfect - I wouldn't need to dial in compensation if it was - but I am saying I have discovered the 'predictable' aspect of TTL/BL bounce flash - that it meters off the lightest part of the picture - as long as it is under a focus point .....
I worked hard to make sure there were no focus points on the white manual and my 'default' setting for 'average grey' scenes of +0.3 did the trick without blowing any highlights while +1.3 totally blew the highlights in this shot .

So maybe that is the problem solved for now with regard to TTL/BL and underexposure - time will tell . Just remember that when you use forward flash with the SB400 , SB800/600 or built in speedlight indoors you don't need this compensation because the flash is using the distance info from the lens .
26/10/2009 I did some more tests to see exactly how much difference there is in the amount that TTL/BL meters compared to TTL .
I borrowed a flash meter and took slow exposures and used rear curtain flash mode so I could meter the main flash without interference from the pre-flash .
The first image was in a situation where I know TTL and TTL/BL give the same results - a neutral tone centralized in the frame - they both gave the same result according to the flash meter .
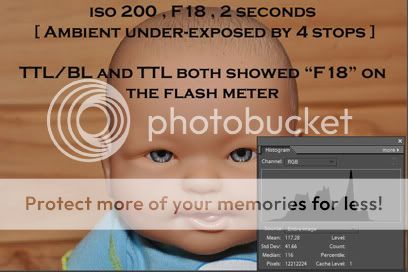
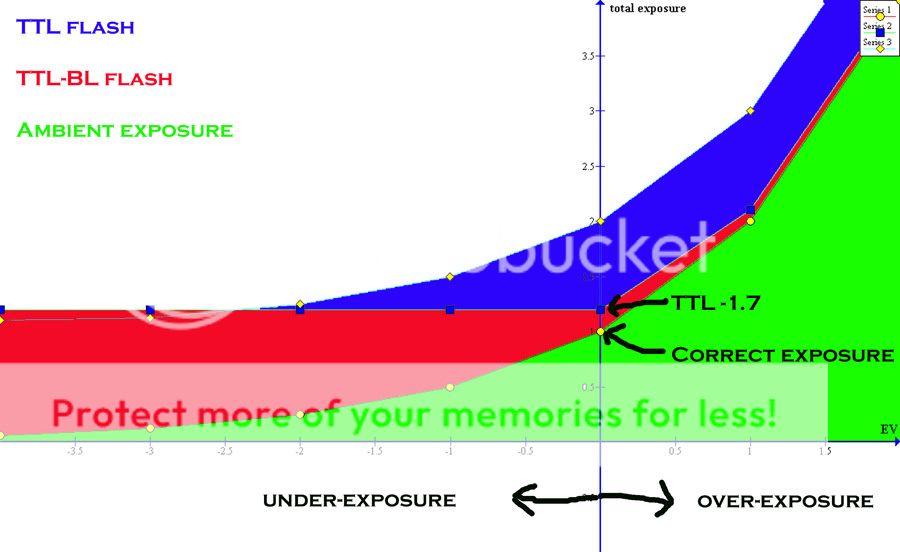
Then I increased the time the shutter was open to expose the ambient correctly - TTL/BL responded by decreasing its power by 1.7 stops .
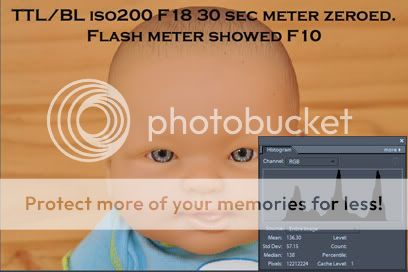
This test proves that TTL/BL does in fact adjust according to where the meter is which is affected by the shutter speed and how much of the ambient you capture . When the ambient is badly under-exposed TTL/BL takes over and provides as much lighting as it deems necessary . As you drag the shutter and let in more ambient TTL/BL responds by backing off its output all the way to -1.7 when the ambient is correctly exposed - which is a commonly accepted setting for for fill-flash in TTL mode . Of course since TTL and TTL/BL meter differently the results will not be exactly the same in varying situations .
In my recent blog on tests with the diffuser dome a comment was added by Russ McDonald who helped design the original system in the 80's which I find very interesting .
" In TTL-BL mode, When the preflash return is strong much more emphasis is placed on the preflash and much less is placed on the distance.
In TTL-BL mode, when the preflash return is weak, much more emphasis is placed on the distance.
This may be part of the differences you are seeing between using the diffuser and not using the diffuser. The diffuser can cause a big difference in the preflash return energy. "
A while ago he mentioned how the original program was designed to use distance info in case the pre-flash reading was messed up by the bright background for which TTL/BL was originally designed [ before they changed it ] .
So it appears that in an obscure way the diffuser dome gives greater accuracy because the weaker pre-flash reading encourages the program to use the distance info more in its calculations taking advantage of the direct light coming from the dome .
Here are some images that show how TTL-BL meters like matrix metering - it is very strongly affected by the outer focus points. {update, since I found that this wasn't true for my D7200 I realised that it depends on the matrix metering of the body, my D90 matrix metering was also affected by the outer focus point in natural lighting, the D7200 not at all - this modified my theory on TTL-BL to include the fact that it must hijack your matrix metering program since it differs between bodies, in the same way that matrix metering does}
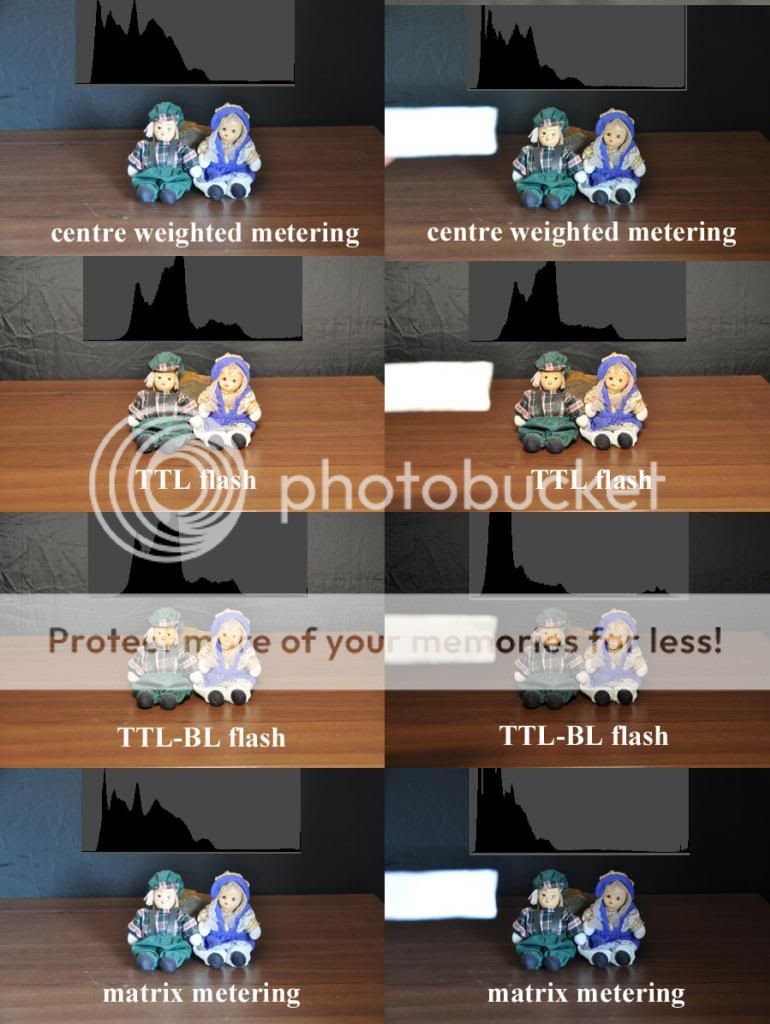
original blog
-->
Flash : Direct flash , TTL-BL vs TTL
Direct flash :TTL/BL vs TTL
Recently I was involved in a discussion regarding the advantage of distance info when using TTL/BL and direct flash .
Anyway I decided to try to explain this in an uninterrupted logical manner for those who are interested in the subject .
Ideally we avoid direct flash but there are times when we have no choice . Outdoors in daylight is a good example with nothing to bounce off and when we only want subtle fill-flash as well .
First we need to understand how they meter :
TTL doesn't care how well you have the ambient exposed , it simply tries to get an average grey in the centre of the frame ......
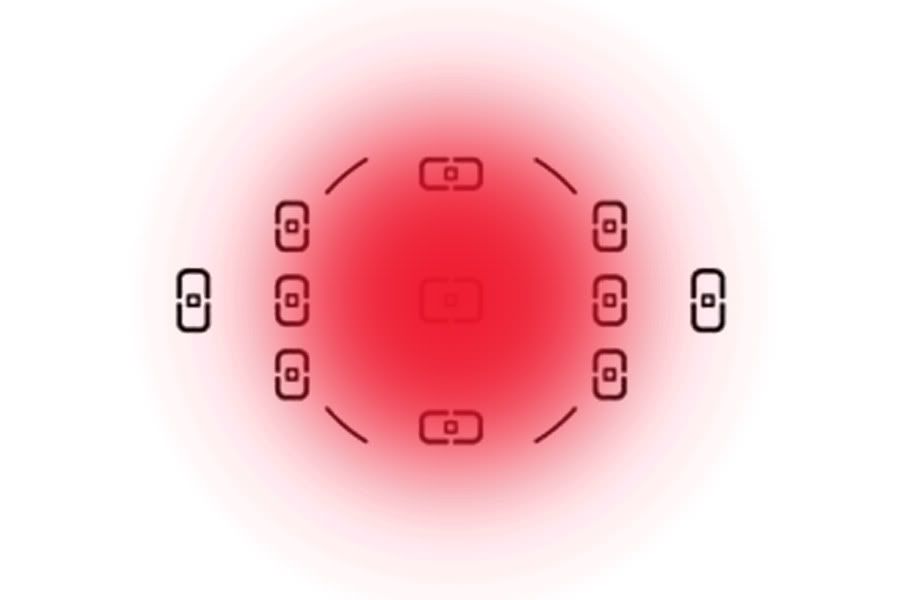
With direct flash though it only uses a small portion of the pre-flash reading from this pattern .
On to the tests . First we have TTL/BL , I've underexposed the background in these pictures so we only have the flash lighting the scene .
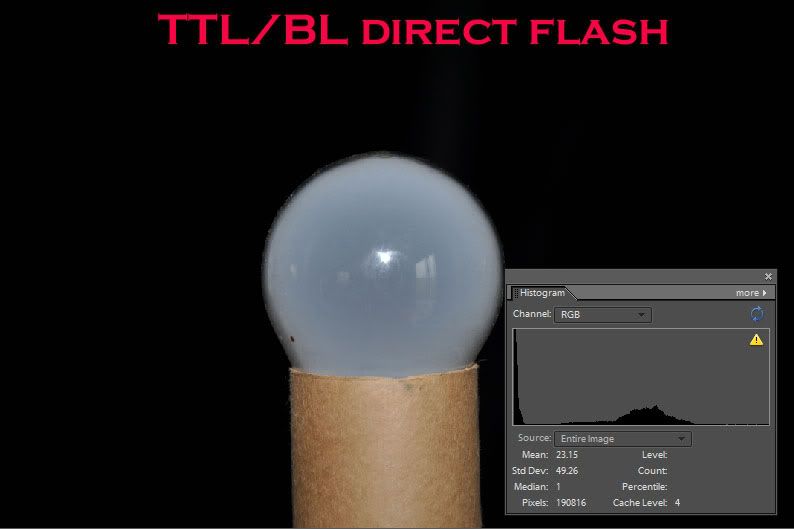
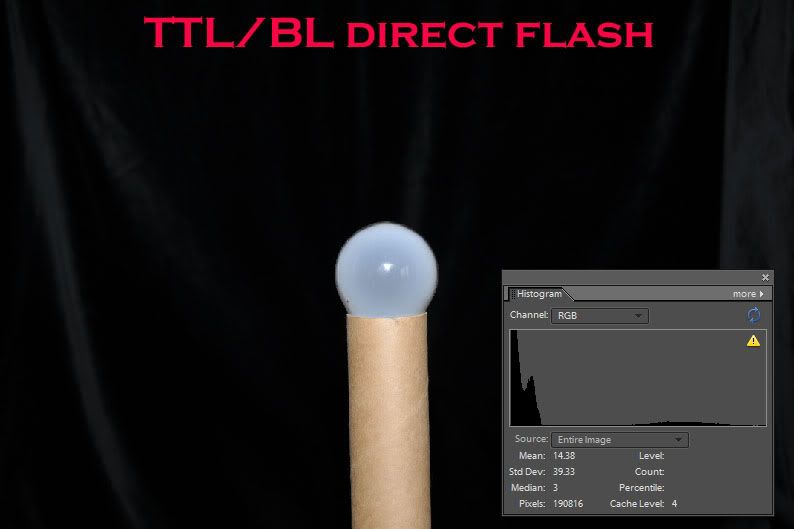
With the advantage of distance info TTL/BL does a pretty good job of maintaining a consistent exposure for the subject regardless of its size in the frame - now TTL flash .
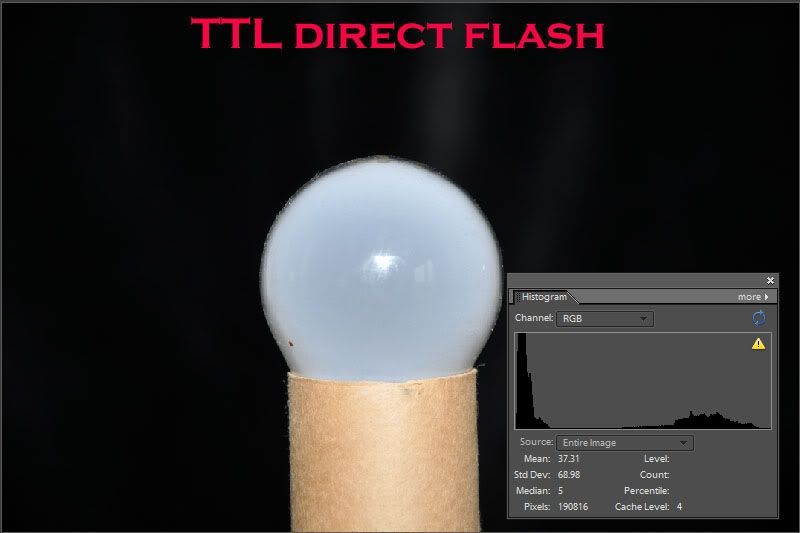

As you can see TTL doesn't know the distance , all it knows is that it wants an average grey in the centre of the frame and to illustrate this I took both of these images and applied an 'average blur' in photoshop in the centre of the frame .....
When the subject is central and fills a decent percentage of the centre of the frame it's not bad ....

But when the subject is smaller and far from the background TTL has to make that small subject really bright to get and average grey in the centre of the frame , TTL/BL does not suffer from this weakness since it knows how far away the subject is [ with direct flash only ! ]

Now we take a darker subject with a lighter background , some may say TTL flash looks better here ....
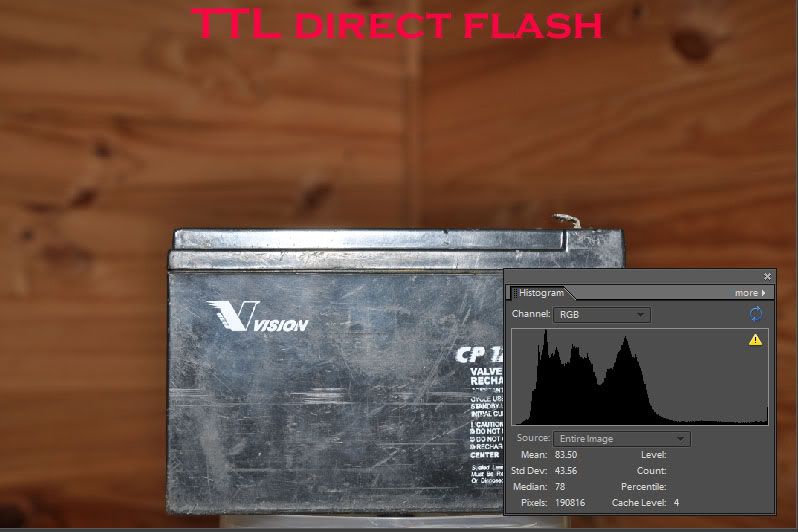
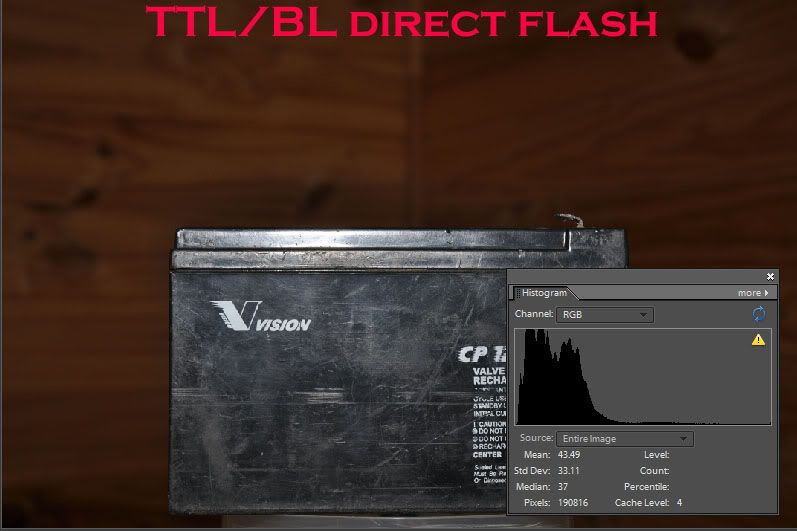
In reality TTL has fired stronger because the subject does not fill the frame and is black so it's trying to make it an average grey . The result may be more pleasing to the eyes for some but essentially the problem is not with TTL/BL flash in this case . When you are using direct flash and want to light the subject correctly you can't expect the flash to light the background correctly as well as the subject and be accurate in both cases ,though , with TTL flash , there will be the odd occasion where the results will look good with the right combination of subject colour , size , and distance from the background which is pure luck .
So the problem is not the 'car' but the 'nut that holds the steering wheel ' .
If you are using direct flash you have to make sure you expose the ambient correctly - so that is what I have done , I adjusted the shutter speed to expose the background the way I wanted it and let the flash handle the subject - in this case TTL/BL senses that the ambient is having a greater effect on the subject and backs off accordingly .
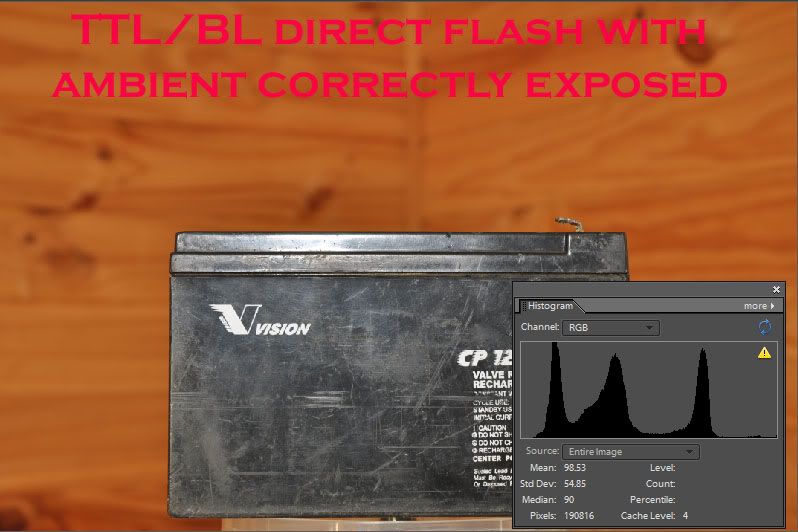
TTL on the other hand still thinks it is the only light source and fires too strong causing more blown highlights .
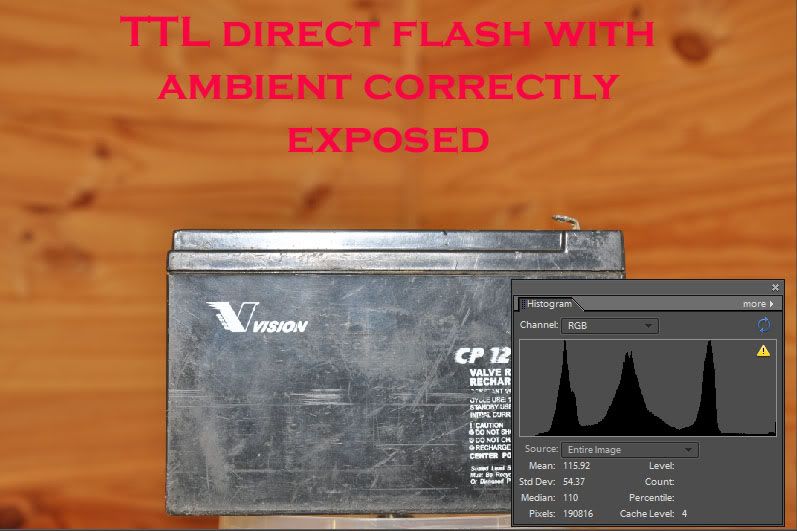
The conclusion of the matter ? If you are using direct flash with TTL/BL you are concentrating on the subject at a set distance and have to expose for the background with your normal camera settings , with direct flash and TTL on the other hand it all depends on how big your subject is in the centre of the frame , the subject colour , the background colour behind the subject in the centre of the frame that it meters from , the distance form the background that is having an effect on the metering .......
I choose TTL/BL and the advantage of the distance info from the lens with direct flash .Choose whichever you want - just understand how it works . [ and shoot manual flash when possible :smile: ] .
On page 1.) we established that TTL/BL uses the distance info from the lens "when the flash is facing forward" . Of course in most situations we want to avoid direct flash but outdoors where there is nothing to bounce off , and in bright sunlight where the flash isn't the main light source , we still use it sometimes .
Just a quick review of TTL/BL and the distance factor - first a properly focused picture ....

Then we manually go to close focus and the flash dims down automatically

and as we change the focus distance to 20 metres it brightens up ....

proving that the focus distance directly affects the flash .
Now for the proof in real life . I set up my model ''Stinky'' indoors to only show the flash with little ambient to detract from the results . I left a reflector in the same position and then moved the subject under the focus point further away . This is what TTL did with the scene - it was totally fooled by that white reflector and exposed for it the whole time .


Now on to TTL/BL . Even though the reflector was in the same position reflecting back a lot of light TTL/BL continued to meter for the active focus point on the subject and was not fooled by the white object in the frame .


This proves that TTL/BL is superior with direct flash photography - it's a pity it doesn't have that reliability with bounce flash and wireless CLS .
Of course it isn't a simple program and there may still be some surprises when we use it but I am slowly coming to grips with its 'logic' .
Using direct flash outdoors is not the problem , predicting results indoors where the flash is the main source of light is more of a challenge because there is little ambient light to hide our mistakes as with pictures in bright sunlight .
Understanding Nikon flash
Flash : HSS flash mode
The apertures shown here are not important , they are just the settings I used to do my tests and maintain a constant ambient exposure to compare the difference in working distance at different shutter speeds .
The shutter speeds shown should show the same pattern though .

Nikon's manuals don't explain auto 'high'- fp very well - or the limitations involved .
Most cameras have a focal plane shutter , except the D1 , D40 , D50 and D70[S] , they have electronically switched sensor/shutters and can do what I call
and effectively have 6X as much power with flash at maximum speed , compared to a pro body in high-fp mode } , but other cameras need high-fp mode .
<br />
At your camera's maximum synch speed [ 1/200th sec for the D90 ] the shutter opens , the flash fires , and the shutter closes , which means that the entire sensor gets the full flash .
Here's an older camera with a 1/90th sec synch speed ...

As the shutter speed increases the " first curtain " of the shutter opens and the " second curtain " starts chasing it across the screen right after it starts moving which means that a slit slides across the screen . If the flash were to fire at a higher shutter speed than the maximum synch speed you will get a partially-lit photo .....

As you can see in the above image the flash fired , it lasted about 1/10 000th sec and turned off - the slit was still in the beginning stages of its travels though and so only a slit has been lit , as the slit continues its journey with no light source the top of the image will be black .
The solution is for the flash to act as a ' continuous ' light , it fires rapidly in succession and may fire tens of thousands of times per second , and so is effectively a 'continuous ' light and behaves the same as the ambient with regard to the fact that shutter speed now controls the flash output as well as the ambient .
It would look something like this in slow motion - as the slit slides across the frame the flash keeps firing .... bzzzzzzzzzzzzzz


This is an old Canon camera so it is not exactly what the Nikon shutter would look like but it conveys the general idea . The main trade-off being that a lot of light is being wasted on the back of the partially open shutter .
To do the maths you simply need to put your SB800 on the camera and assume 'sunny 16' rule - for the brightest clearest day you could have - at iso 200 and 1/200th you would be at F16 - set it to that , it's a " worst case scenario ' for outdoor flash .
Now have a look at the working distance shown on the back of the flash with the flash head facing forward , we have :
1.) 18mm 8.8 feet .
2.) 35mm 11 feet .
3.) 105mm 17 feet .
Now when we keep the ambient exposure where it is we can assume that changing to F8 will let in 4 X as much light so we would have to go to 1/800th sec shutter speed which is high-fp mode .
This gives us :
1.) 18mm 4.6 feet
2.) 35mm 5.8 feet
3.) 105mm 8.8 feet .
The calculations :
1.) 4.6/8.8 = 0.522 X the distance .
2.) 5.8/11 = 0.527 X the distance .
3.) 8.8/17 = 0.517 X the distance .
The D90 has a synch speed of 1/200th and @ 105mm zoom ....
I kept adjusting my settings for an equally exposed ambient and got these results :
F20 iso 200 1/125th = 4.0, working distance
F18 iso 200 1/160th = 4.5m
F16 iso 200 1/200th = 5.0m
F14 iso 200 1/250th = 2.7m
F13 iso 200 1/320th = 2.7m
F11 iso 200 1/400th = 2.7m
F10 iso 200 1/500th = 2.7m
We see the pattern change with auto-fp where the flash starts to behave like a continuous light source and the working distance stays the same .
I just recorded the assumed working distance that the SB800 reported without actually doing any tests to see how much power it had but the distance of 2.7m as opposed to 5.0m suggested slightly more than 1/4 power available than normal flash mode .
It seems though that many are reporting less than that so I wonder where the error lies ?
So that means that we have just over half the working distance in each situation when we keep the ambient exposure where it is . To confirm this we can go to F4 , let in 4 X as much light , and to keep the ambient where it is we will have to go to 1/3200th sec effectively cutting that 4 X as much light in 1/4 again and negating the " advantage ' of opening the aperture .
So now the flash is behaving the same as continuous light and whatever we do , keeping the ambient correctly exposed , we will have that same working distance .
Because of the 'inverse square law' [ 2 X the distance needs 4 X the power , while 1/2 the distance only needs 1/4 the power ] .
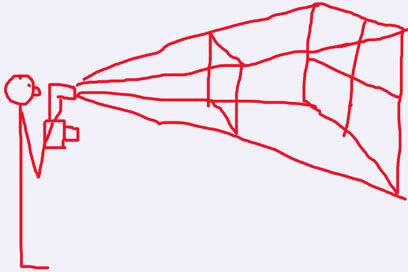
When the subject is twice as far the lengths of the sides doubles , 2 X 2 = 4 X the area .
And of course halving the distance means you will only need 1/4 the power .
Once again it's not all that simple . The distances shown are with regard to the flash having to light the entire scene , something we don't need when we have the ambient correctly exposed .
A common setting for those who use 'fill-flash' outdoors is TTL-1.7 compensation , just to add some light to the subject without overpowering it with flash .
TTL flash doesn't know how well you have the ambient exposed and negative compensation will need to be dialed in . TTL/BL on the other hand takes the ambient exposure into account and if it detects correct exposure it will automatically dial itself back to the equivalent of TTL-1.7 in situations where they meter equally .
Many people will dial in even more negative compensation so if you had to assume an 'average' of -2 EV for the flash compensation that is two stops , or 1/4 the power that you are 'demanding' of the flash anyway so it will be able to do that at the first distance suggested by the flash head before you changed to high-fp mode .
If you were in TTL mode and went to high-fp , at105mm , and shot a subject 17 feet away [ when the flash head tells you that your limit is 8.8 feet ] the flash head will probably register -2 after firing telling you it never had enough power .
But if you have dialed in '-2' on the flash head it will be happy to light a subject 17 feet away because it can do that at '-2' :) .
This afternoon I did some tests to compare the power of auto-fp to normal flash . I used a solid white wall and kept the flash set at 1/1 full power and also made sure I kept the ambient level [which was very under-exposed ] the same , to simulate a situation where we would keep our ambient settings in the same place while reverting to auto-fp mode .
I aimed to get the same histogram in each shot and it was interesting how much difference a few cm made when I made adjustments .
This is what I aimed for :
After each change in settings I moved the camera until I got the same histogram and then measured the distance to the flash head so I could calculate the power difference compared to normal flash .
F25 1/200th normal flash 195cm
F22 1/250th auto-fp mode 68cm = 1/8th of normal flash power
F16 1/500th 88cm = 1/5
F11 1/1000th 120cm = 1/2.6
F8 1/2000th 136cm = 1/2
F6.3 1/3200th 120cm = 1/2.6
F5.6 1/4000th 112cm = 1/3
did similar tests where he maintained a constant distance and measured the difference using the histogram and has kindly allowed me to use his results here .
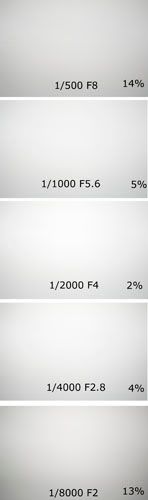
He then did a test with ambient only and compared the results to make sure it wasn't the shutter that was causing the variation .

My conclusion is that due to the way auto-fp works even though the flash head suggests the same working distance at any of these settings when in auto-fp mode it appears that the combination at 1/2000th sec yields the greatest output , after which the curve drops off again .
Since auto-fp flash behaves as a continuous light the slower the speed the more energy it requires ! So faster shutter speeds mean that light is 'switched on' for shorter times , not counting the short period before the shutter opens and after it closes that it will need to be on . This will result in faster charge times .
In other words , when you revert to auto-fp mode stay away from the slower speeds and aim for 1/2000th sec and the aperture that gets you the results you want to get the most flash power possible in this mode .

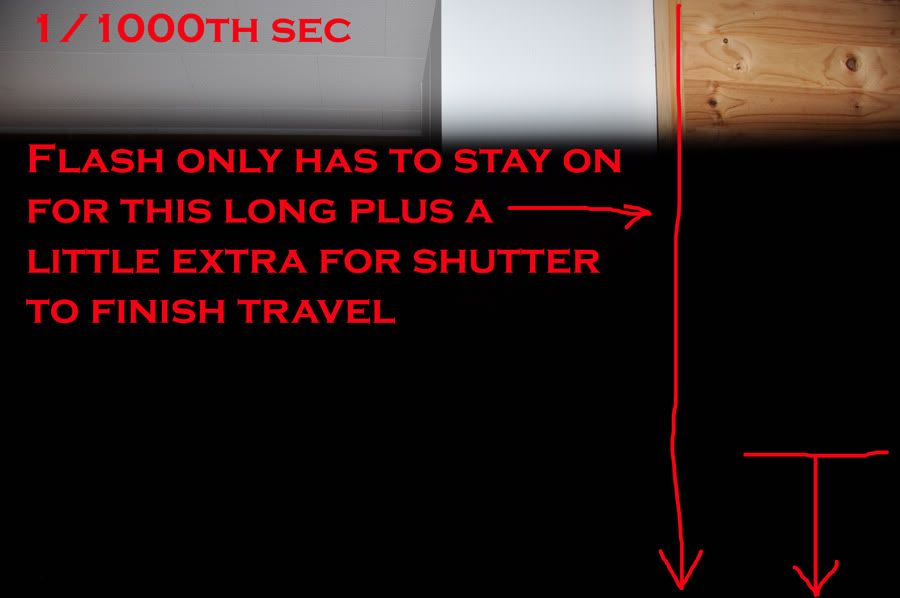
Ok well I've been doing more tests and calculations on the subject to try and figure out why we lose so much power as we start going into auto-fp mode and think I just worked it out .
Auto-fp flash logically must stay on for longer for slower shutter speeds .
Let's take 1/1000th sec first , the flash must start 'pulsing' before the first curtain opens - then it must last for 1/280th sec [ if that's how fast the curtain moves ] but once the first curtain reaches the other side it must stay open for the duration of the slit that still has to close !
At 1/1000th sec let's say that slit is 1/4 of the frame = another 1/1120th of a second.
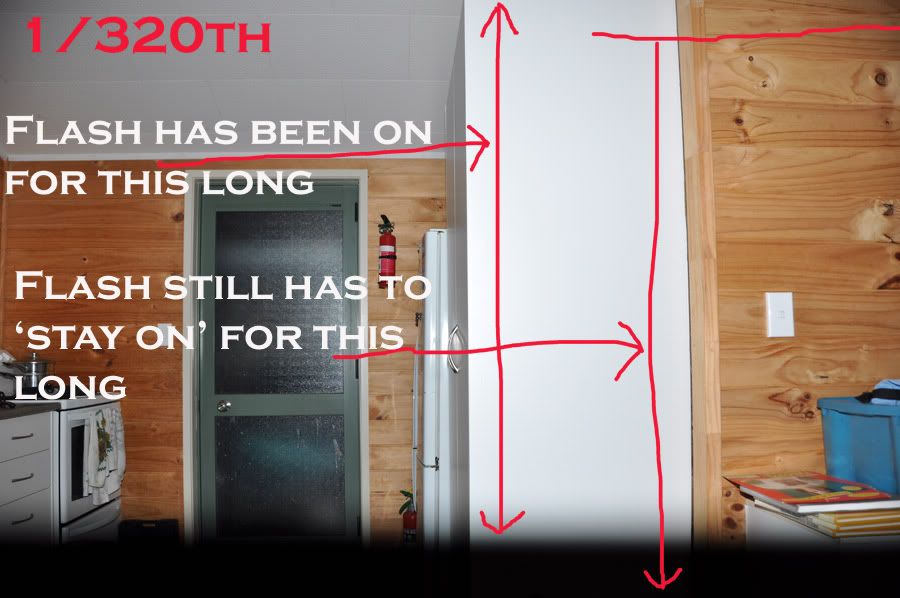
Now we look closer at the slit at speeds closer to normal sync .
1/320th shows a much larger slit [ 3X the size of 1/1000th?]
Now after the first curtain moves across the frame [ 1/280th sec] the flash still has to remain on until the second curtain is closed which will now take 3X as long as at 1/1000th = 3/1120th = 1/370th sec extra !
This would explain why the first drop into auto-fp mode gives us so much less power than 1/2000th .
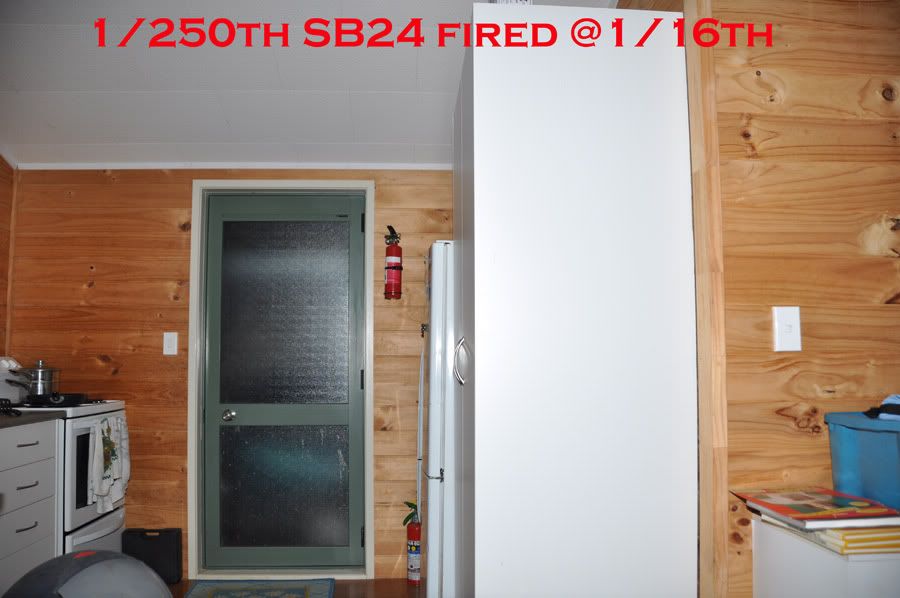
When I fire the SB24 at 1/16th on the D90 at 1/250th sec I don't see the curtain starting to close yet though sync speed is back at 1/200th .
This means that when the flash goes into fp mode it is doing so over 1/280th sec plus the 1/250th sec that the rear curtain takes to close cutting the total power in half [approximately ] .
So auto-fp would have to push out around half as much power over twice the time as opposed to around 1/250th sec shutter travel at 1/4000th sec - not counting the power before and after the pulse .
So essentially different shutter speeds would vary how long auto-fp stays on , and how much power it pushes out over that time period resulting in the differences we see between 1/250th and 1/2000th in auto-fp mode !
.
<!-- amazon_ad_tag = "bestofthephot-20"; amazon_ad_width = "728"; amazon_ad_height = "90";//-->
Flash : Sound activated flash trigger
<br />
I have been asked to share my technique with regard to triggering a flash for 'special' pictures .
Here's the video:

the basics :
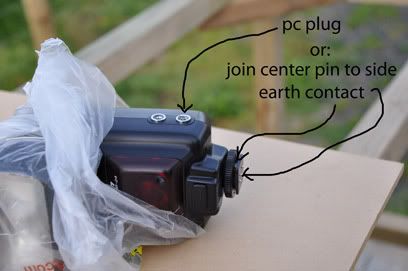
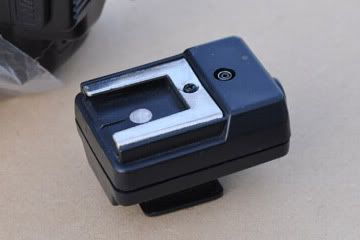
To trigger a flash you simply need to join the centre pin to the side 'earth' contact which is basically what the 'test' button does on a flash . The 'pc' plug on the side of the flash has these two contacts . if your flash doesn't have a 'pc' plug you can always use a cheap hotshoe adapter to make the contact for you.
plug a 'pc' cord into it and take the two wires to the relay on the switching kit , connect them to pin 'com' and 'no' contacts of the relay [ 'common' and 'normally open' ] .
The picture is taken in a very dark room or at night outside , especially if you are shooting water balloons with an air rifle ! Set up the camera in manual mode, lowest iso , around F9 and two seconds exposure which gives a pitch black image if there is no additional light .
Take a few test images and adjust the distance of the flash to get correct exposure before you start destroying anything .
Then you need to trigger the flash , there are various ways to do this but in this case I bought a voice activated switch
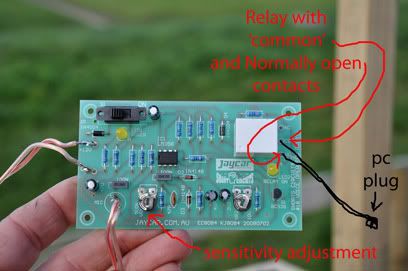
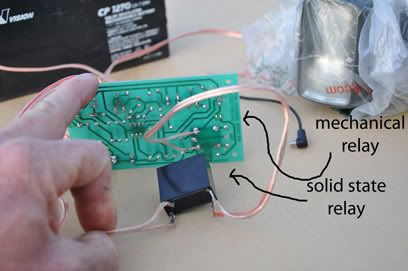
I also added a two metre length of wire to the mic so I could move it around .
It would have still worked with the original relay but there would have been a slight delay when it pulls in - I added a solid state relay for instant switching and the first images were of a balloon with a hole in it that hadn't had time to split yet !
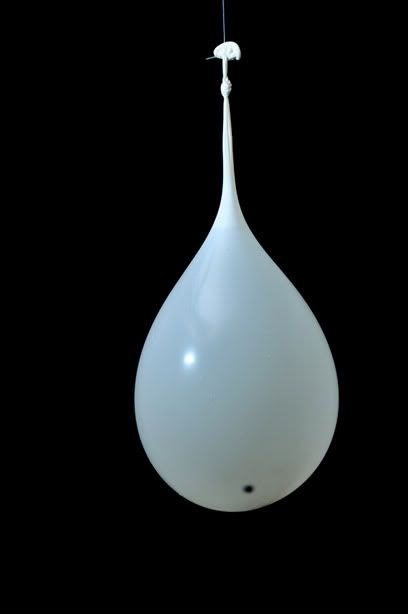
What you need to do in a case like this is keep moving the mic further away so the sound has to travel further , until you catch the explosion at the right moment in time .
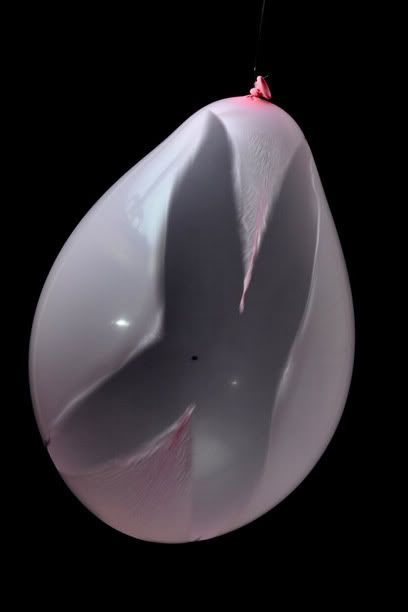
I set the camera up on a tripod [ D90 , 70-200VR lens , but any camera would do the job if it has a manual mode - even a compact ! ] , fill the balloon and place it on the table , trigger the camera with the remote and you have two seconds to fire !
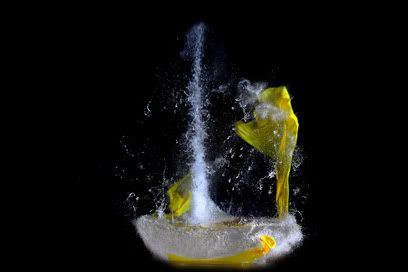
The sound of the air rifle triggers the 'voice activated switch ' and the relay joins the two 'pc' wires together which fires the flash . the lowest power on an SB24 is 1/16th which fires at 1/11000th sec and for some shots I used the Sb800 at 1/128th power which gave me 1/41600th sec .
That's the pellet behind the balloon , at 1/11000th sec .
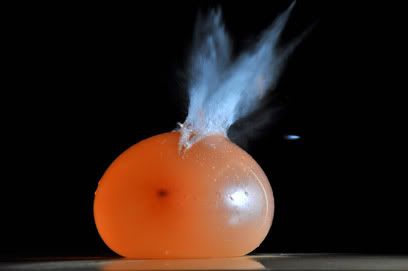
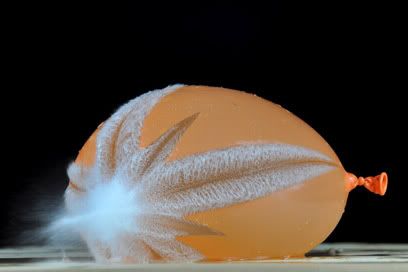
Someone sugested I try safety goggles so I said "ok"

You could add food colouring
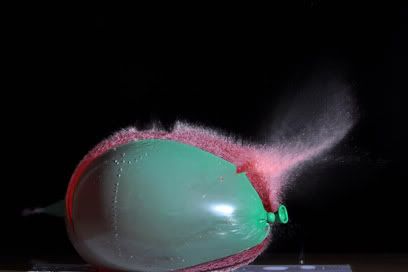
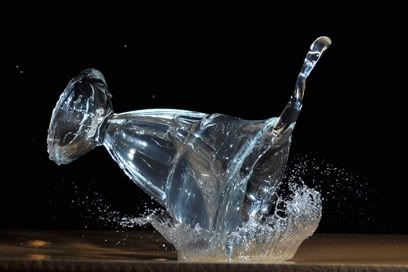
And of course not every country allows the use of air rifles and you don't all live on a farm like I do so you could just put the mic on a table and drop a glass of water or something to trigger the flash ...
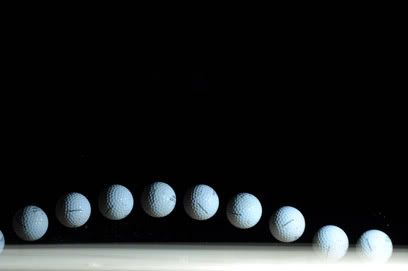
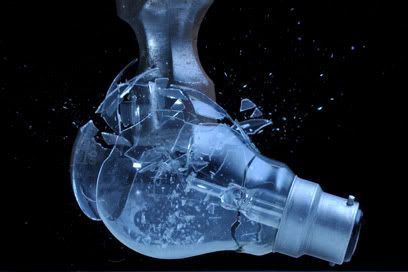
These are just a few of the things I tried , you can photograph anything that makes a sound that will trigger the flash - how about setting your SB800 to 100hz repeating flash and dropping a golf ball .... it needs some work still but shows one of the many other possibilites for sound activated flash pictures !
<!-- amazon_ad_tag = "bestofthephot-20"; amazon_ad_width = "728"; amazon_ad_height = "90";//-->
Search Posts
Featured Posts