Turbo flash


This afternoon I decided to put the new "mutant" flash through its paces to see what it could do .
I fired it about 15-20 times all together without giving it much time to cool down .
I took a few shots to compare it to the SB800 on full power .Ignore the background getting brighter , it was raining and the sun was coming out again . Concentrate on the foreground and shadows .
I used the D50 because it can sync flash at any speed .


I had the "super-flash" on half power which was half the capacitors in the original flash plus the 3500uf cap I added .


Then I moved up the driveway to really put it to the test ....


I then moved to the top of the driveway . And tried at 1/3200th sec .


I would imagine the flash tube will last as it doesn't appear to have suffered any side effects .
"Full power " is when the other half of the capacitor bank inside the flash handle is also connected.

Extending the SU800's "angle"

For some this may be common knowledge but today I was doing some experiments with the SU800 outdoors .
I had the SB800 on a stand behind me in remote mode firing at 1/128th power and kept changing the angle of the camera until it would no longer fire .
When they were both pointing toward that fence it fired every time even with the flash behind the camera - maybe it was bouncing the signal off the fence ?
Anyway I reached an angle when the SB800 would no longer fire ...


You kind of wonder why Nikon would make the trigger system facing directly forward which is the last place anyone would have their lighting .
Then I added something to the equation , without moving anything , which made it fire again ....


I had tried simply placing my finger in front of the SU800 and that worked , the signal bounced off my finger and triggered the flash behind the camera .
I just added this little white object in front of the SU800 which bounced the signal backwards and made the flash fire every time .


I see possibilities here , for the SU800 and SB800 , I think I could design something that attaches to each of them to send and receive signals from any angle - or at least increase their reliability in some situations .

04/10/2010 
I did some tests to see what range the SU800 has in bright sunlight with nothing to bounce off . I measured it out as 19 large steps .


When I turned around it would no longer trigger , understandably , but I found that placing a wide angle mirror in front of the SU800 would trigger the flash but the range was now down to 7 large steps .

Not many people will ever need that range especially using flash outdoors but it's good to know what the limits are .


.

Nikon wireless flash basics

When working with multiple groups using Nikon's CLS system it helps to know the basics of how it meters .
First we need to understand the limitations of the system .
The camera , or SU800 -whichever you use to command the remote flashes , doesn't know how many flashes are in each group . You could put 10 flashes in group A and the commander system you use wouldn't even know there was one there until it requested a pre-flash - Once it 'sees' the pre-flash reflected off the subject it knows there is at least one flash in group A and not much more .
This means that the flash output in each group is equal from all flashes in that group whether it's half power from one flash , 1/4 power from two flashes or 1/8th power from 4 flashes .
One situation where this is useful to know is when when you have a flash behind the subject making it difficult for the metering system to work correctly .
Disregarding the under-exposure due to the white subject in this example , here is an image taken with one flash from the front left of the subject ..


The system has metered the pre-flash reading using the 'focus point diamond' in much the same way that Nikon's 3D matrix metering measures the ambient in normal photography . It 'maps out' an area , in this case the pre-flash reading , and determines that that is the subject and adjusts flash output accordingly .


Now see what happens when we move the one flash to an angle behind the subject  ....


Nikon TTL-BL , which is the metering mode that wireless CLS uses [Though it doesn't include distance info in its calculations with wireless CLS] unless you are in spot metering mode , is programmed to measure overly bright areas and disregard them from the equation classifying them as highly reflective surfaces . Understandably this is good for the system but also means that if you are using one flash behind the subject you will have very bright highlights as the system is not seeing the light in the direct line of the flash itself , rather it is getting readings from an angle and can only do so much in metering it correctly .
It rejects the very bright spots and meters for the reasonably exposed areas .....


Now we put another flash in the front left , also in group A and see what happens ....

 
The system has measured the pre-flash that came from both flashes at the same time , without knowing there were two of them , disregarded the bright spot which it deems to be a highly reflective surface - which it is at that angle , and requested a flash output that  gives it the 'correct' exposure on the rest of the metered area .
This gives a more accurate result with less blown highlights - it would be almost impossible not to have a small bright circle from the rear flash considering the angle of the flash and reflectivity of the subject's surface .


What would happen if they were in separate groups ? Well the system would meter them independently and add their combined exposures on any common areas where both contribute and calculate an output to prevent over-exposure of any of the areas under the focus point diamond
Like this ....


The system now knows that there is more than one flash because when it requested a pre-flash , in sequence from each group , it got one from group A and one from group B . The reading it got from group B was mostly disregarded due to the bright reflection that it detected resulting in an excessive exposure on one side and a 'correct' exposure in the front of the image using the readings from A and the small amount from B on that area , combined .


What I get from these results is a clue as to controlling a light from behind  the subject- by placing it in the same group as the front light and adjusting distance from the subject to vary its brightness , since it will be the same output as the front light , we can be confident that it will never be brighter than the front light - since they fire at an equal output .
The more complicated option is to use exposure compensation for a separate group or use manual settings for that group .


Moving the focus point can affect flash output !

Update: This issue has been fixed with the newer bodies as I found while doing the same test with the D7200, the difference being that with the D7200 the meter changes once the flash is turned on unlike the D90. This is the result I got in June 2016. The D7200 did not do this.

First off : This is not a big cause for concern when using TTL-BL or wireless CLS , it is just an exercise in understanding how TTL-BL 'thinks' and very hard to duplicate in a test scene let alone have the possibility of it happening during normal photography :) .
I decided to 'correct' an incorrect blog on the subject .
I'll just emphasize here that the flash does not meter off the selected focus point , the change has nothing to do with the way the flash system meters .
This will also only happen in TTL-BL mode and with Nikon's CLS wireless flash which also meters in TTL-BL mode . The possibility of it happening falls within a very small window of the metering system - when the meter detects under-exposure causing the flash system to compensate by increasing output , or conversely by decreasing output if it detects that the exposure is suddenly correct after it showing as being under-exposed .
The possibility of this happening when a focus point is moved also depends heavily on the metering mode selected [ it must be matrix metering ] and how matrix metering works in that particular body - because it varies between models .
I used the Nikon D90 in these tests , I've tested the matrix metering system before and understand [ to a degree] how it 'thinks' .
In many of the Nikon's [ not too sure about Canon ] matrix metering is strongly weighted toward the selected focus point and the 'focus plane' that it sits on , and it adjusts exposure accordingly . 
This means that if you are photographing a landscape and move the focus point from bright sky to shadow area "in the same frame" your exposure could vary by as much as two stops without even moving the camera .


Now it has been suggested that the changes seen in flash output are not due to the metering but rather due to the change in distance info from the lens which affect the output of TTL-BL flash [ not wireless which doesn't use the distance info ] .
This will cause changes as well but not the type I am demonstrating here . I have selected a scene in which the darker object which causes the an increase in output , is actually closer than the lighter object proving that the change in this case is not related to distance info from the lens .


Here is my test scene , the back of a camera closer to the camera with a white multi-plug adapter further back . 


Theoretically  when I change the focus point from the white object to the black object closer to the camera the flash exposure should decrease as the lens registers a closer focus point .


First I take a picture with the focus point moved onto the white object :


Then I move it onto the black object closer to the camera .... the flash exposure increases !?!


Why did that happen ?
Well TTL-BL and wireless CLS 'watch your meter" and adjust output accordingly .
Here's the back of the screen in the first shot : 
The camera's meter was happy with the exposure with the focus point on the white object - that 'focus plane' decided that the camera's settings were correct for the scene so the camera told the flash to back off accordingly .


After taking the picture I simply moved the focus point onto the black object closer to the camera , which should have backed off the flash according to the distance info , but when the 'focus plane' shifted and the white object was no longer a dominant part of matrix metering's equation it decided that the image was under-exposed and the meter moved to "-1"
No camera settings were changed , the focus point was simply moved .


The flash output was increased because matrix metering decided that the scene , for that focus point , was under-exposed and so it decided to increase the flash output accordingly !
So this proves that regardless of the changes caused by the distance information from the lens , there are isolated instances where flash output can be affected by moving the focus point in the same scene with no other changes to the camera's settings :) .


TTL/BL increase in exposure with diffuser dome .

The manual suggests using the diffuser dome at 60 degrees for bounce flash .I have found that generally TTL/BL and wireless CLS under-exposes with bounce flash with white objects .
I noticed recently in some tests using the diffuser dome [ which I seldom use ] that the exposure seems to increase when it is used .
With plain TTL flash there seems to be a slight increase in exposure when the diffuser dome is on , possibly something to do with reflectivity and the way the metering pattern of TTL works .


With TTL/BL though the change is a lot more pronounced .


There's a slight increase in exposure when the wide angle diffuser is pulled out and the flash head pulls back to wide angle inside .


Then there is another slight increase when the diffuser dome is fitted .


Now when you fit the diffuser dome there is a small button under the flash head that gets pressed in . Watch what happens when I simply press that button ...... the flash head zooms back and BAM !


To get the same increase in exposure with direct flash I had to dial in an extra two stops of compensation .
So there is something in the TTL/BL program that responds to that button , besides the fact that the flash head zooms back to its widest setting it also seems to increase its output excessively disregarding the pre-flash reading .
Another possible concept is that when it expects a wide flash output and more diffused light perhaps the program that detects reflections and disregards them from the pre-flash reading starts to allow for wider areas of reflection resulting in over-exposure as it starts reading more from the darker areas . [ these are all just theories for now ] .


Now in the past I have noted that TTL/BL under-exposes quite badly with white objects and bounce flash but this increase in output seems to counter-act that under-exposure if you remember to either use the diffuser dome or the wide angle diffuser - both of which increase the output .
The manual for the SB800 [ page 101 ] states that best results are achieved when the flash head is at 60 degrees with the diffuser dome on [ depending on the situation of course ] , perhaps they have calculated their over and under exposure and the amount of light the dome throws forward at this setting  ?
Either way I tried the same subject with bounce flash ......
And of course we have the usual over-reaction to whites that TTL/BL displays with bounce flash .


Then we fit the diffuser dome .... much better !


And once again either pulling out the wide diffuser or simply pressing the button under the flash head that the diffuser dome switches still gives us a favourable increase in exposure ...


So my thoughts for now are that if you use bounce flash then either have the wide diffuser out , or the diffuser dome , or be prepared to dial in positive flash exposure compensation with 'normal ' bounce flash  .


I was also requested on a forum to post a picture of the room .....


Update : some tests with bounce flash and distance info ...


When you use plain bounce flash with no modifiers the TTL/BL program "almost" ignores the distance info - we'll call it a 95% pre-flash reading and a 5% distance reading calculation just to make it easier to explain .

The pre-flash reading identifies the white ball as the subject and responds by aiming for a neutral gray output .


Changing the focus and obviously the distance information from the lens has a very small effect on the exposure .


As soon as the diffuser dome is added or the wide diffuser is pulled out [ Just in case the program assumes that the bounce card will be used I left it extended ]  the distance info affects the output to a larger degree and this shows in the change in focus [ and the resulting change in distance info ] .


It's starting to look more like a 50/50 equation now with regard to input from the pre-flash reading and the distance info .


The histograms are almost exactly the same with the wide diffuser and bounce card .


This explains the 'superior' output with bounce flash when the diffuser dome is used but doesn't really explain why the output increases with direct flash .


I also did some tests with the SU800 and one flash in wireless mode .
There was no change with focus distance showing that distance info doesn't seem to be any part of the equation with wireless flash .
There does still seem to be that slightly better look and exposure with the diffuser dome though .....


TTL/BL and metering modes .


In my video on how TTL/BL responds to a change in the meter someone suggested that it was not the movement of the meter that caused this change but rather the fact that the change from Centre Weighted metering to Matrix metering caused the flash system to meter differently . This is not so . TTL/BL uses the focus point diamond for its metering regardless of whether you choose matrix or CW metering - these modes do not change how the flash system meters .


The reason for the change in output is that TTL/BL is trying to balance the flash with the ambient already on the subject . If you are in CW metering mode with the meter centered while shooting manual , and you change to matrix metering which decides the subject is underexposed and causes the meter to suddenly register "-1" then TTL/BL will increase its output - not because of the different metering mode but rather because it noticed the meter change . It decides that since the ambient is underexposed it may as well take over the exposure by increasing flash output .


My thought on the fact that you can't use TTL/BL with spot metering is that perhaps spot metering 'switches off' the rest of the metering pattern so TTL/BL can't do its calculations and therefore reverts back to TTL metering with the centre of the frame .


Either way I see no reason to suspect that the different metering modes [ CW vs matrix ] cause TTL/BL to meter with a different pattern - it still uses the focus point diamond - as with wireless CLS .

TTL/BL and bounce flash under-exposure .

I still need to do some more tests with bounce flash in various situations to 'nail' the equation .
With 'normal' bounce flash and perhaps the bounce card out or the diffuser dome on and a fair amount of 'forward ' light TTL/BL does a good job . But as soon as the flash head is pointed backwards and the distances start changing TTL/BL tends to expose for " the brightest object in the focus point diamond " which means that it under-exposes when there is white in the frame ....

Lots of forward light = good exposure .

 
 Only bounce light = under-exposure with white in the frame .


I still need to do some tests to confirm my suspicion but I'm thinking that perhaps TTL/BL still 'remembers' the distance info from the lens when you tilt the flash head and doesn't totally forget about it .
Perhaps it determines a minimum output for ''if the flash head was still facing forward'' and doesn't drop below that amount while still using part of its program to prevent blown highlights - which may be what backs off the exposure for whites to an average gray .

At a set distance with the flash head facing forward it can 'conclude' that an object 'must be white' if it is reflecting so much light back on the pre-flash since it knows its distance , but when the flash head is tilted and it doesn't know how far the light will travel then it has to start using its ''preserve highlights'' part of the program along with the ''minimum output'' from distance info data [ perhaps ] which allows it to be quite accurate with a decent amount of forward flash . 
Perhaps this is why the manual suggests leaving the diffuser dome on at a 60 degree angle ''for best results ' ?

I'm going to have to work out some sort of a test to figure this one out because this is the final link to '' predictability '' of flash with TTL/BL mode .


10.) TTL/BL "Maps out" its subject .

Disclaimer : This theory is made up based on my studies of TTL/BL and is not information from Nikon themselves .... but I still think it may be the truth .

This may be the most simple fact of TTL/BL - or just my wild speculation , but the easiest way to understand the fact that TTL/BL has a similar consistency to matrix metering is to think of it as the same program in that it can 'map out' its subject based on colour information [and the pre-flash reading] .
How can TTL/BL have greater consistency regardless of subject size unless it is totally independent of subject size ?
I'll start off with a simple subject with a dark background .


Whether we have the subject under-exposed or correctly exposed TTL sees this : The area it meters off - end of story .
TTL/BL sees the subject based on the matrix metering pattern which is what gives it the edge with reflective subjects [ more on that later ] .

TTL needs to get an average gray in the centre of the frame and fires stronger when the subject does not fill the frame ....


to get this result .. [ average filter applied to centre of frame ]
 
TTL/BL on the other hand fires a pre-flash [ as does TTL ] and 'maps out ' its subject based on the reading it receives ....
 

 It uses the 'focus point diamond' to determine where its subject is and 'maps it out' rather than relying on it being a certain size .
And gives  a much better exposure ....

Then we move the subject off-centre and see what TTL does to get an average gray in the centre of the frame ....


TTL flash still only sees the centre of the frame and has to totally over-expose the subject to get its average gray in the centre circle ...


Now here's how I define TTL/BL metering , if the subject is off centre it is still using the focus point diamond to 'find' its subject and 'map it out ' and so maintains consistency with its output .


 When it did its pre-flash it mapped out the subject using the matrix metering pattern and was not fooled by the off-centre subject [ which is why you don't need to use 'fv-lock' with TTL/BL ] .


 Here's another two samples with the subject below the centre of the frame .... TTL :


 TTL/BL :


I can think of no possible scenario where TTL will beat TTL/BL with direct flash [ which you would mostly use outdoors ] . In brighter light [ with the ambient closer to correct exposure ] TTL/BL will back off accordingly while TTL will fire at exactly the same power it has here .

On to the 'reflections' ... This is just theory based on some 'borrowed' information from the Canon E-TTL system . The Nikon manual mentions that TTL/BL is good for reflective surfaces but doesn't explain why . Obviously we can't simply assume that Canon and Nikon flash works the same way but much of  E-TTL appears to work the same as TTL/BL and it is a useful explanation with regard to E-TTL which mentions that " E-TTL II examines all evaluative metering zones both before and after the E-TTL preflash goes off. Those areas with relatively small changes in brightness are then weighted for flash metering. This is done to avoid the common E-TTL problem of highly reflective materials causing specular highlights in a flash-illuminated image and throwing off the flash metering. ". As mentioned we can't 'assume' that TTL/BL and E-TTL work exactly the same way but it's a highly likely possibility .


If it does work the same way then my understanding of this is that TTL/BL can analyze the matrix metering pattern before the flash fires ....
 
And then when it fires the pre-flash it can trace out the subject and pick up the reflections and reject them from the metering equation ...


This may also be why TTL/BL doesn't work when you switch to spot metering . It needs the whole pattern to be active to do its calculations . Changing to spot metering 'switches off' the rest of the metering pattern and so TTL/BL can't do its calculations unless you are in centre weighted or matrix metering - because then the whole pattern is available for its use .


Incorrect flash information in books

To make beginners feel better : professionals make mistakes too - but unfortunately sometimes they publish them as well  .
Why do people write photography books ? For the money , not because they want to help people !

{Please note : I am not condemning entire books - just warning about information that could be misleading to a beginner - the rest of the information in the  books mentioned is useful ! }


Many of these people are very knowledgeable about photography but are not necessarily 100% right in all their statements .
As I read through some of the more popular books I see mistakes that could greatly mislead beginners so I thought I would list them here for the benefit of beginners trying to find their way through a sea of [ sometimes incorrect] information .
It's confusing enough as a beginner without reading misleading statements that could further confuse your learning process !


I am busy with this book and on page 18 the author makes the statement about "BL" flash that in this mode " the flash is trying to make the foreground and background roughly equivalent exposure zones " .... that's close to what the manual says which is also ambiguous . Then he goes on to state that if the background is dark it will blow the subject trying to light the background as well  . Nothing could be further from the truth ! In my blog on TTL/BL I explain my tests and how it really works . 

{5/03/2010 :
I've decided to expand on this particular subject since many are questioning my basis for stating that the book's description is totally wrong . The problem lies primarily with Nikon who haven't explained things properly to us .
Page 37 of the SB800 manual describes TTL/BL flash in a very ambiguous way [ I'll go so far as to say the manual is wrong as well in this respect ] ... with regard to TTL/BL "Automatic balanced Fill Flash " it states " The flash output is adjusted for a well balanced exposure of the main subject and background " .... work that one out without getting everyone confused . I started doing tests with TTL/BL flash almost a year ago on Nikoncafe . After many test images [ you can see them on my photobucket album in the "flash" album , most have text on them ] I concluded that TTL/BL only cares about correct exposure on the subject and is far more accurate than TTL flash .
To stick to the subject at hand with TTL/BL it would be more accurate to read : " The flash output level is automatically adjusted for a well balanced exposure of the main subject taking the 'background' or ambient lighting already on it into account " .
As they say "a picture speaks a thousand words "
The author stated that the flash would "arm the photon warhead " and " obliterate the darkness " .. some simple tests will confirm the inaccuracy  of this statement .
To digress slightly TTL flash does this when the subject is smaller than the metering area in the centre of the frame ...


Now we go to TTL/BL , due to the fact that it can 'map out' its subject using the matrix metering pattern - and has the advantage of distance info - it is much more accurate :

 So : Did TTL/BL try to obliterate the darkness ? No , it concentrated on the subject . If anyone still doesn't believe me than all you have to do is try it out for yourself and you will see that the statement that TTL/BL will try to light the background is totally wrong .
 So , Never base your statements on something you have read in a manual or heard form someone else - do your own tests and you will learn so much more .... and never make statements in a book based on what you think the manual means - it will get back to you in the end ! } 


The incorrect statement is due to a rather ambiguous statement in the Nikon manual that has been badly misinterpreted . In reality , the wireless CLS that the author praises so highly uses the same metering mode as TTL/BL  ! BL mode will try to get perfect exposure on the subject " and take the ambient[ background] lighting on the subject into account " - that's the balancing part of it .


On to page 258 " I want the light source to be at least twice as far away as I had it , so that's gonna mean twice the power " ..... this is totally wrong , due to the inverse square law  twice the distance means 4X the power ! 
This may have been a genuine mistake overlooked by a hasty review before publishing  - but it's going to have a lot of beginners believing the wrong thing .


The other book I was reading recently ....


.... has a suggestion on page 41 about using fill flash outdoors .


I have seriously never seen anything so pointless !
How much of the light in this image do you think is going to go sideways .... maybe 1% of 5% ? You'll have your flash firing at full power every shot just to put catch-lights in the subjects eyes , and those catch-lights will be "L"- shaped .

No wonder we have global warming and professionals complain about burning out flash heads ! 

Please note : I agree that fill flash should be used outdoors ! You will do well to follow the advice to use it .... BUT : wasting flash into the air makes no sense when you can simply dial back direct flash for the same results and use less than 1/100th of the power .
 
This weekend I will do some tests to verify the amount of flash that hits the subject with the bounce card .
With outdoor flash you will have the flash dialed down , your working distance will already be greatly reduced and you will hardly notice direct flash at -3 compensation  when used as fill flash .
Why fire the flash at the moon and only get 0.05% of the flash power hitting the subject ? That's one way to fry a flash and waste battery power .


On to the tests :


To give him the benefit of the doubt I stood 6 feet away , he mentioned 8-10 feet .


Just to make sure we were getting the full potential of the flash I set the flash to manual and full power ....


Pretty dismal isn't it [ not the subject! ]

Then I went to TTL/BL -1 direct flash ...


I won't show the picture of my face 2 feet from the camera but when I put the camera in manual at those settings at 1/128th power it tells me I have 0.6m working distance .... with direct flash that is .
At 0.6m [ 2 feet ] with the flash in the suggested position there is still not enough flash at full power .... this suggests that we are getting less than 1/128th of the power from the sideways light using the suggested setup .
You will use more than 150 X the flash power and flatten your batteries more than 150 X faster using this ' technique ' .
I rest my case ... it's a bad suggestion regardless of who made it .


When I buy a camera I expect everything on it to work .
I expect everything in the manual to be correct .
And when I pay for a book of photography knowledge I expect it to be correct .


If anyone has anything to add to this page please let me know !

Flash : Diffuser dome and "spread" tests

I decided to do some comparisons between normal direct flash , then with the diffuser dome and with the wide angle diffuser .
When I set the lens to 50mm and set iso 200 , 1/200th sec and F11 [ A good 'average' setting for a sunny day with a bit of haze ] the flash tells me I have 5.7m working distance which is actually the maximum distance it could fully light the subject , just as fill flash you could probably double that distance .

This is the flash pattern at 50mm zoom and 1/16th power .


With the diffuser dome fitted the camera tells me I now have 2m working distance which equates to 1/8th of the original flash power actually hitting the subject . This is its pattern .


Then with the wide angle diffuser out we have 2.5m or 1/5th of the original power which is a bit better than the diffuser dome - and this is its pattern .


In my mind it would be better to use the wide diffuser when firing into an umbrella .
With indoor flash you would be working with wider apertures and letting in more light so I suppose the diffuser dome would have its uses there since the light going sideways will add to the exposure when it bounces .
I don't see much use in having the diffuser dome on outdoors since just about everything that hits the subject will be direct light anyway so direct flash when using fill makes more sense to me - and the diffuser dome will use 8X the battery power for the same lighting .


Now have a look at this comparison . This afternoon I decided to see how much of the flash power is wasted outdoors with nothing to bounce off . I fired the flash at 1/500th and F14 with my D50 and the Yongnuo 602 kit mounted on my D90 - the second shot was at F25 .
I had the lens on the test camera fully framing the sideways calendar - anything outside the calendar is wasted flash .
It would appear that making the flash head rectangular has worked out to be counter-productive in that it creates a diamond pattern at a 45 degree angle to the subject !
I would also imagine that by making a reflective 'snoot' around the flash head that bounces this wasted pattern back to the subject we would get a much better diffusion effect than by putting on the diffuser dome which has almost exactly the same area as the flash head itself anyway - I reckon we could also have close to twice the flash power hitting the subject considering how much falls outside the frame .


Videos : Flash studies .

How TTL/BL works


TTL/BL and wireless flash compared ...


TTL/BL and metering modes


TL/BL flash and the focus point diamond .


Flash basics : TTL flash


Flash basics : Two exposures in one .


On camera flash comparisons ;


How high-fp or auto-fp flash works :


Sound activated flash trigger :


Motion detecting camera trigger ...


Tests with the bounce card and diffuser dome .


Rear curtain flash .

Is E-TTL the same as TTL/BL now ?!

After doing my own research to work through the confusion of the change of Nikon TTL/BL from "back-lit " mode to "balanced fill flash " I published a blog on it called "Nikon's "new" TTL/BL" to help others understand how it works .
Due to the fact that Nikon had changed the system without really explaining much it has taken a while to convince many of those who thought they knew how it worked .
I recently decided to start reading up on Canon E-TTLii and found that it is almost the same system - so now many of you Canon users could probably learn about E-TTLii from my blog on TTL/BL !
While reading up on it [ I have not done my own tests but Canon seems to hand out the information more freely than Nikon !] the similarities are the fact that
1.) E-TTLii now uses distance information as does BL mode .
2.) E-TTLii now takes the ambient into account [ based on my understanding of the description of how it works ] so should need less exposure compensation when the ambient is correctly exposed
3.) E-TTLii can analyze a pattern and determine that a bright spot is a reflection based on its pre-flash reading compared to the ambient reading of the subject . I would imagine that Nikon has a slight advantage here with its greater number of metering segments - Nikon also advertises that TTL/BL is good for reflective surfaces and I am assuming that it is for a similar reason to the Canon description.
I see that E-TTL has also gone through a few changes but at least Canon changed the name accordingly and explained those changes .


Perhaps a diligent Canon user could duplicate some of my tests on my blog and confirm 1.) the change in exposure with a change in focus distance ...
2.) and then perhaps the most important test of all is the one to see if the flash output changes with a change in the meter reading .
Set the camera up on a tripod with a subject to the side . Set the metering mode to CW or pattern and find a point where the exposure registers a one stop difference between the two modes without changing any other settings . If E-TTLii changes its output based on a simple change in the position of the meter then it is the same as TTL/Bl mode .

A failed attempt at extending the SU800's range

Today I went into Jaycar electronics  and asked if I could try something out with their IR remote control extenders . We used the newer model than this picture but the principle is the same .
My idea was to be able to extend the working distance of wireless TTL using an infra-red repeater system as used to extend the working distance of the TV remote . 
My thoughts were that if this system could receive the IR signal from the SU800  , transmit it to the receiver , and change it back to IR then perhaps reliable wireless TTL could be achieved at up to 100 metres .
The shop assistant was very knowledgeable and spoke about frequencies and wavelengths and said it sounded quite feasible .
We set the SB800 up on remote mode at one end of the store , I triggered it a few times with the SU800 on my D90 and then walked to the front of the store and made sure it couldn't trigger directly from the SU800 , connected up the remote extender modules - but had no success . Then we decided to tell the trainee assistant to actually turn the receiver on and tried again with no success . Finally we convinced the trainee assistant to push the power supply plug all the way in and actually make the lights come on ..... but still no success . I never even got a pre-flash out of the remote .
There were various measuring devices in the store and with one of the CCTV systems we could switch it into a mode that actually made the SU800 signal look like a flash burst . Then we tried to save the signal into a programmable remote and it froze the remote up - twice ! The batteries had to be taken out to reset the system on the fancy remote .
We tried getting real close to the transmitter - every possible variable was excluded [ I think ? ] and the conclusion was that the Nikon trigger signal was too advanced for any of the systems in the shop .
Now I have the shop assistant thinking and perhaps he will come up with something :) .
I would appreciate any suggestions in this regard .


23 February 2010 : Duncan from www.hellophoto.co.nz 
donated a set of AR 1830 remote extenders " to the cause " and I set them up also with no results .
I may have to 'dissect' the controllers .


.

Yongnuo RF 602 wireless flash trigger .


Today I tested my new Yongnuo RF602 wireless flash transmitter , this is what you get in the package .

When you look at the instructions you feel like contacting the manufacturers and asking them " Who learned you to spoke english so deliciously ? "

This is a close up view of the transmitter and receiver

  
Apparently the two back contacts aren't connected to anything inside which either means they are only there to make it look more 'functional'  or perhaps they are there because the next model [maybe the "903's"] will have TTL functionality !
It was also suggested that they may just be for other cameras and the wiring gets connected for the brand you choose .
There are contacts so you can use them to trigger the shutter release of some cameras at 100m .  


 Then I set up the tripod with my old SB24 so I could test the fastest trigger time    
[ which they advertise as being 1/250th sec - mainly because that's the fastest time most cameras can synch flash ] , and the furthest distance it could work at .


I used the D50 because it has an electronically switched sensor/shutter so it can synch flash at 1/500th sec normally and if it doesn't know there is a flash connected - as with a wireless trigger - there is no limit to the shutter speed you can use with flash .
I explain this in my blog on realsynch flash
Standing next to the flash I managed to trigger it at 1/800th second .


Then I took a walk across the farm and managed to trigger that flash from positions 1 , 2  and 3 . With position 3 I had gone out of range and had to walk back to that point to trigger the flash again ..... BUT : I could trigger the flash wirelessly at 1/800th sec from each of these positions .


And these are the results from those positions , all at 1/800th sec !
Tamron 17-50mm lens at 50mm .


I ran and took 96 large strides to get back so perhaps it is more than 100m .
As another test I took I went to the milking shed and placed the tripod with the flash on it behind a metal door and between two large metal tanks to make it as difficult as possible . The flash still fired ! I think that's covered every possibility that I could come up against at any distance I could need it to work at .


As a side issue we were discussing the possibility of transmitting wireless TTL on nikoncafe . This has been done with the radiopoppers but we  also spoke about the fact that the RF 602's wake up the SB800 flash from standby  mode with a half press of the button but can't wake the SB600's and won't let the SB900's go into sleep mode so we did some measuring and this is what mike66 of nikoncafe came up with ....

" Here is what I found on the left rear contact of the speedlights. When active, each contact had a DC component with a negative going square wave pulse. When in standby, the contact was zero Volts.
SB-900:
3.75V DC with a negative pulse of 40mV. The pulse width is 8ms and the period is 130ms.
SB-800:
4.00V DC with a negative pulse of 100mV. The pulse width is 8ms and the period is 250ms.

SB-600:
4.00V DC with a negative pulse of 80mV. The pulse width is 60ms and the period is 260ms.

The SB-800 had another interesting surprise on the front right contact, which neither of the other speedlights shared. When the speedlight was active, this contact had a positive going square wave pulse train of 2.5V. The pulse width is 2.5ms and the period is 250ms. When the SB-800 went into standby, the voltage on this contact was zero with no pulse train. "
As we learn more about the RF 602 wireless flash triggers perhaps we will find a way to make them work properly with the SB600 and SB900 . Perhaps Yongnuo will just make the next product work properly ? They probably took a D200 and SB800 and reverse engineered the contacts thinking that it would work with any flash .  For now anyway they are still a pretty powerful product considering what they can do compared to other cheaper flash triggers .


Realsynch flash

I'll state from the beginning : This will only work with a Nikon D40 , D50 or D70/S since they do not have a focal plane shutter , instead the sensor fires electronically which gives it the advantage of capturing the whole flash in one go as opposed to a slit moving across the frame as with Focal Plane [FP] shuters .


First off two samples to whet your appetite comparing what I call "realsynch" to the high-FP trick mode that modern cameras use in bright sunshine with high shutter speeds .
This is the best a Nikon D90 and SB800 can do at a distance of 5 metres ....
taken indoors at night .


Photobucket


And this is what "realsynch" does ....


Photobucket


I used a modified SB24 flash for my "realsynch" flash . Because the cameras mentioned fire electronically with their sensors they have a 1/500th flash synch speed meaning that since the SB800 , for example , fires at full power for around 1/1000th of a second the camera will be able to capture that entire flash in 1/500th of a second without any overlap in the timing of the electronics .
With a D90 this time is only 1/200th of a second and after that it changes to FP mode where the shutter slides across the frame in a slit - then it has to resort to a weak continuous light so the whole frame receives the same amount of light .... more on that later .


First we have to make sure the D40/50/70/S we are using doesn't know there is a flash connected and there are two options , either slide a piece of paper under the two back pins as you slide the flash into the hotshoe or do what I did - open the base of the flash and cut the two wires to the back two pins -BUT : be careful of high voltages , you could get zapped !
Now if you have an SB600/800/900 the paper trick is the safest if you are not 100% sure of what you are doing , also you don't want to damage a newer flash .
And this is a picture I took a while back to show the flash pins .


The centre pin gets earthed to the 'ground' contact on the side of the hotshoe when the camera wants it to fire . The single pin at the top is the 'camera to flash' communication pin .
The two at the bottom are for the flash to communicate with the camera so I disconnect them so the camera doesn't know the flash is connected and can't default to maximum synch speed .
In any case it doesn't speak the same language as the newer cameras so I have found that with my D40 and D50 I can fit an older flash without bypassing or blocking any of the pins and it still works at any speed , however I can't guarantee that there won't be any mis-communication between the camera and flash so I generally use my SB24 with the wires cut ....
I leave the one at the top connected because it is useful in that you can switch the SB24 to "standby " mode and when the camera is switched on that pin wakes the flash up - so the flash knows a camera is connected but the camera doesn't know a flash is connected !
Of course this means you have to input the aperture , iso and zoom of the head manually - but you can still leave the flash in 'auto' mode and it will use its sensor to control the flash output accordingly - based on the settings you have told it to use .
The advantage ? Well you can see that from the two pictures at the top !
If we go by the 'sunny 16' rule : Bright sunlight at F16 gives you iso 200 and 1/200th max for the D90 . The SB800 tells me I have 2.7 metres working distance at this setting but when I open the aperture - F8 1/800th , F4 1/3200th ... the flash has to go to high fp mode and tells me I have 1.4 metres working distance .
Now the SB24 : F16 on the D50 allows me 1/500th sec at iso 500 , full power - which gives me 4 metres . f8 iso 200 1/800th full power is cutting it a bit fine to prevent overlap but as we drop in flash power it fires much faster . At 1/4 power it fires at 1/2700th sec and at 1/8 it fires at 1/5500th sec so at F4 1/3200th and iso 200 I can leave it on 1/4 and still catch a high percentage of the flash and have 4 metres working distance .
These distances are at 24mm wide angle on the zoom head and increase [ on both flashes ] as I zoom in and the power used would be enough to light a subject in total darkness as shown by the first two pictures . Of course outside in bright sunlight we would not need all that power and could use the flash as fill only , bounce it off a reflector , or close the aperture without changing the settings on the flash thereby fooling the flash to think it doesn't need to fire so strong [ increasing the iso setting on the flash will also reduce its power ] .
Here are two more pictures illustrating the power you have outside in bright sunlight .
Just remember one thing though , you have so much power available you may need to make sure you don't get too close to your subject/s since the flash may not be able to fire weak enough !


Photobucket
Photobucket


Now the 'rough' maths . Due to the inverse square law when you are twice as far from the subject - the light from the flash going forward in a 'rectangular' pattern means that the length and breadth of that 'rectangle' double and twice the length times twice the breadth = 4 times the area . So if you are getting twice the working distance it actually means you have 4 times the flash power ! The results may not agree 100% with the maths but they look close enough to prove that there is a huge advantage in 'realsynch' compared to high-fp mode .
So if the SB800 tells me I have 1.4 metres working distance and the SB24 tells me I have 4 metres then 4/1.4 = 2.85 X the working distance . 2.85 squared gives just over 8X the power !
That's 3 stops more powerful than a D90 and SB800 combination achieved with a lowly D40 and SB24 flash !
After doing some tests in manual mode without flash to get the same histograms as the first pictures [ not 100% but close ] it appears I am getting 2 1/3 to 2 2/3 stops more power than high fp mode .
I just did some calculations on the difference between normal flash and High fp on the SB800 , hopefully they are correct ;
When I set my camera manually to iso 200 , F16 and 1/200th sec the flash tells me I have 0.6-2.7 metres working distance available . As I take it to F8 1/800th or F4 1/3200th it goes into high-fp mode and tells me I have 0.6-1.4 metres . Now 2.7m/1.4m gives us 1.928X the distance . 1.928 squared tells us we have 3.72X the flash power when we are not in high-fp mode .
1/3.72 = 0.2688 which is the power we have in fp mode compared to normal flash mode .
That's less than 27% of normal flash power with a D90 and SB800 flash , when in high-fp mode .
At iso 100 and 35mm the SB800 has a GN of 38m and the SB24 a GN of 36m . By my calculations the SB24 has less than 90% of the power of a SB800 .
But when we start comparing "realsynch" to high fp mode the SB24/D40 combination has almost 8X more power at higher shutter speeds due to the faster flash synch speed !


Today I did some tests to try to turn "day into night " .
First a picture without flash .
Photobucket


Under expose the background by increasing the shutter speed ...
Photobucket


And with the D40 , [35mm 1.8 lens] and SB 24 we still have enough power at 4 meters to make the picture look like a bad 'direct flash' shot at night !


Photobucket

Direct flash and TTL/BL

Recently I was involved in a discussion regarding the advantage of distance info when using TTL/BL and direct flash .
Anyway I decided to try to explain this in an uninterrupted logical manner for those who are interested in the subject .
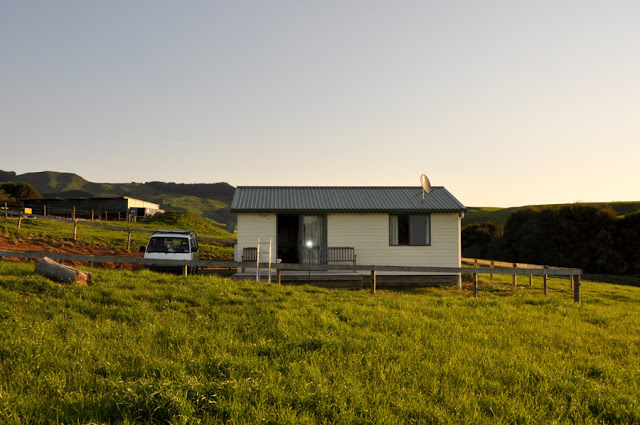
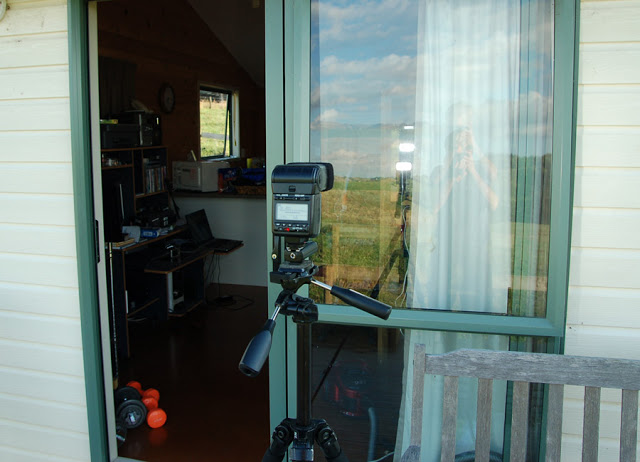
Ideally we avoid direct flash but there are times when we have no choice . Outdoors in daylight is a good example with nothing to bounce off and when we only want subtle fill-flash as well .
First we need to understand how they meter :
TTL doesn't care how well you have the ambient exposed , it simply tries to get an average grey in the centre of the frame ......


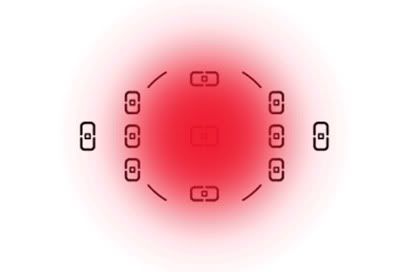
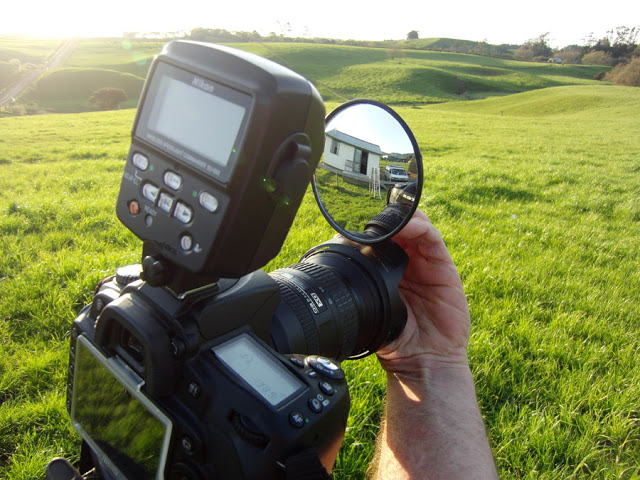
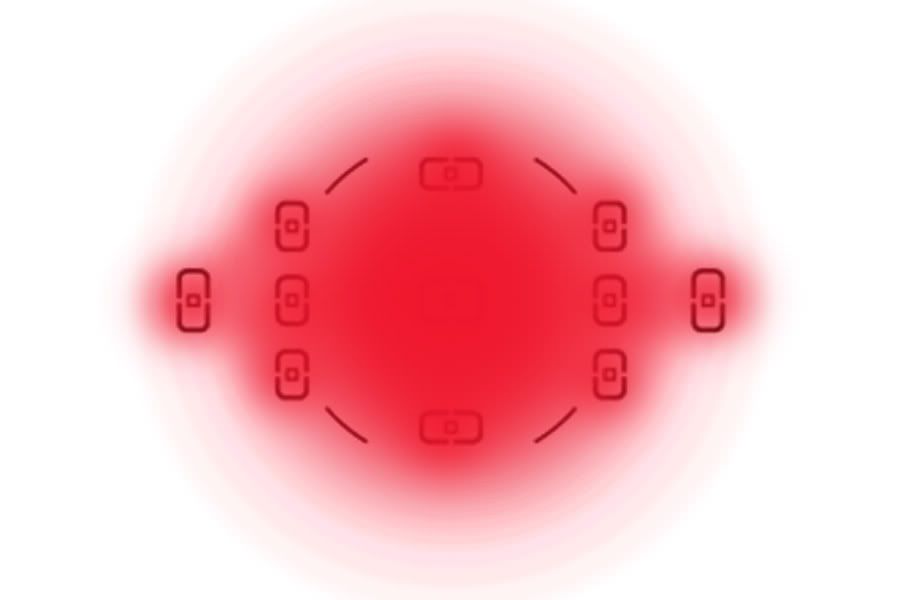
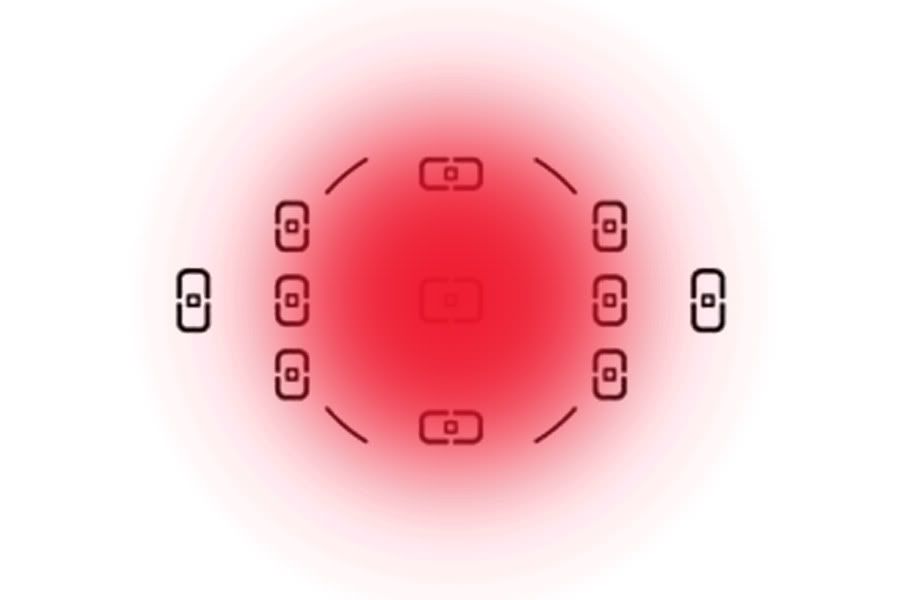
TTL/BL on the other hand is more complicated , when the flash head is pointing forward it meters quite heavily toward the distance info from the lens as well as using a different pattern to meter from , it uses the " focus point diamond '' and can select a smaller area from anywhere inside that pattern ......


With direct flash though it only uses a small portion of the pre-flash reading from this pattern .
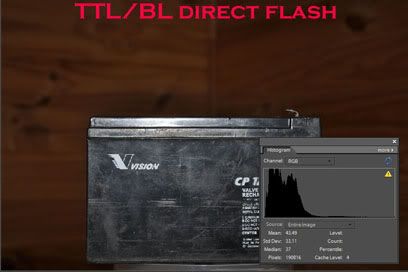
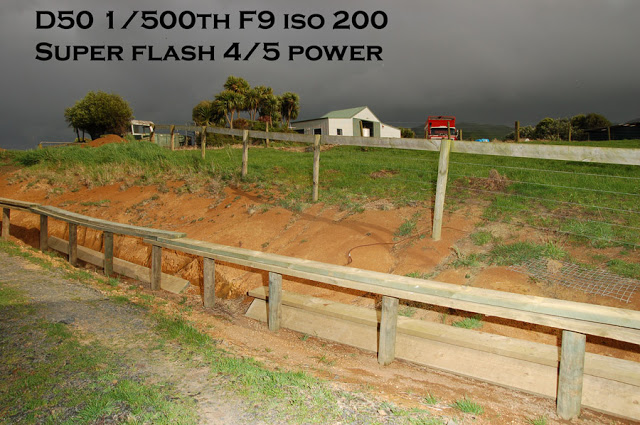
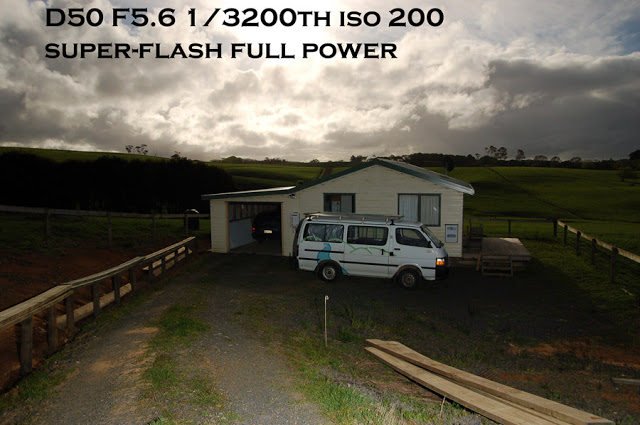
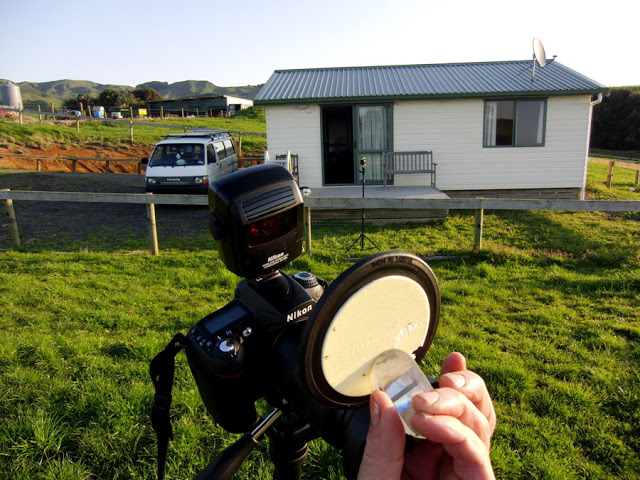
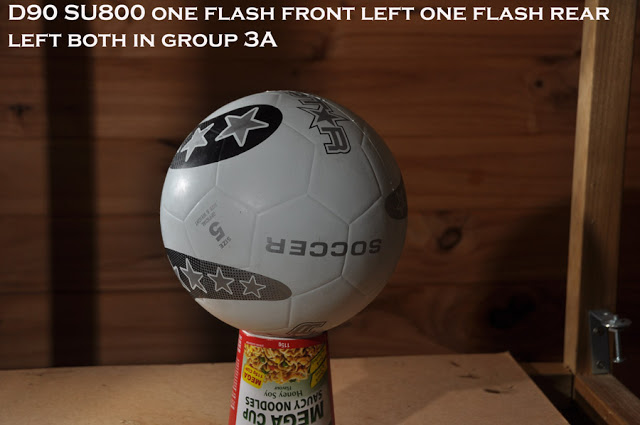
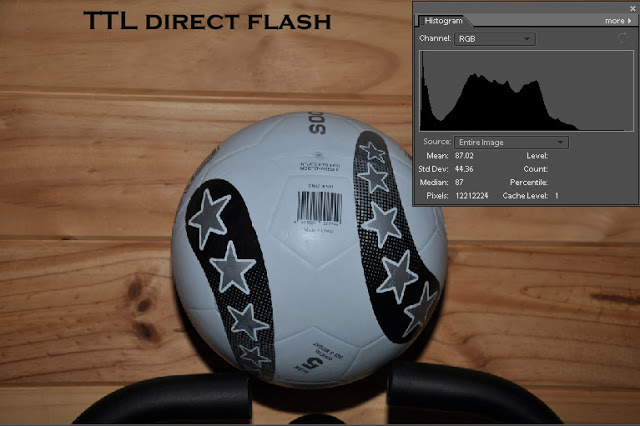
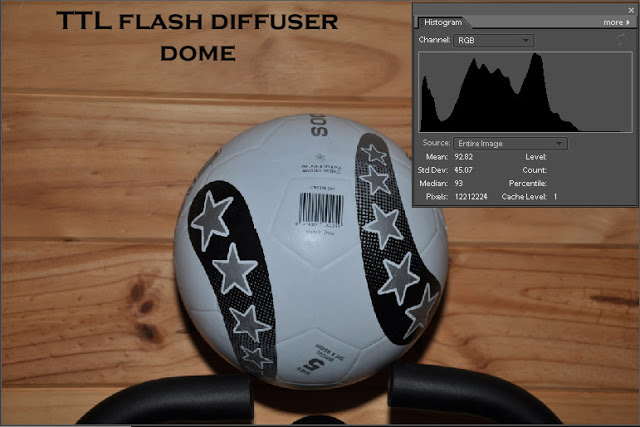
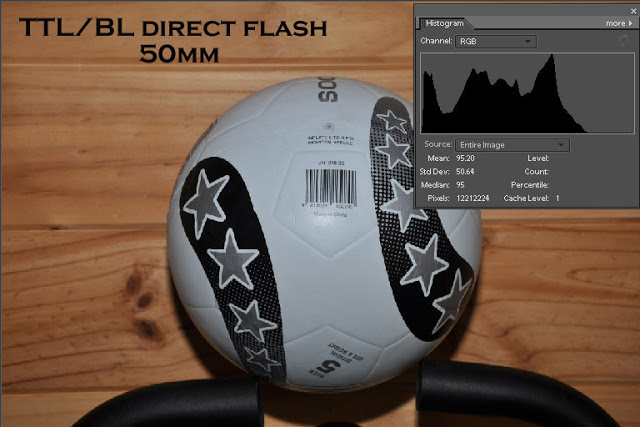
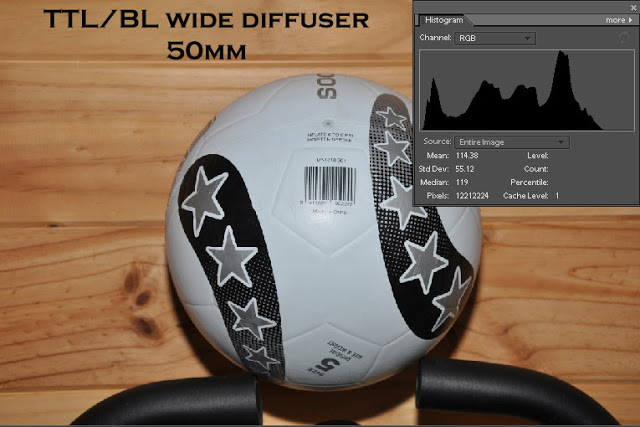
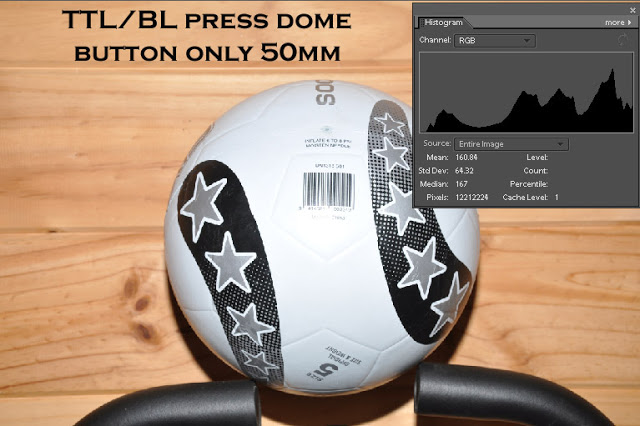
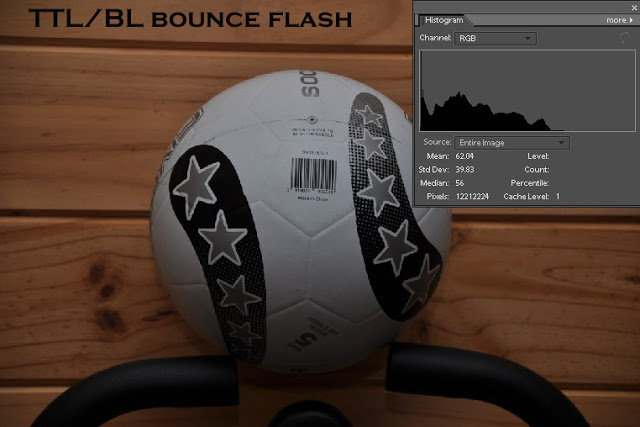
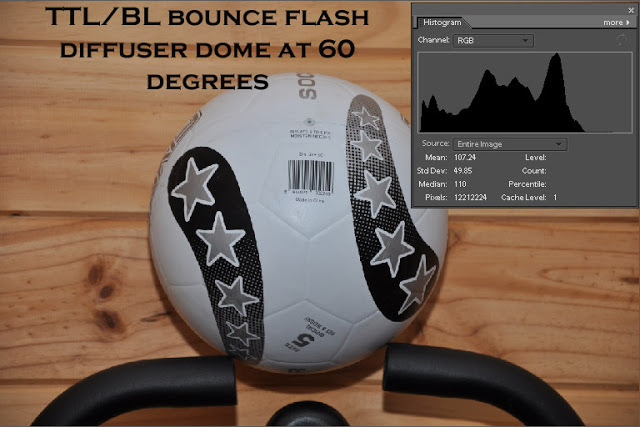
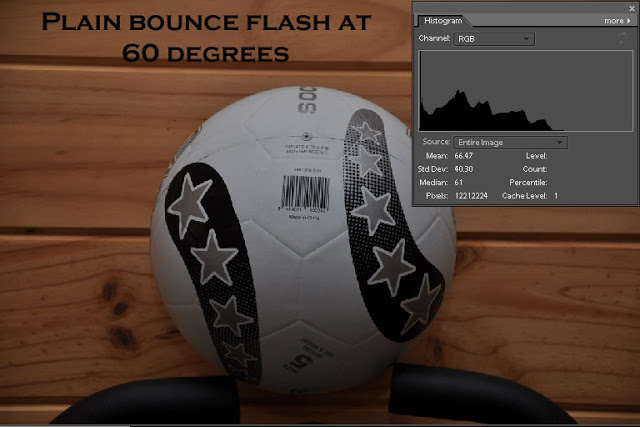
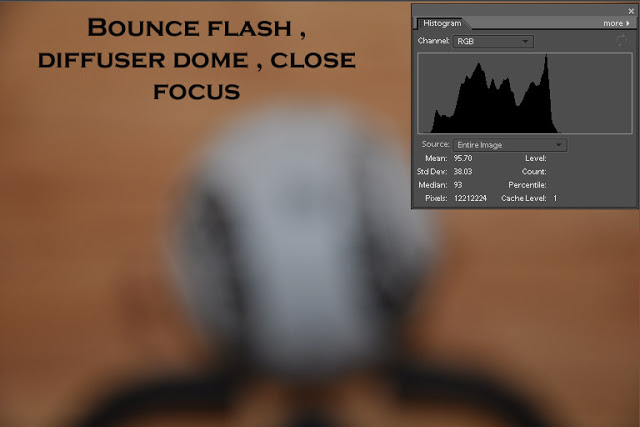
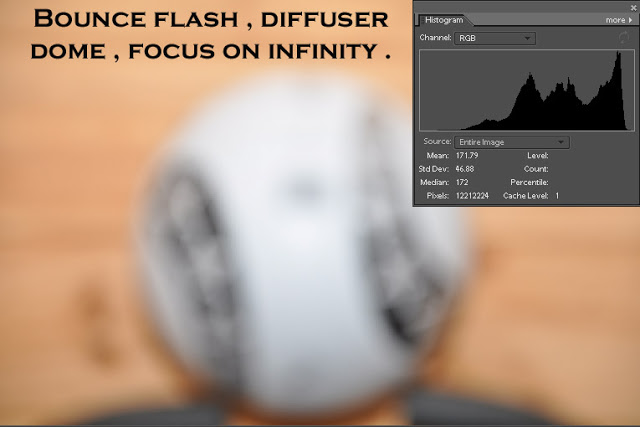
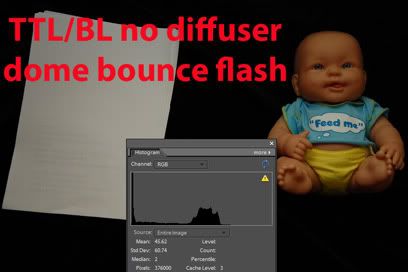
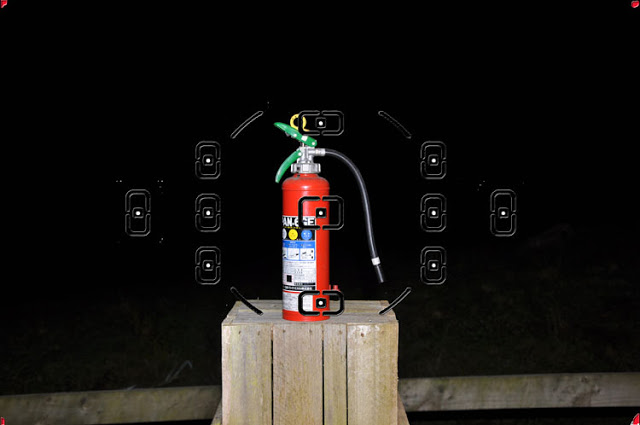
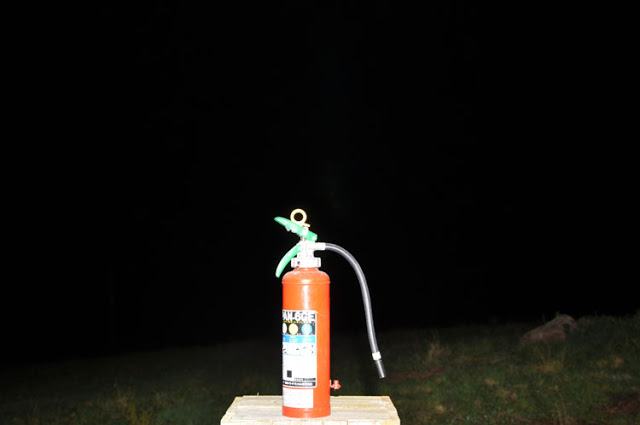
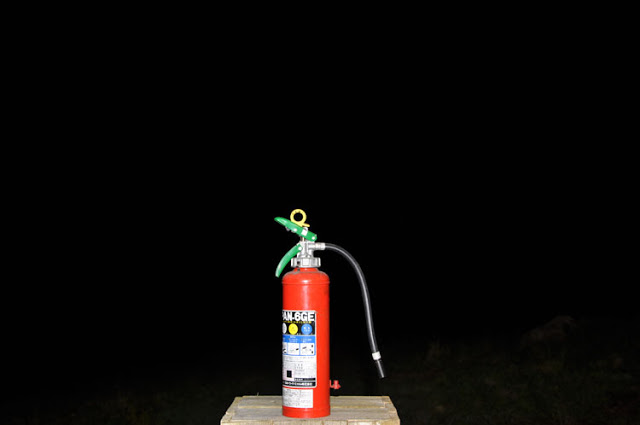
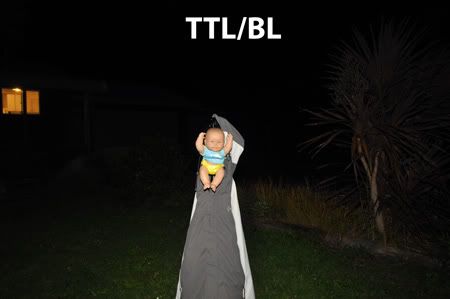
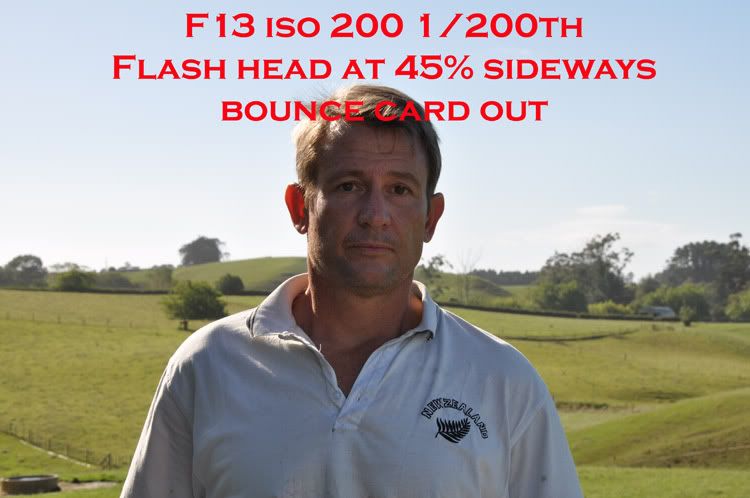
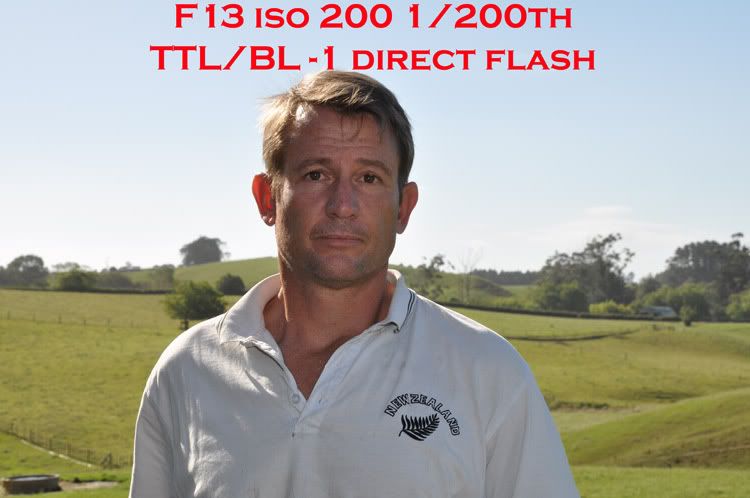
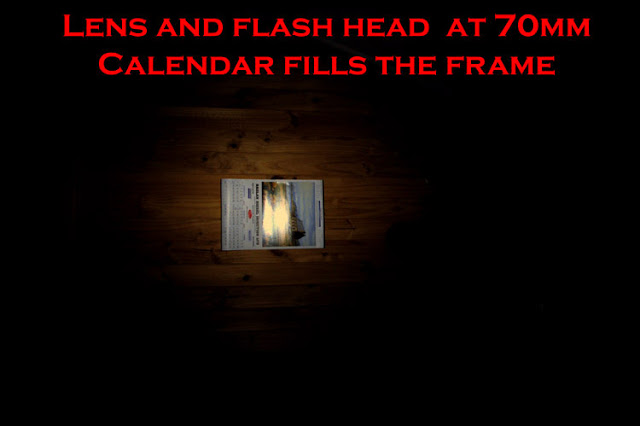
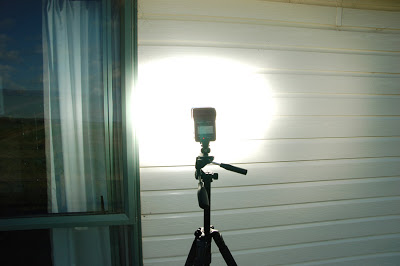
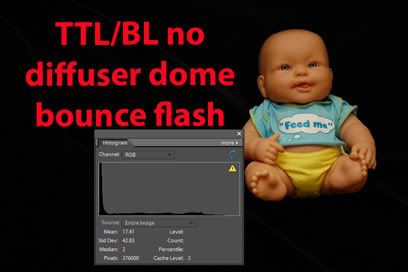
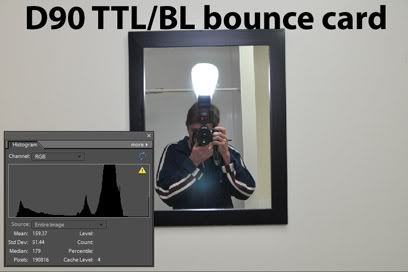
On to the tests . First we have TTL/BL , I've underexposed the background in these pictures so we only have the flash lighting the scene .


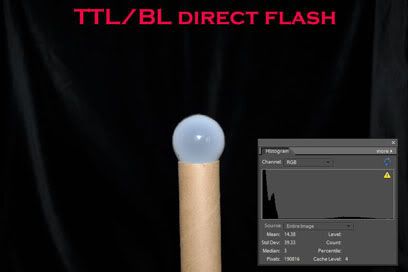
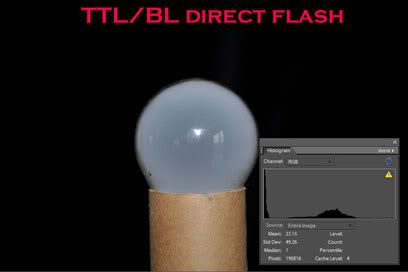
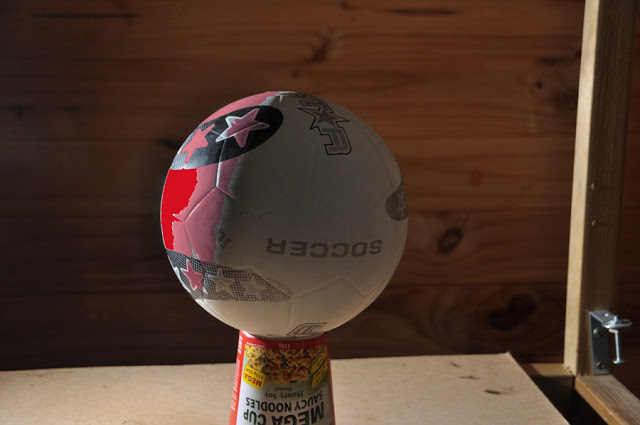
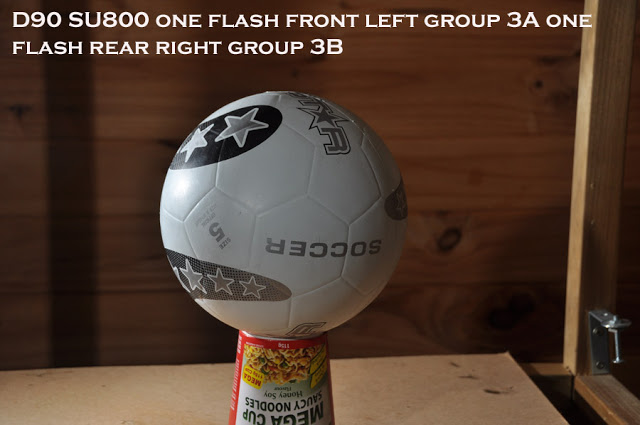
With the advantage of distance info TTL/BL does a pretty good job of maintaining a consistent exposure for the subject regardless of its size in the frame - now TTL flash .


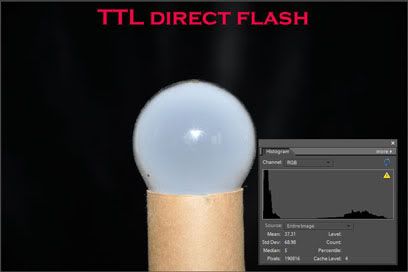
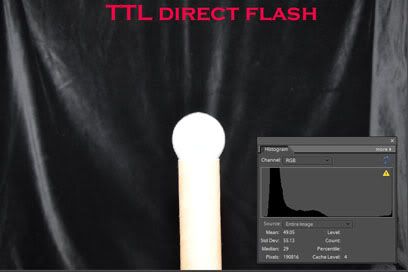
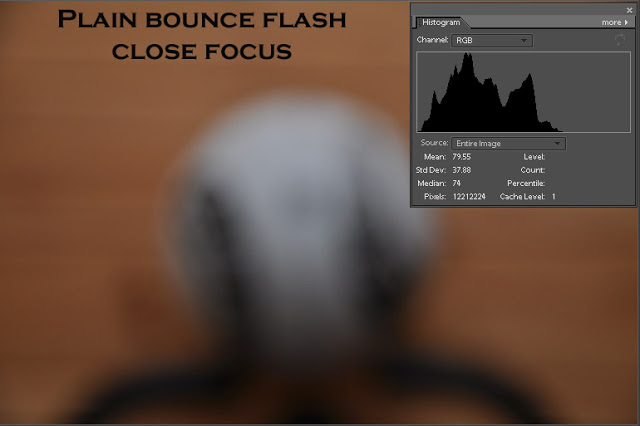
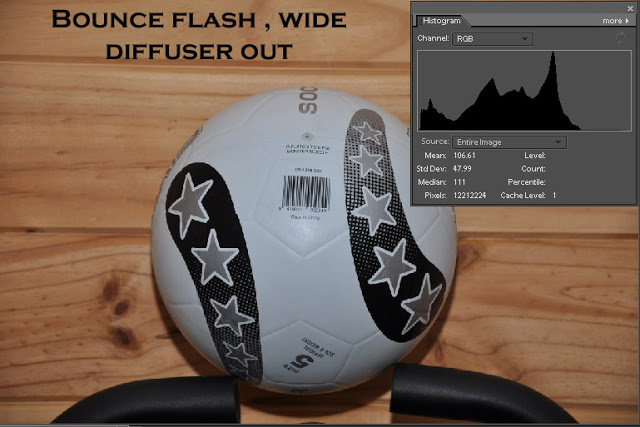
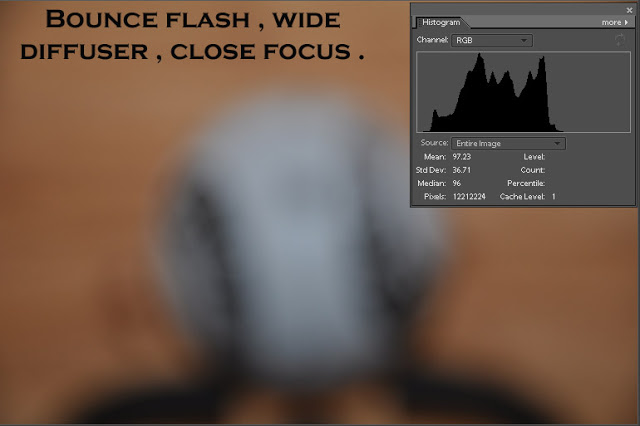
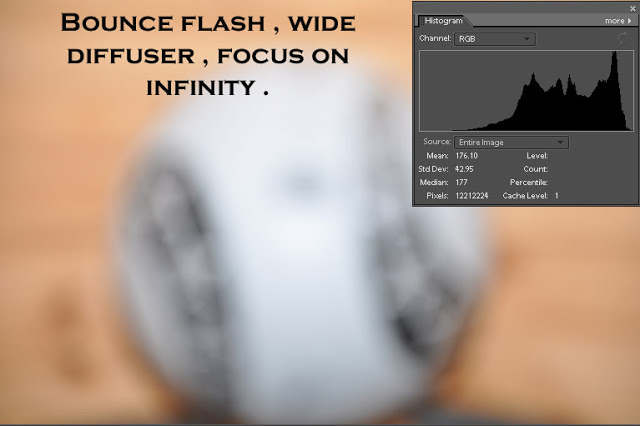
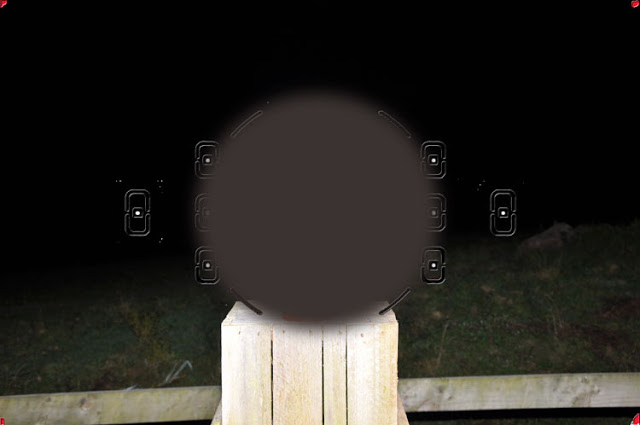
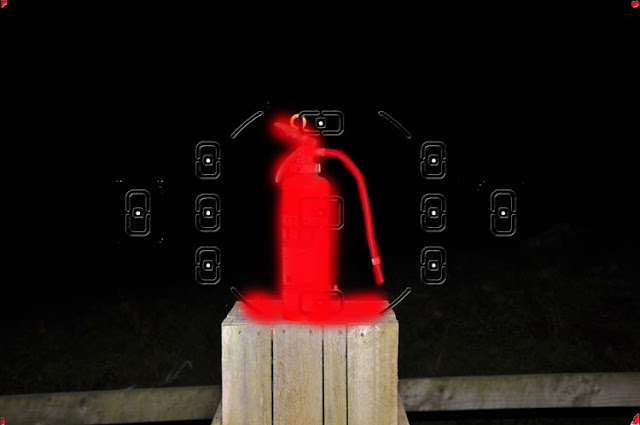
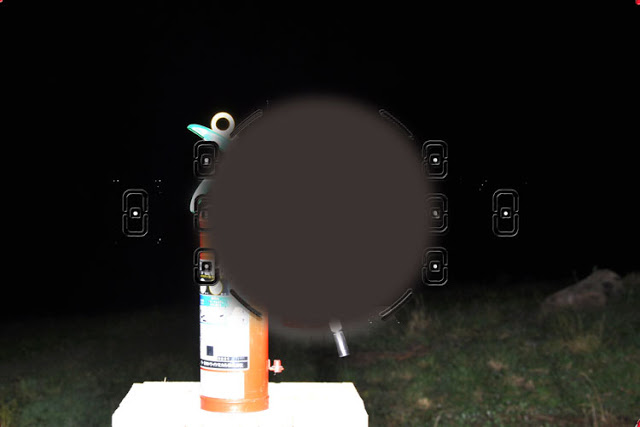
As you can see TTL doesn't know the distance , all it knows is that it wants an average grey in the centre of the frame and to illustrate this I took both of these images and applied an 'average blur' in photoshop in the centre of the frame .....

When the subject is central and fills a decent percentage of the centre of the frame it's not bad ....


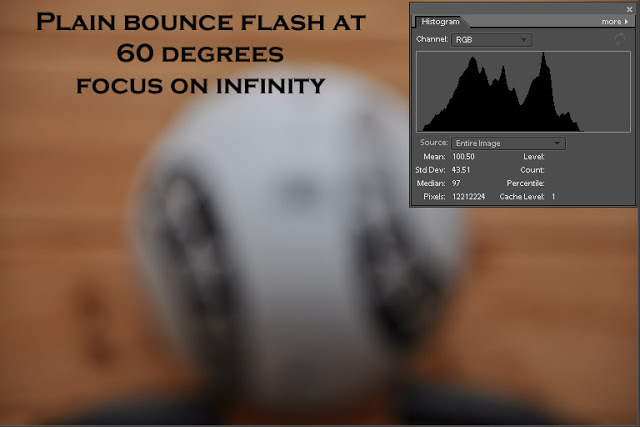
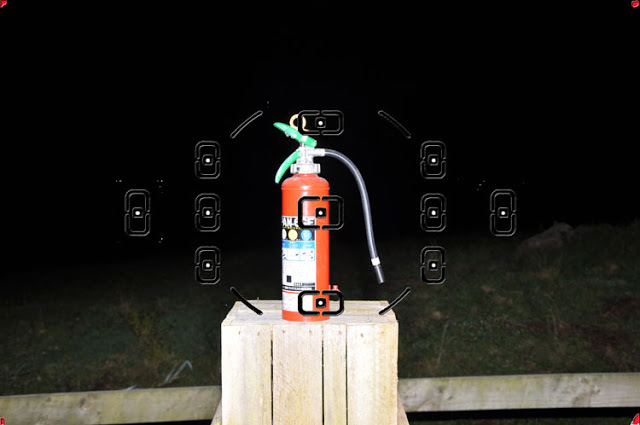
But when the subject is smaller and far from the background TTL has to make that small subject really bright to get and average grey in the centre of the frame , TTL/BL does not suffer from this weakness since it knows how far away the subject is [ with direct flash only ! ]


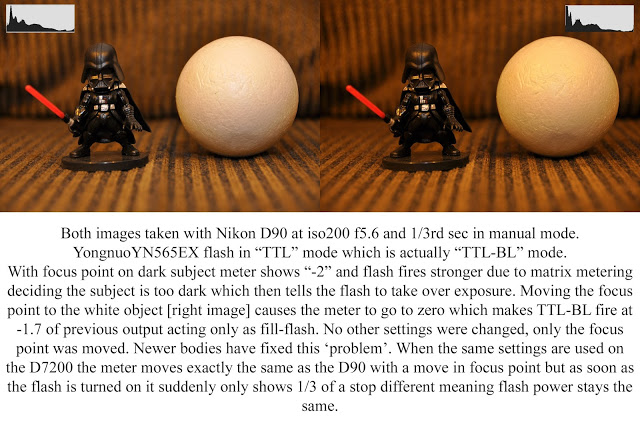
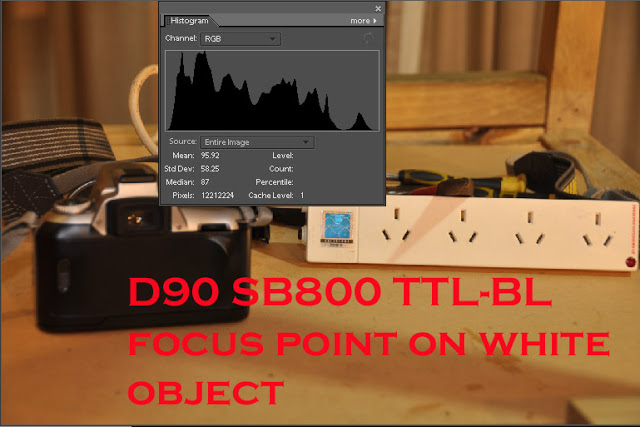
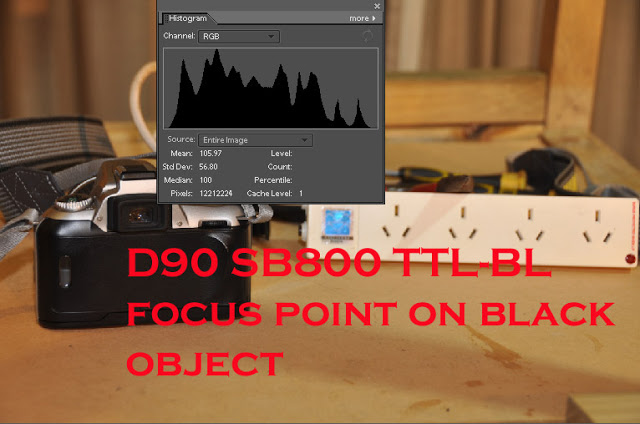
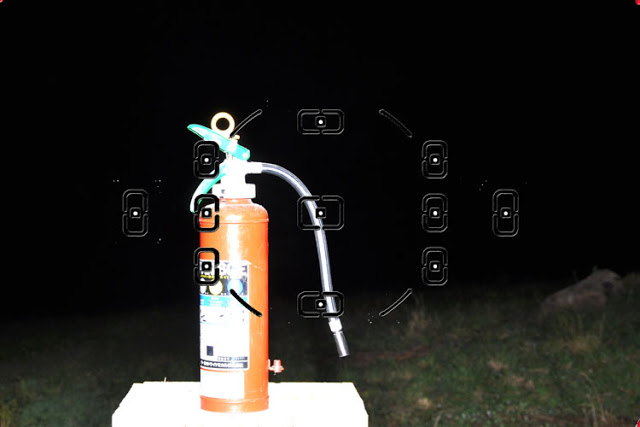
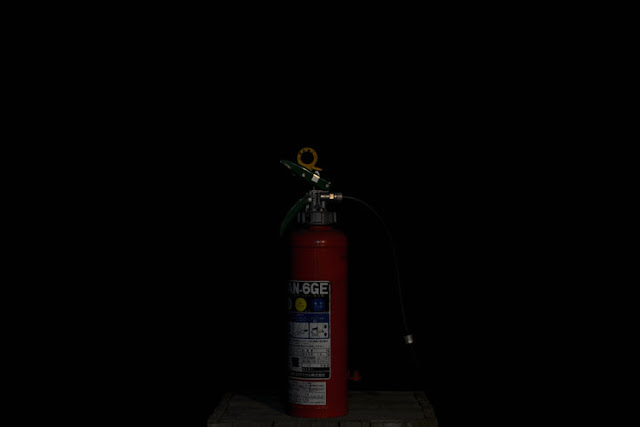
Now we take a darker subject with a lighter background , some may say TTL flash looks better here ....


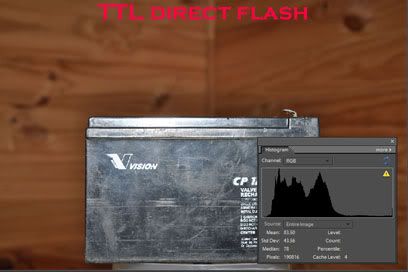
In reality TTL has fired stronger because the subject does not fill the frame and is black so it's trying to make it an average grey . The result may be more pleasing to the eyes for some but essentially the problem is not with TTL/BL flash in this case . When you are using direct flash and want to light the subject correctly you can't expect the flash to light the background correctly as well as the subject and be accurate in both cases ,though , with TTL flash , there will be the odd occasion where the results will look good with the right combination of subject colour , size , and distance from the background which is pure luck .

So the problem is not the 'car' but the 'nut that holds the steering wheel ' .
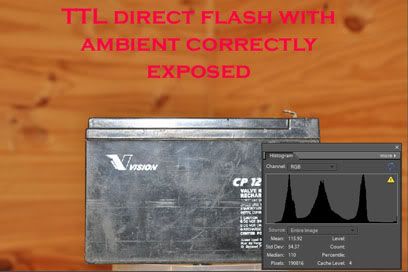
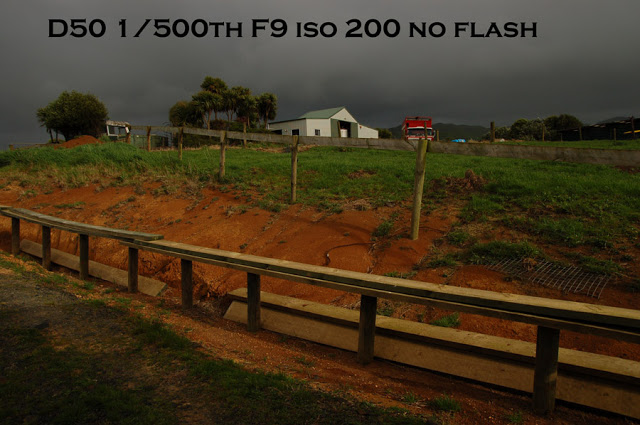
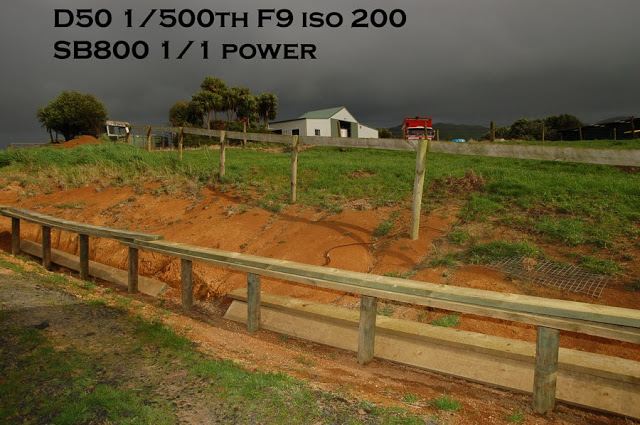
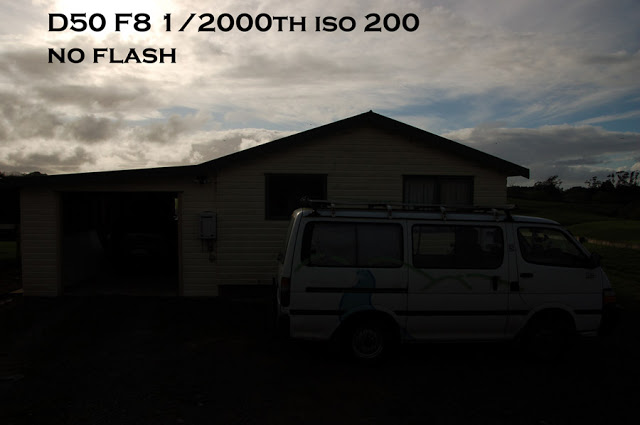
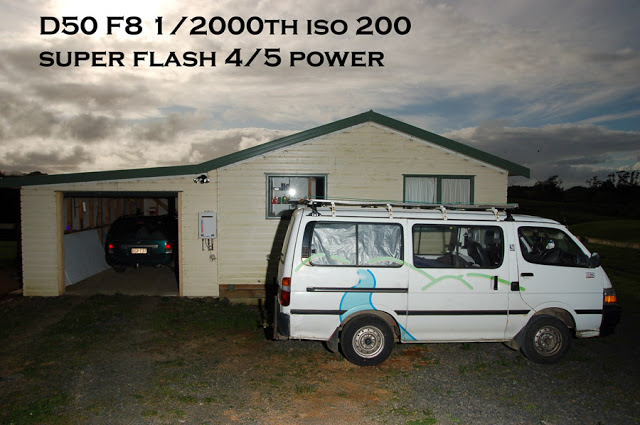
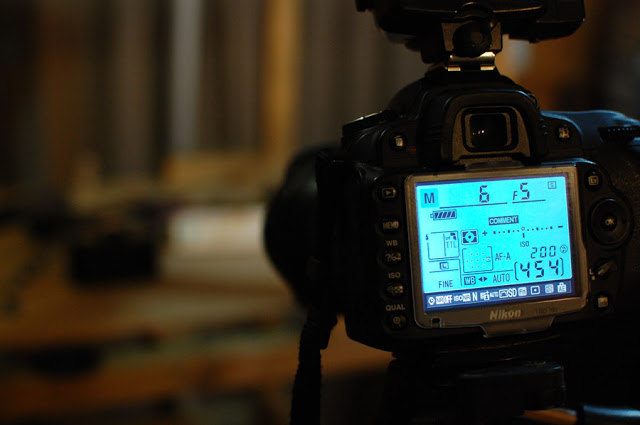
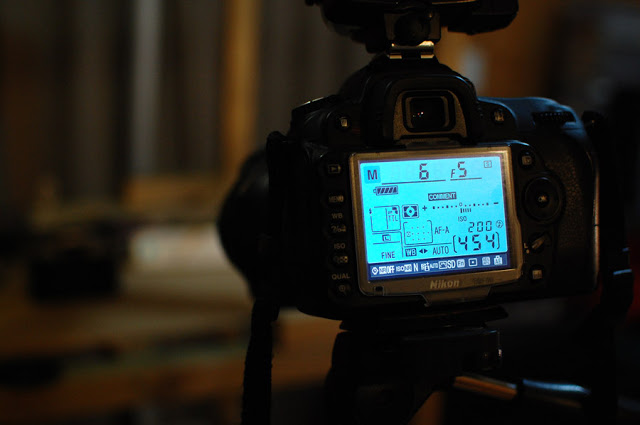
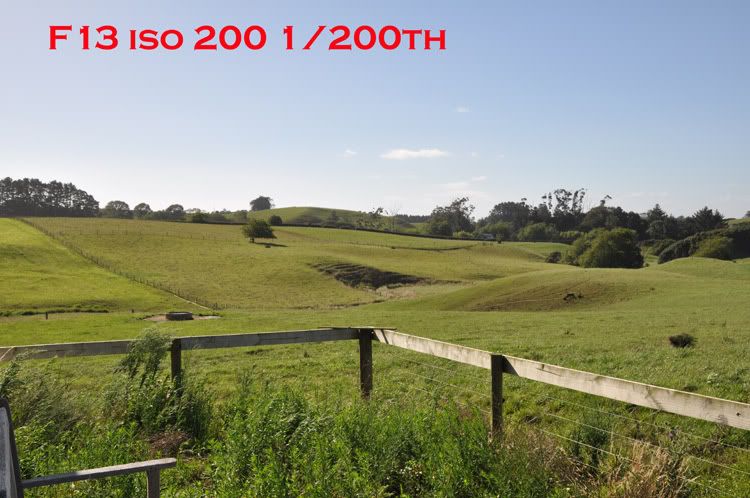
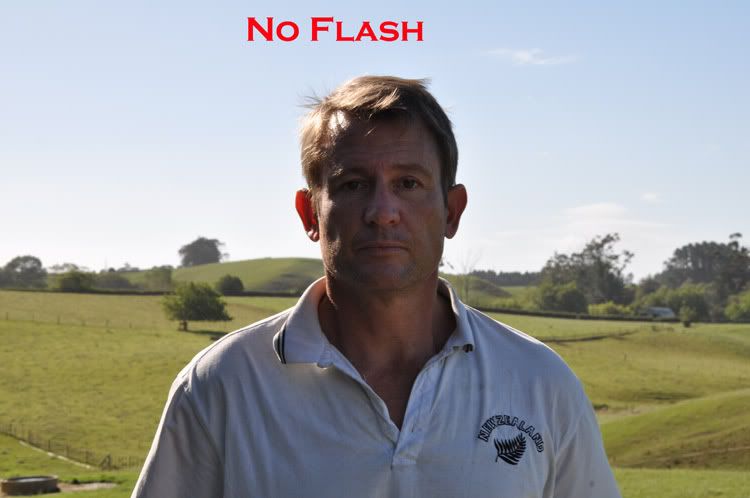
If you are using direct flash you have to make sure you expose the ambient correctly - so that is what I have done , I adjusted the shutter speed to expose the background the way I wanted it and let the flash handle the subject - in this case TTL/BL senses that the ambient is having a greater effect on the subject and backs off accordingly .


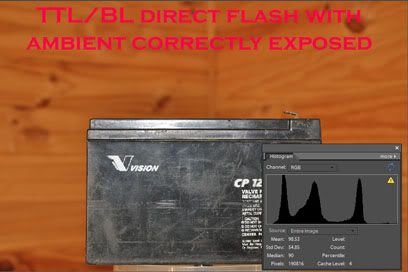
TTL on the other hand still thinks it is the only light source and fires too strong causing more blown highlights .


The conclusion of the matter ? If you are using direct flash with TTL/BL you are concentrating on the subject at a set distance and have to expose for the background with your normal camera settings , with direct flash and TTL on the other hand it all depends on how big your subject is in the centre of the frame , the subject colour , the background colour behind the subject in the centre of the frame that it meters from , the distance form the background that is having an effect on the metering .......
I choose TTL/BL and the advantage of the distance info from the lens with direct flash .Choose whichever you want - just understand how it works . [ and shoot manual flash when possible :smile: ] .

Motion sensor remote trigger

This is the prototype of my modification of a cheap dummy camera , with built in motor and motion sensor , to trigger my camera . The video


First I started with a cheap [ $9 ] dummy security camera that moves from side to side when it detects motion to give people the impression that they are on video . It runs on 3 X AA 1.5 volt batteries which makes it 4.5 volts . { The motion sensor is pathetic so I am getting something better next week , but the same principle applies }
Since the camera remote of my Nikon runs on a 3 volt battery I removed one battery and bridged out that connection in the battery holder making it effectively also a 3 volt system and it still works on that voltage - not that I'm promising that every one you buy will be able to do that :) !


Now this is obviously very rough as it involved a fair amount of trial and error and modifications , so you could do a better job now that you know how it goes - and I will do a better job when my more advanced motion sensor arrives , and I'll share the results with you as well :) .
The basic concept is this : The dummy camera is always 'on' and when it detects motion it switches its power supply to the little motor inside which moves from side to side for about 25 seconds .
By removing one battery and bridging out the contacts of that section of the compartment you are making it a 3 volt system - I'll explain the other option further down .
You open the dummy camera , and cut the wires to the motor and take them to the battery feed of your camera remote !


In the meantime , if you want a neat job , you tape something around the remote , holding the button down [ I ended up taping some copper wire over the bare contacts after destroying the outer case of the remote :D ] ,and this means " you are always pushing the button " of the remote , and when the dummy camera supplies the power to it , it triggers the camera for about 25 seconds meaning you could have the camera in multi-shot mode or use the auto-focus option knowing it will have 25 seconds to get the auto focus right and take the shot[s] .
Imagine a hawk on the side of the road eating some road-kill . You move the 'food' to a safer location , set up the camera and motion sensor and move away - and wait for the hawk to come back and trigger the camera a few times for some cool photos .

If you are concerned that a motion sensor you are using may not work on 3 volts you could always do what auto electricians would tell you not to .... pick up an earth feed from between the batteries . The dummy camera I opened had a bunch of earth wires at one point and one of them went to the motor , along with the positive feed going to the motor . You could still use the positive feed and ignore the earth feed and instead take an 'earth' feed from behind the first battery in line , thereby using only two of the batteries for your supply to the remote .
This is not exactly healthy for the batteries because the two batteries you are using will go flat before the one you are not using for your feed but this will take a very long time and batteries are cheap enough for the results you will get . You could also measure the batteries occasionally and 'rotate them ' , swapping them around regularly .


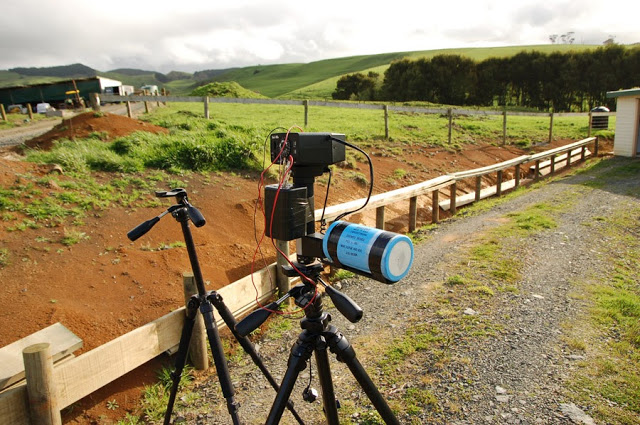
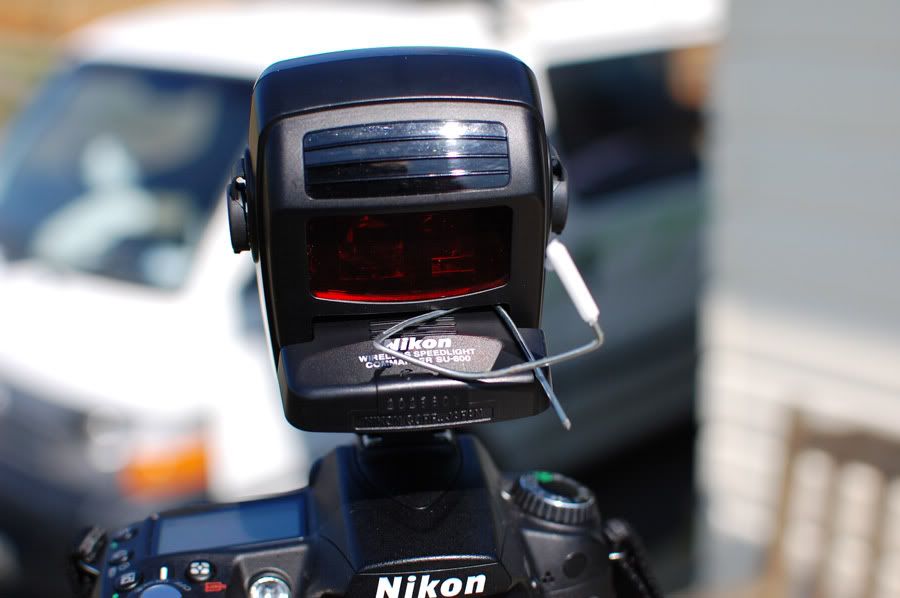
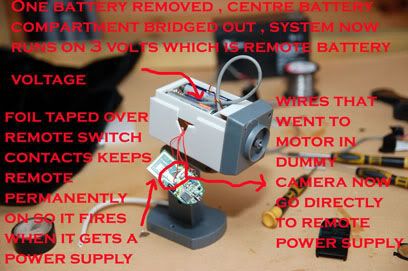
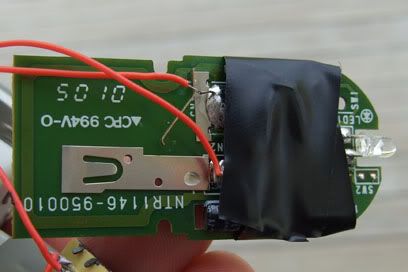
I'll provide an update when my new door sensor arrives and hopefully will have something that works a little better in direct sunlight and has a better range .

Now , how do you get to the battery contacts without destroying the outer cover ?!
Here's a picture showing where the screws are located under the cover so you don't have to peel it off . There are three screws , this is looking from the top .....

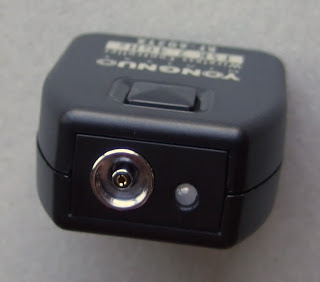
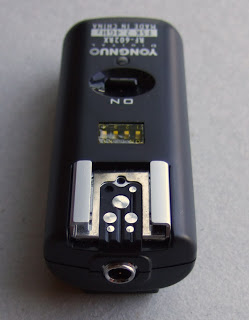
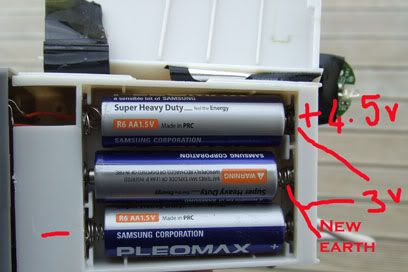
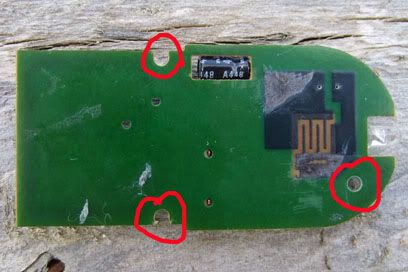
Now you can just cut away a small section of the cover to get to the screws and open the remote and solder two wires to the battery supply - of course you don't re-fit your battery after doing this !
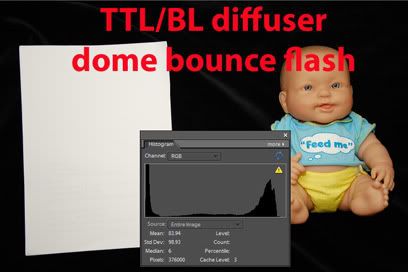
Hopefully I will have an update on a superior model next week !
.