Anyone selling "exposure credits"?

Usually the payment for photos is “exposure credits” - recently someone gave me “money” and I’m not sure what to do now !!!

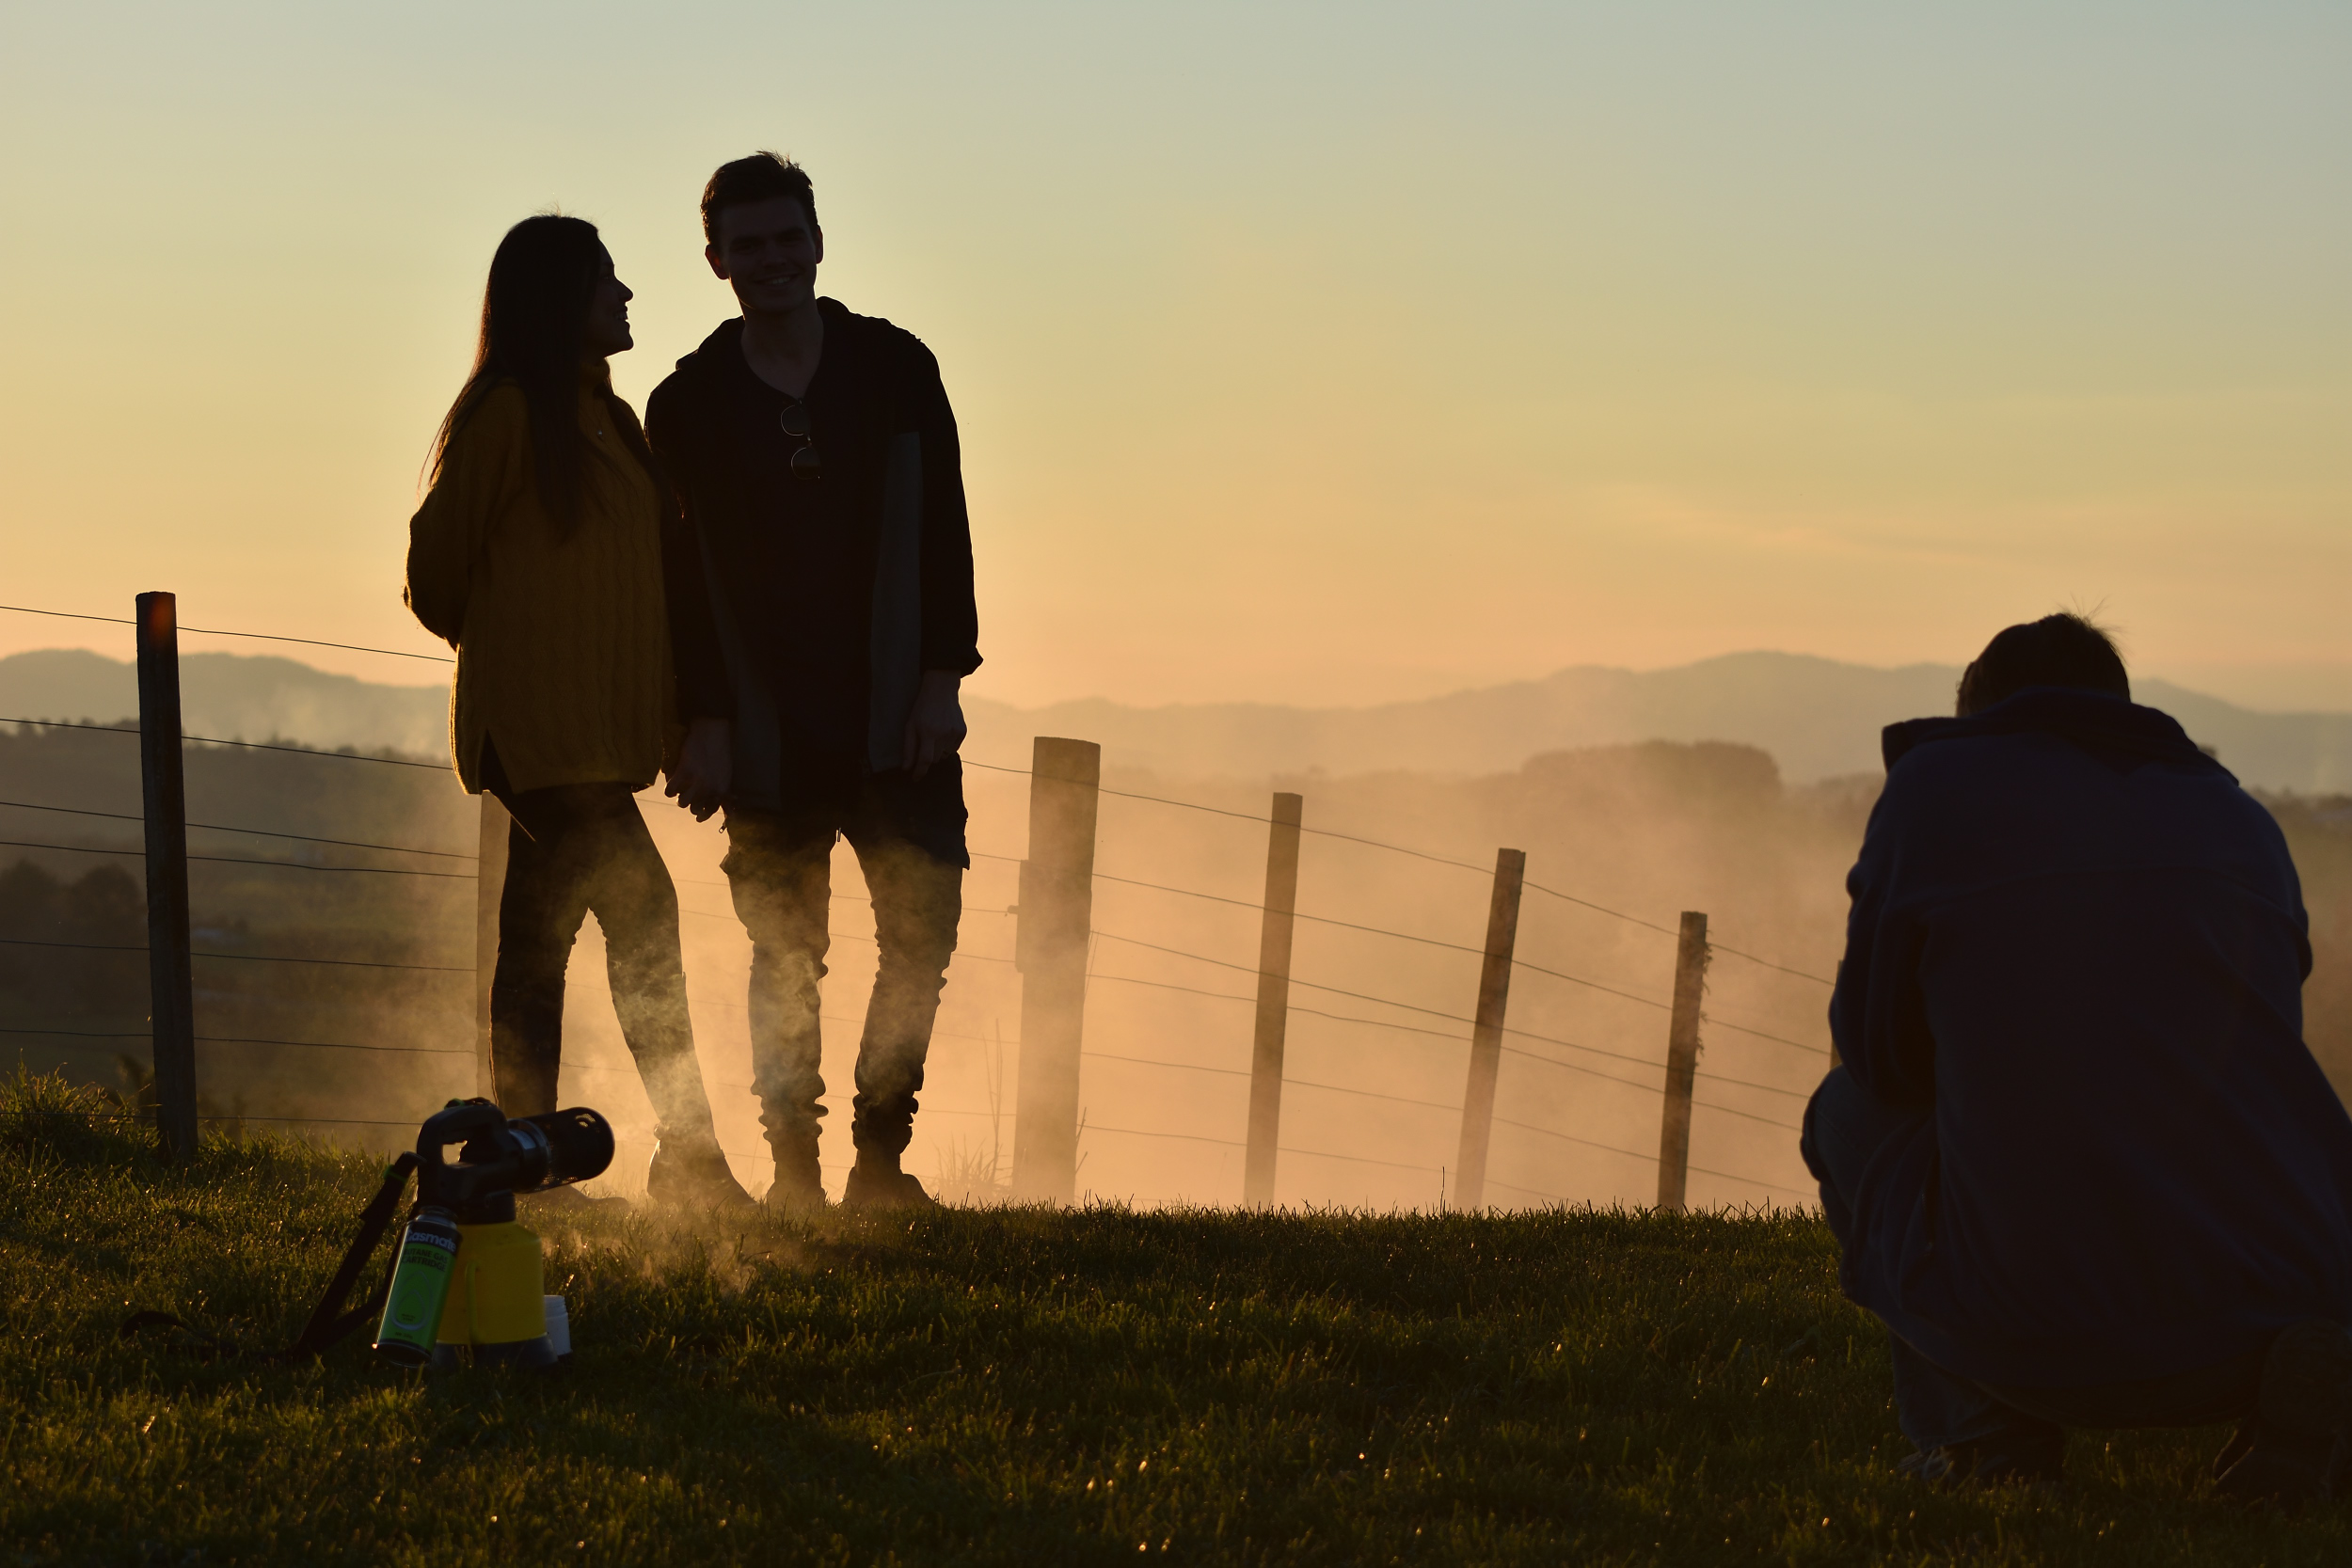
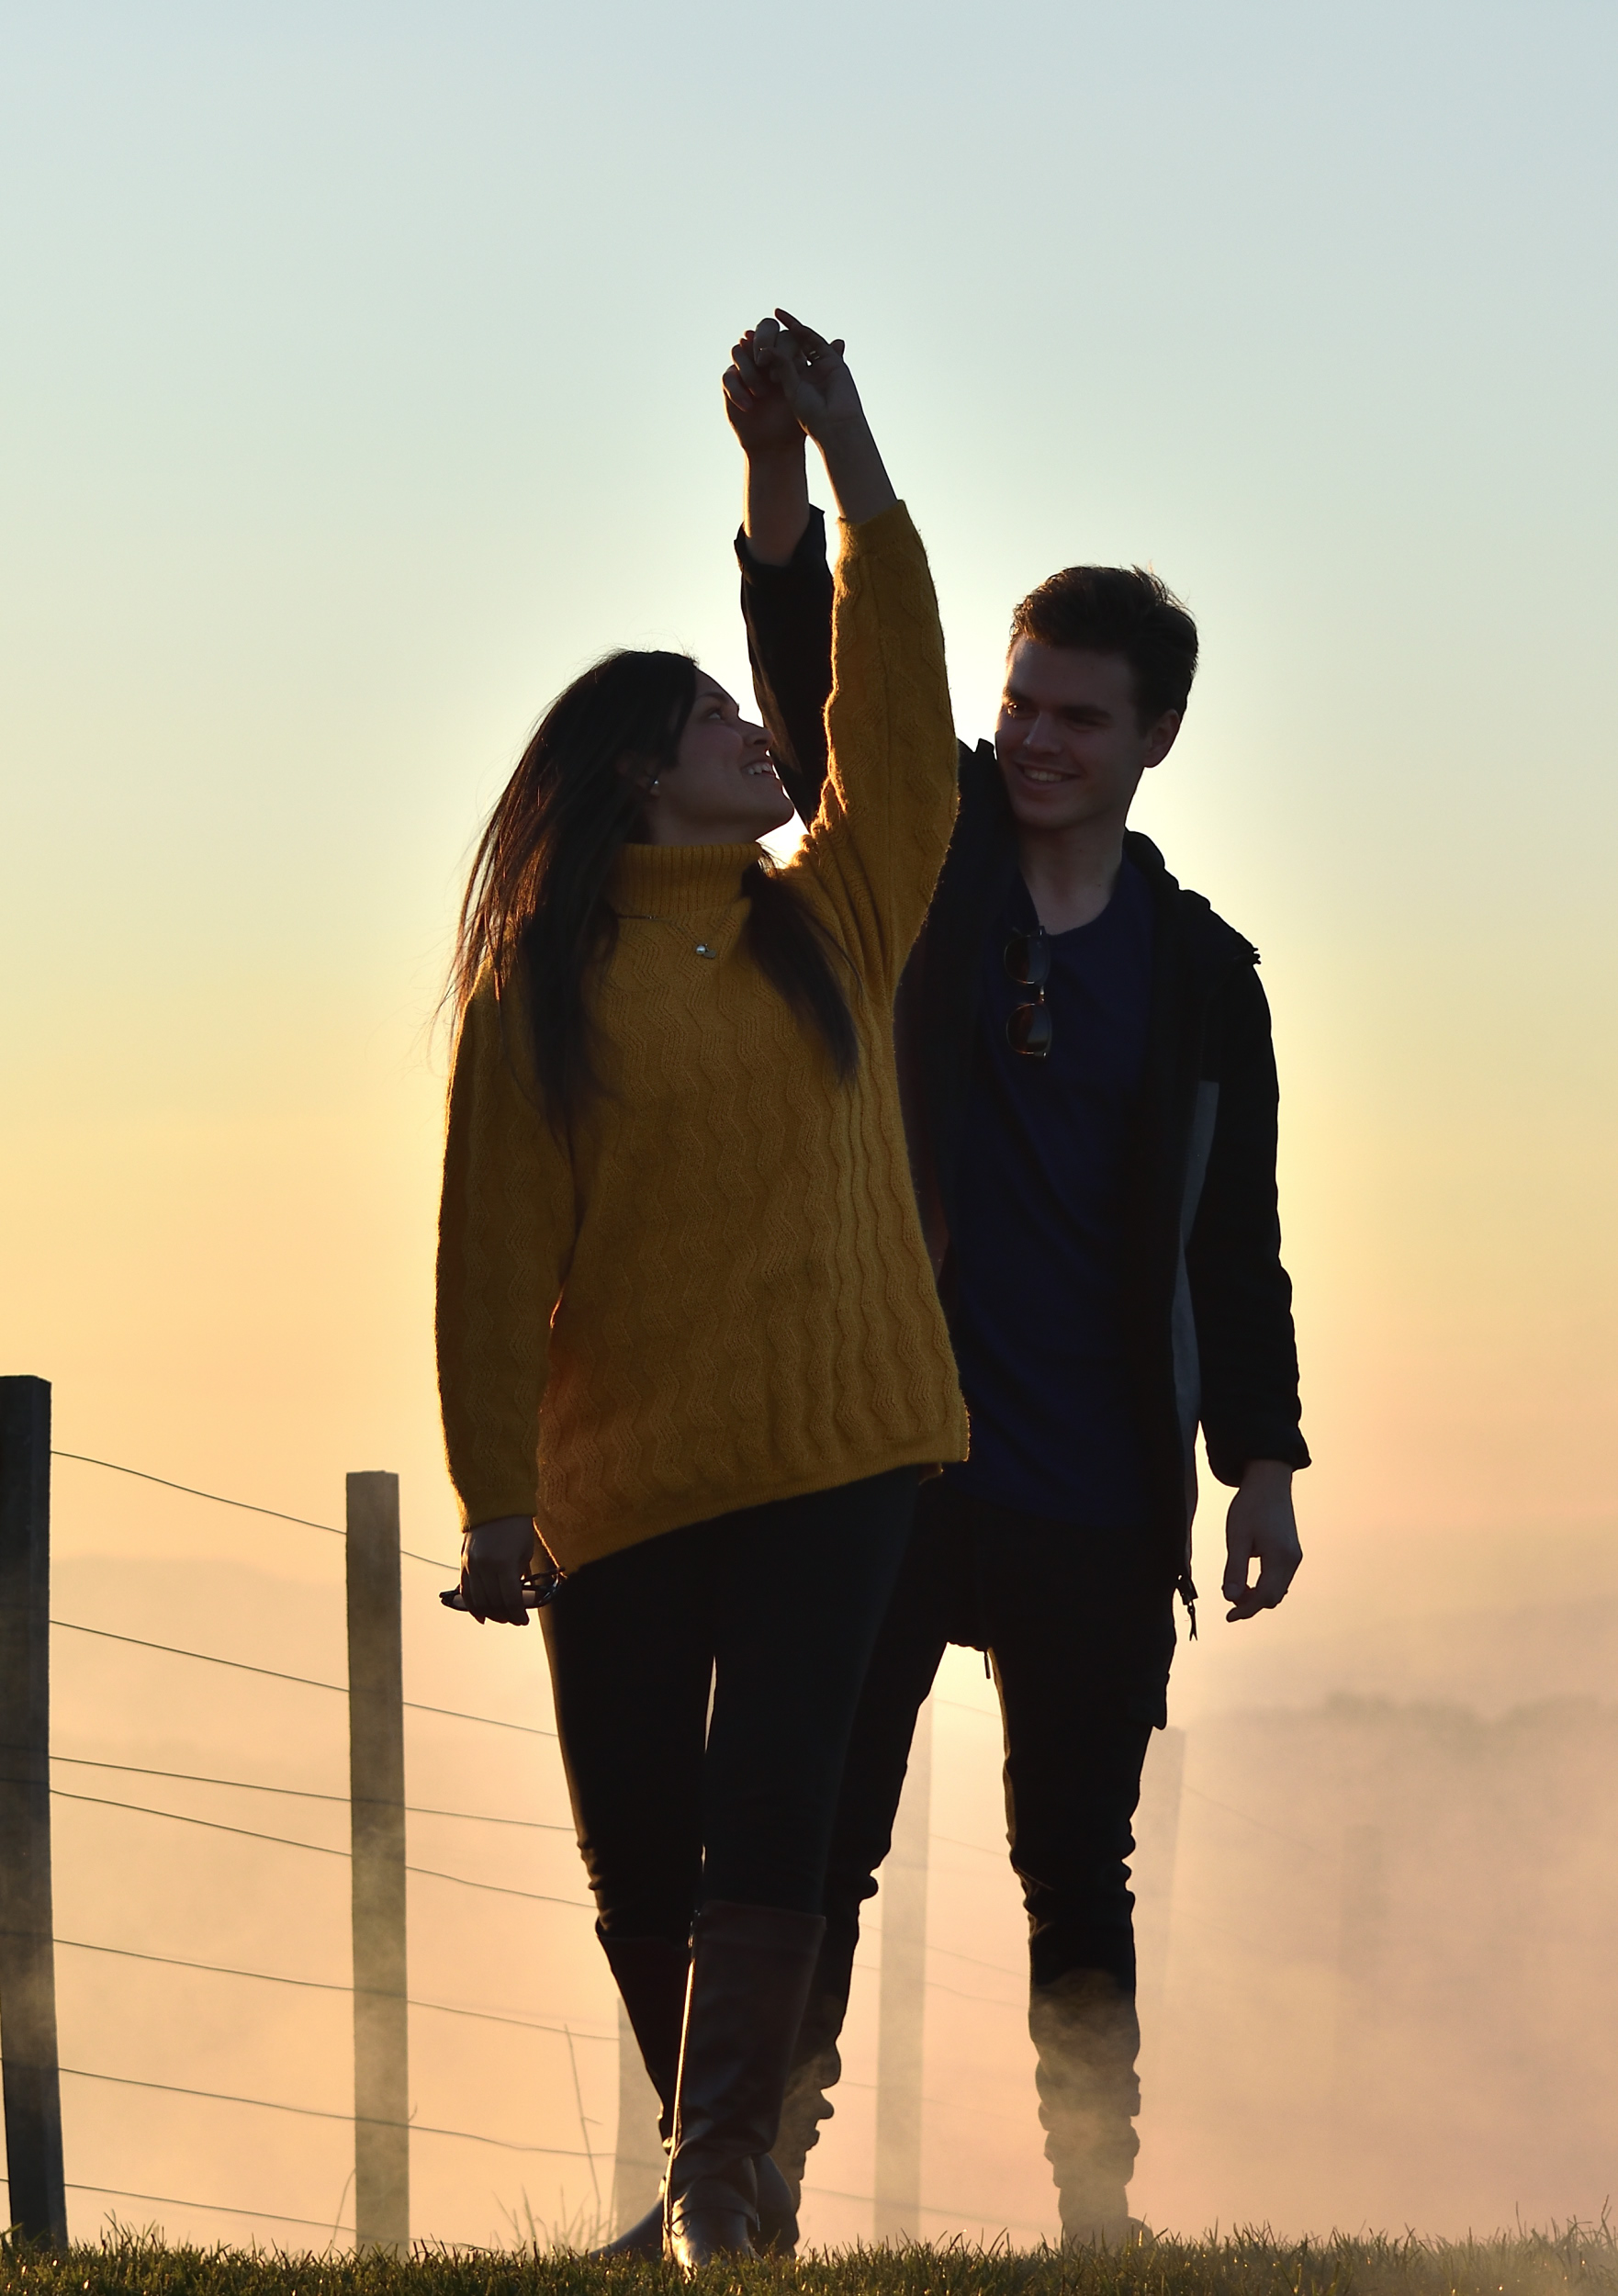
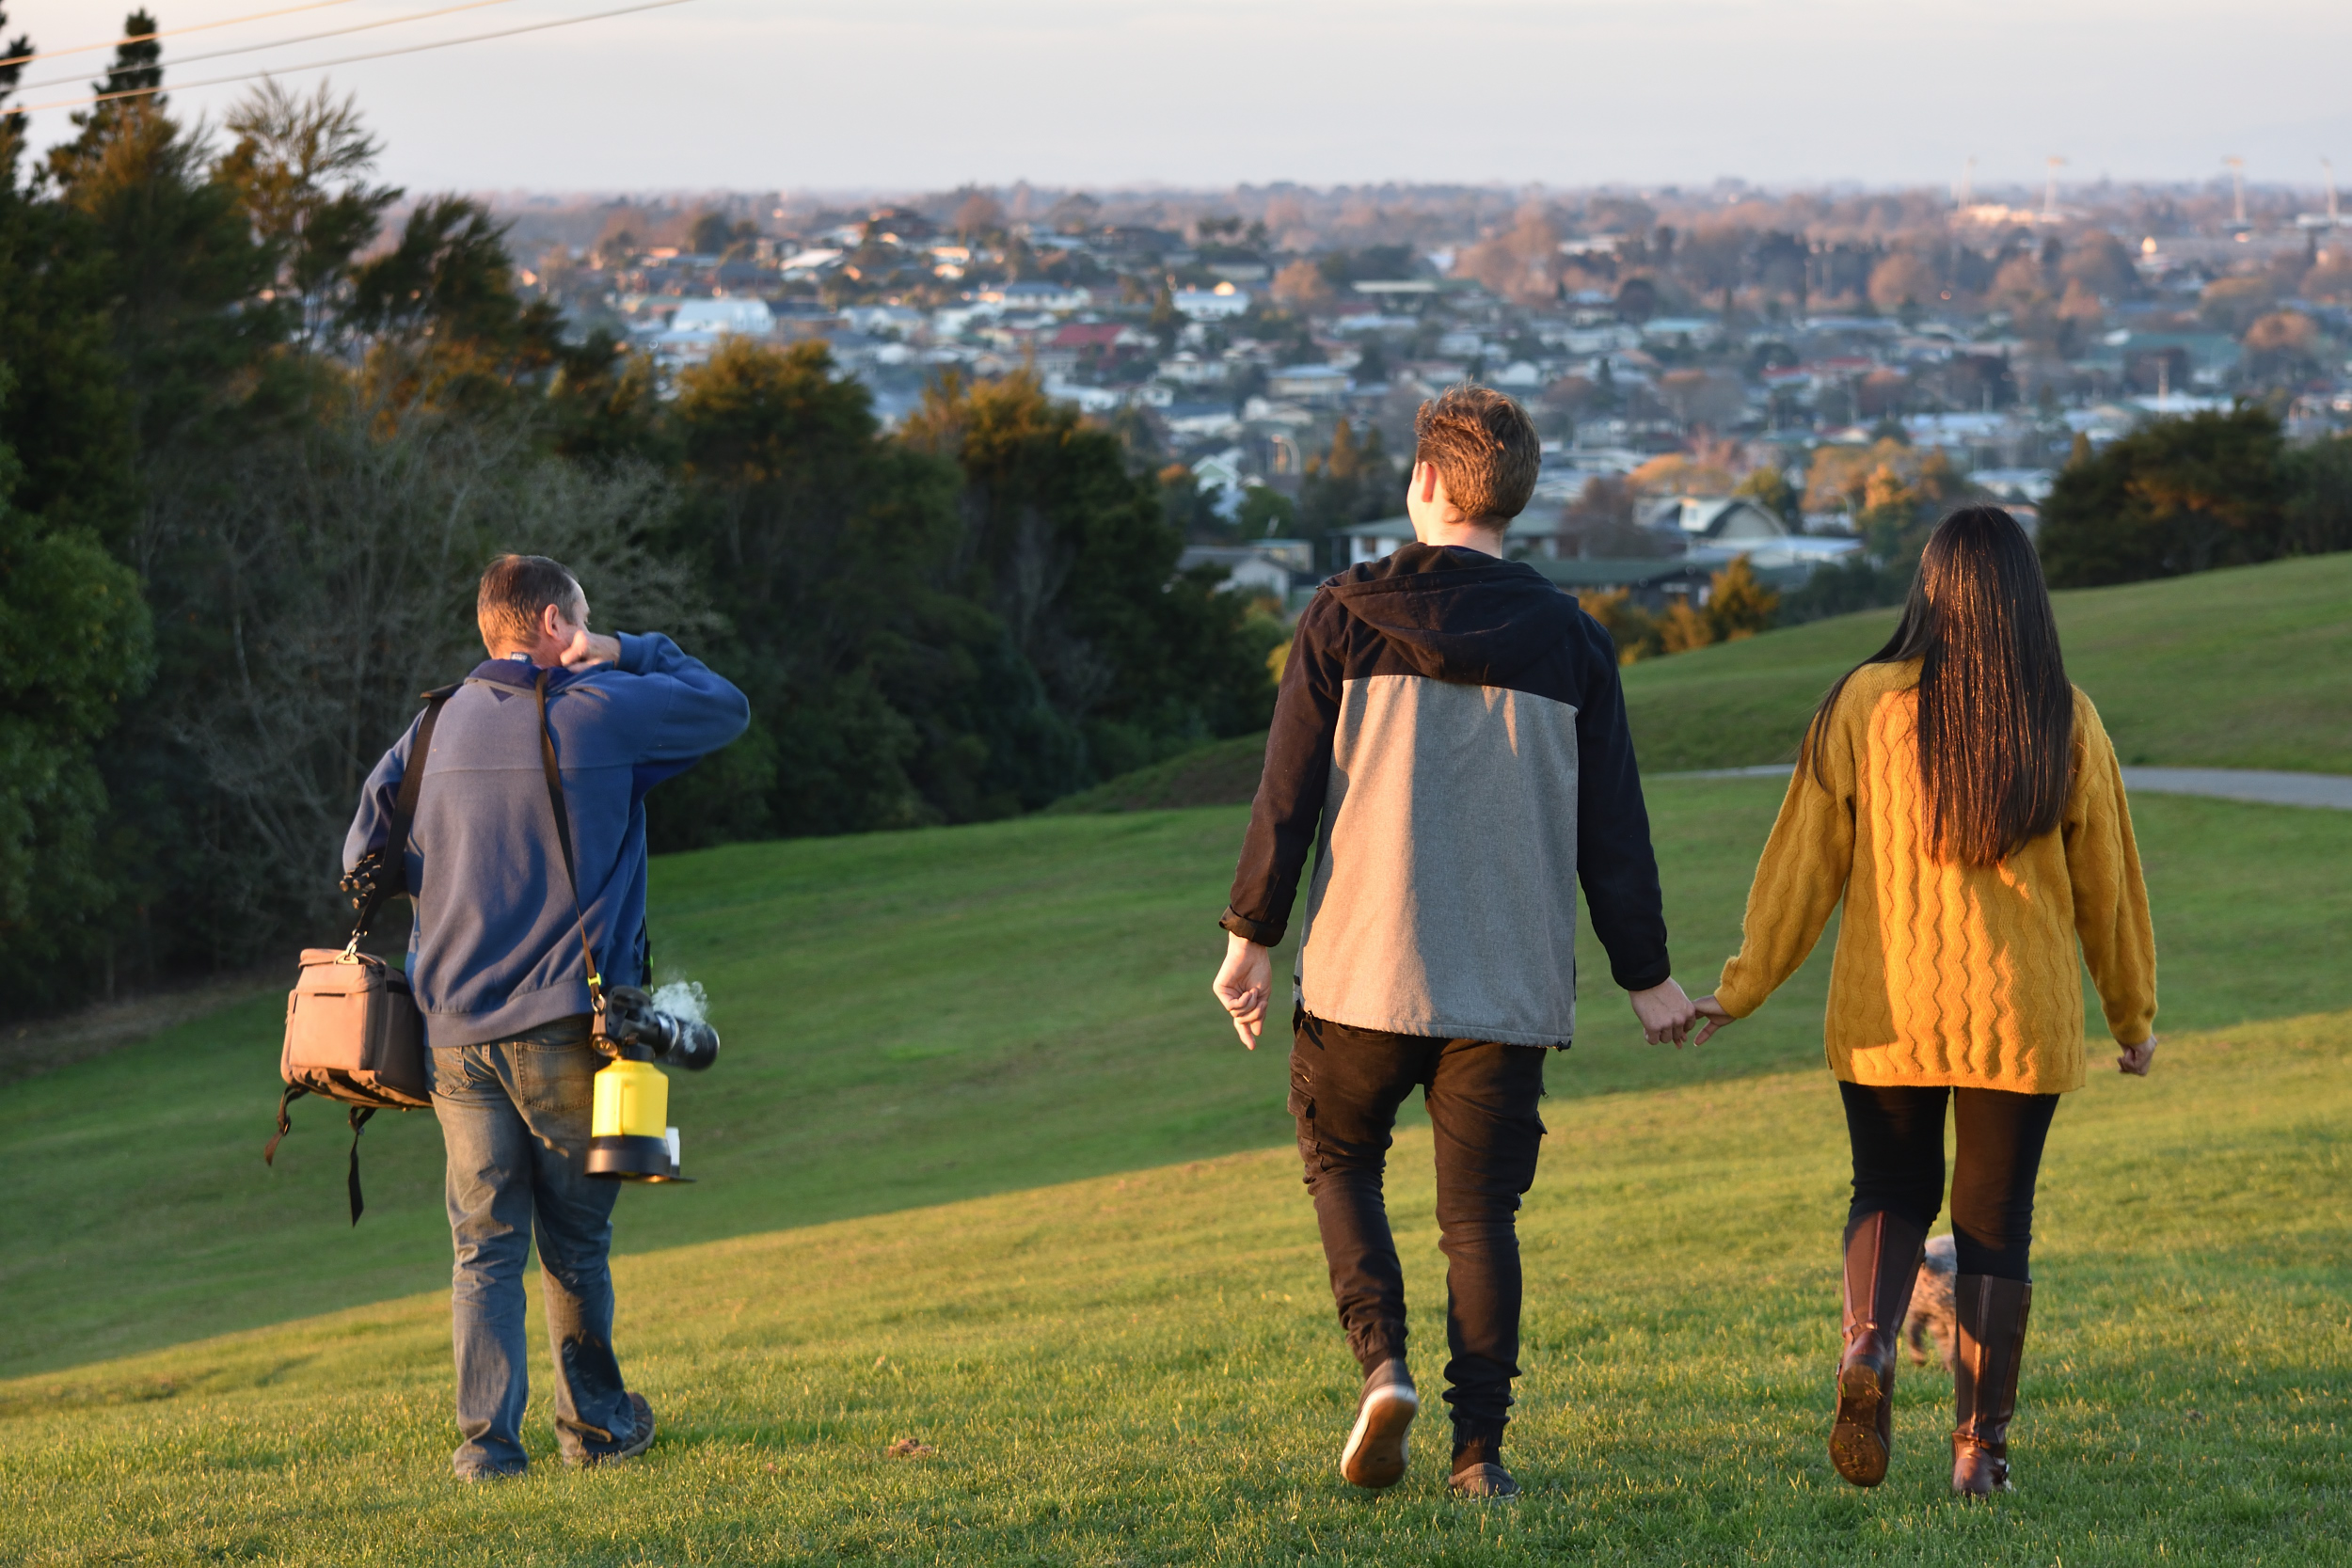
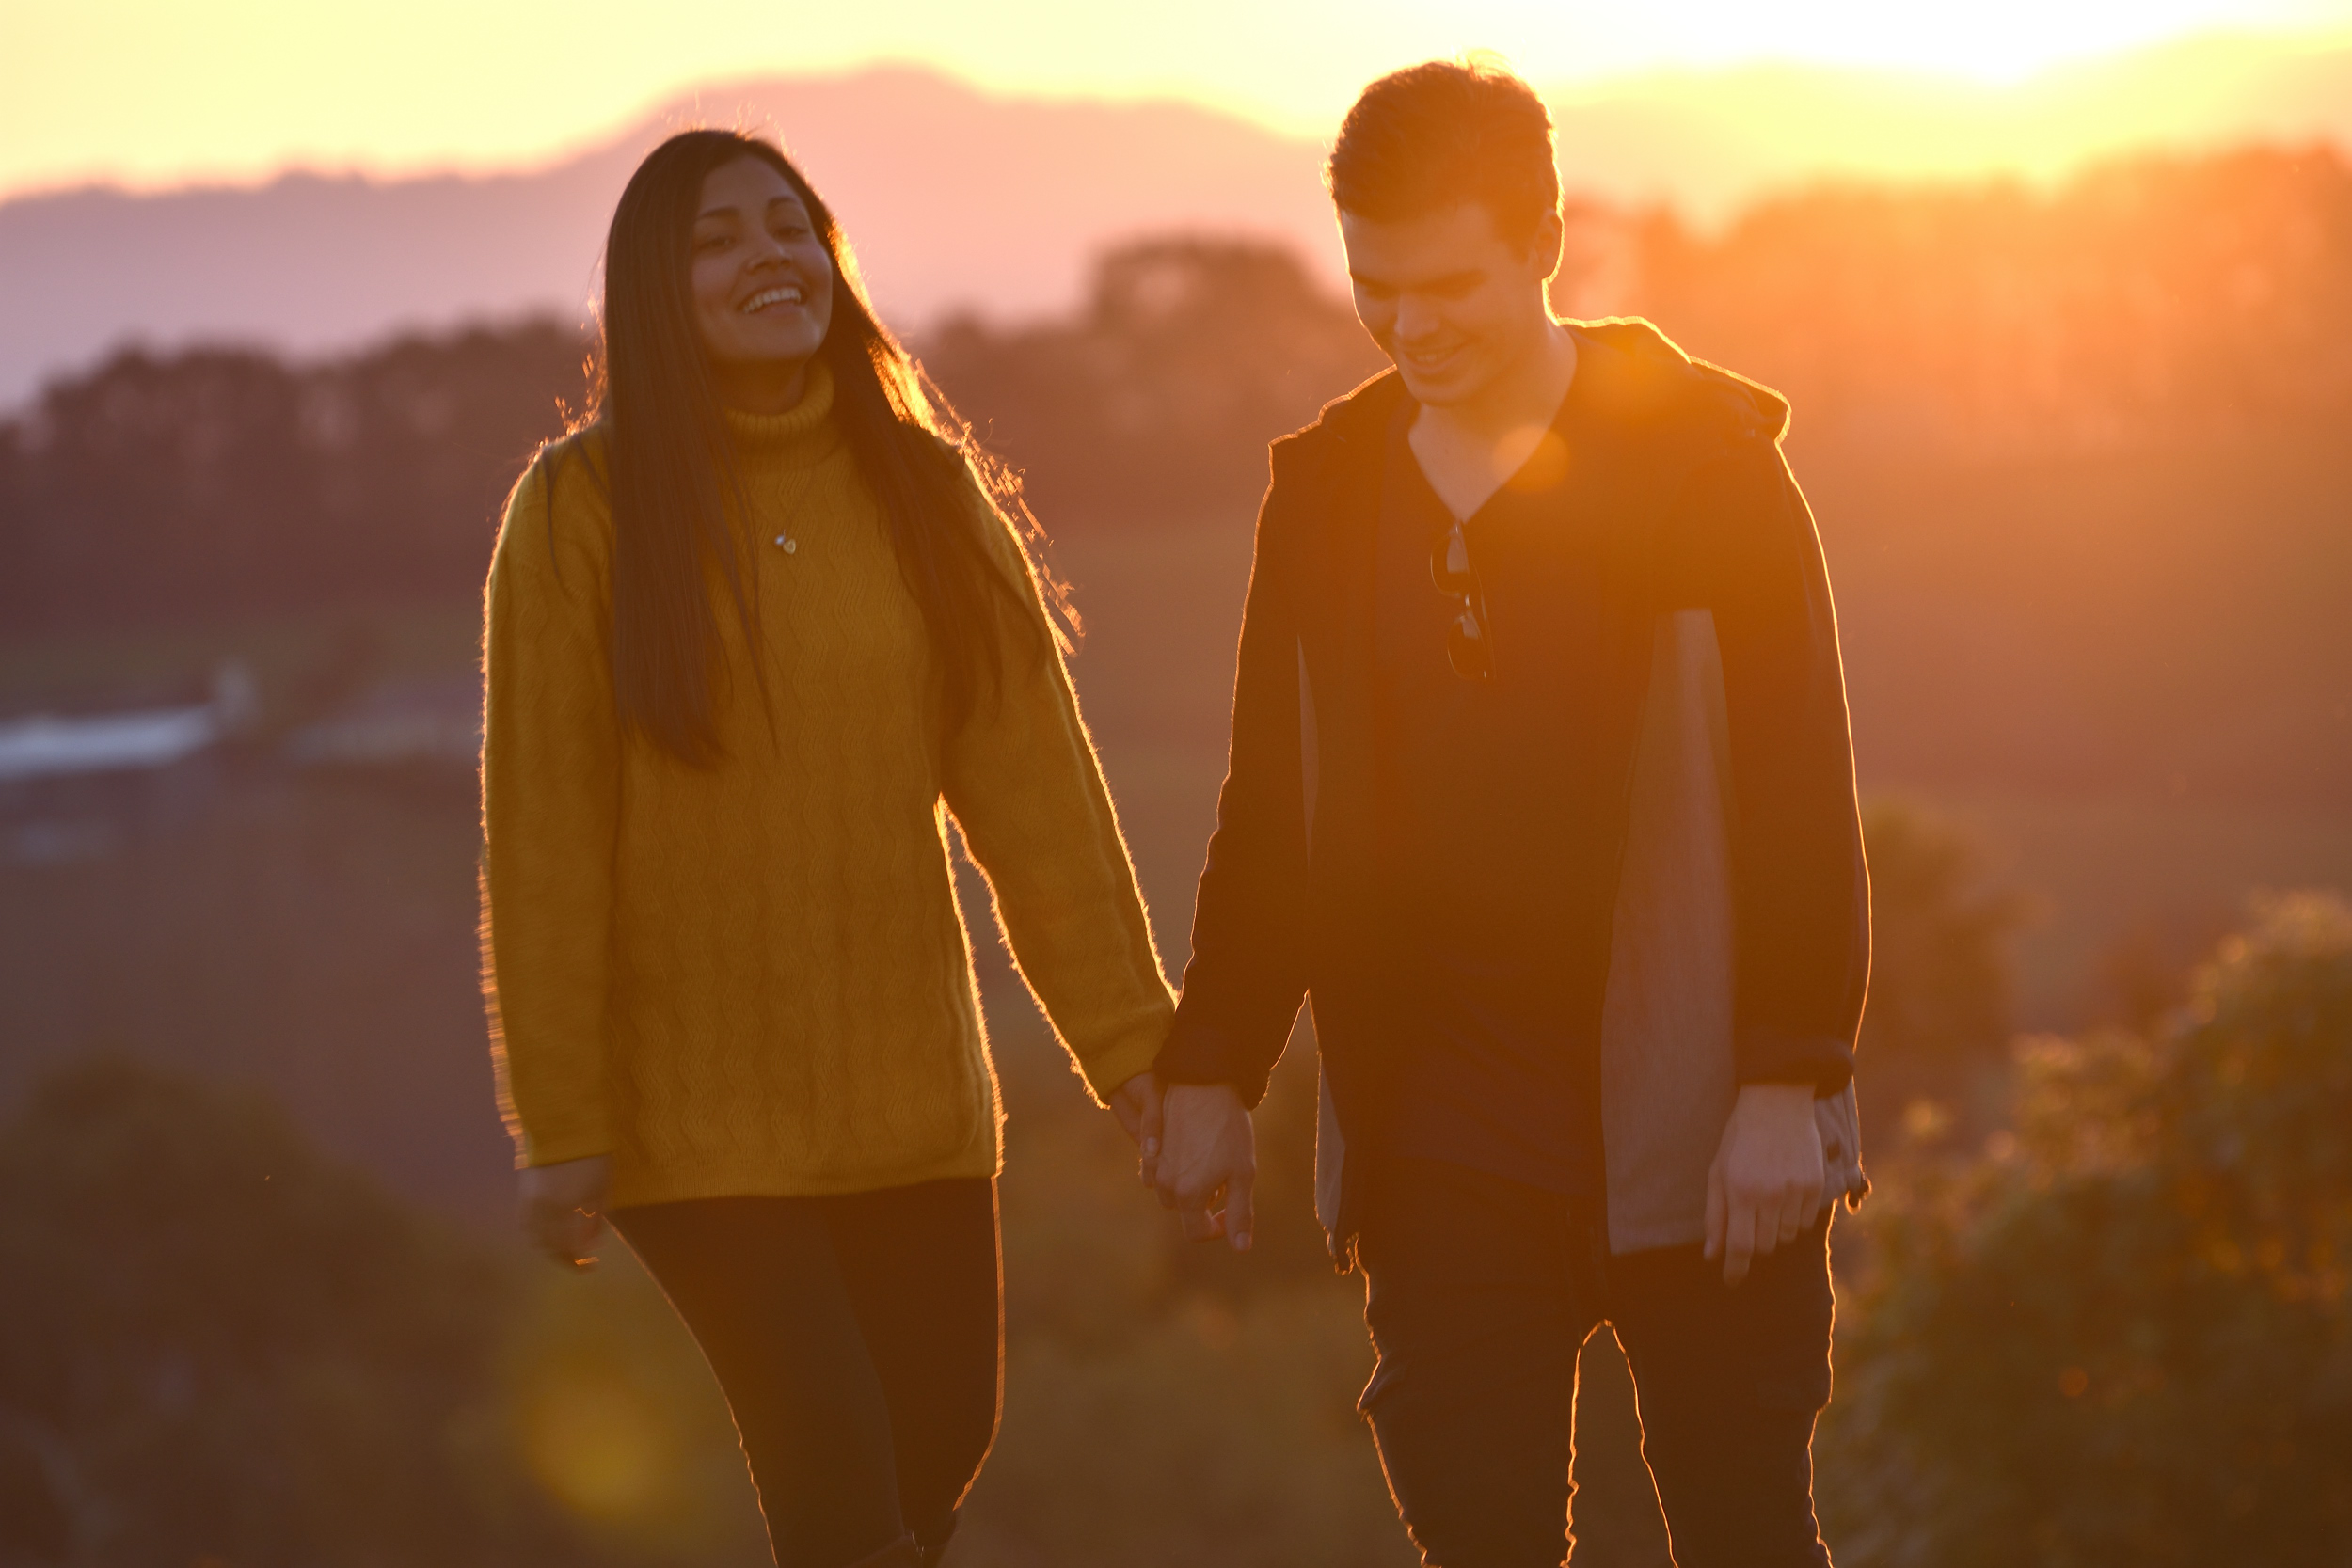
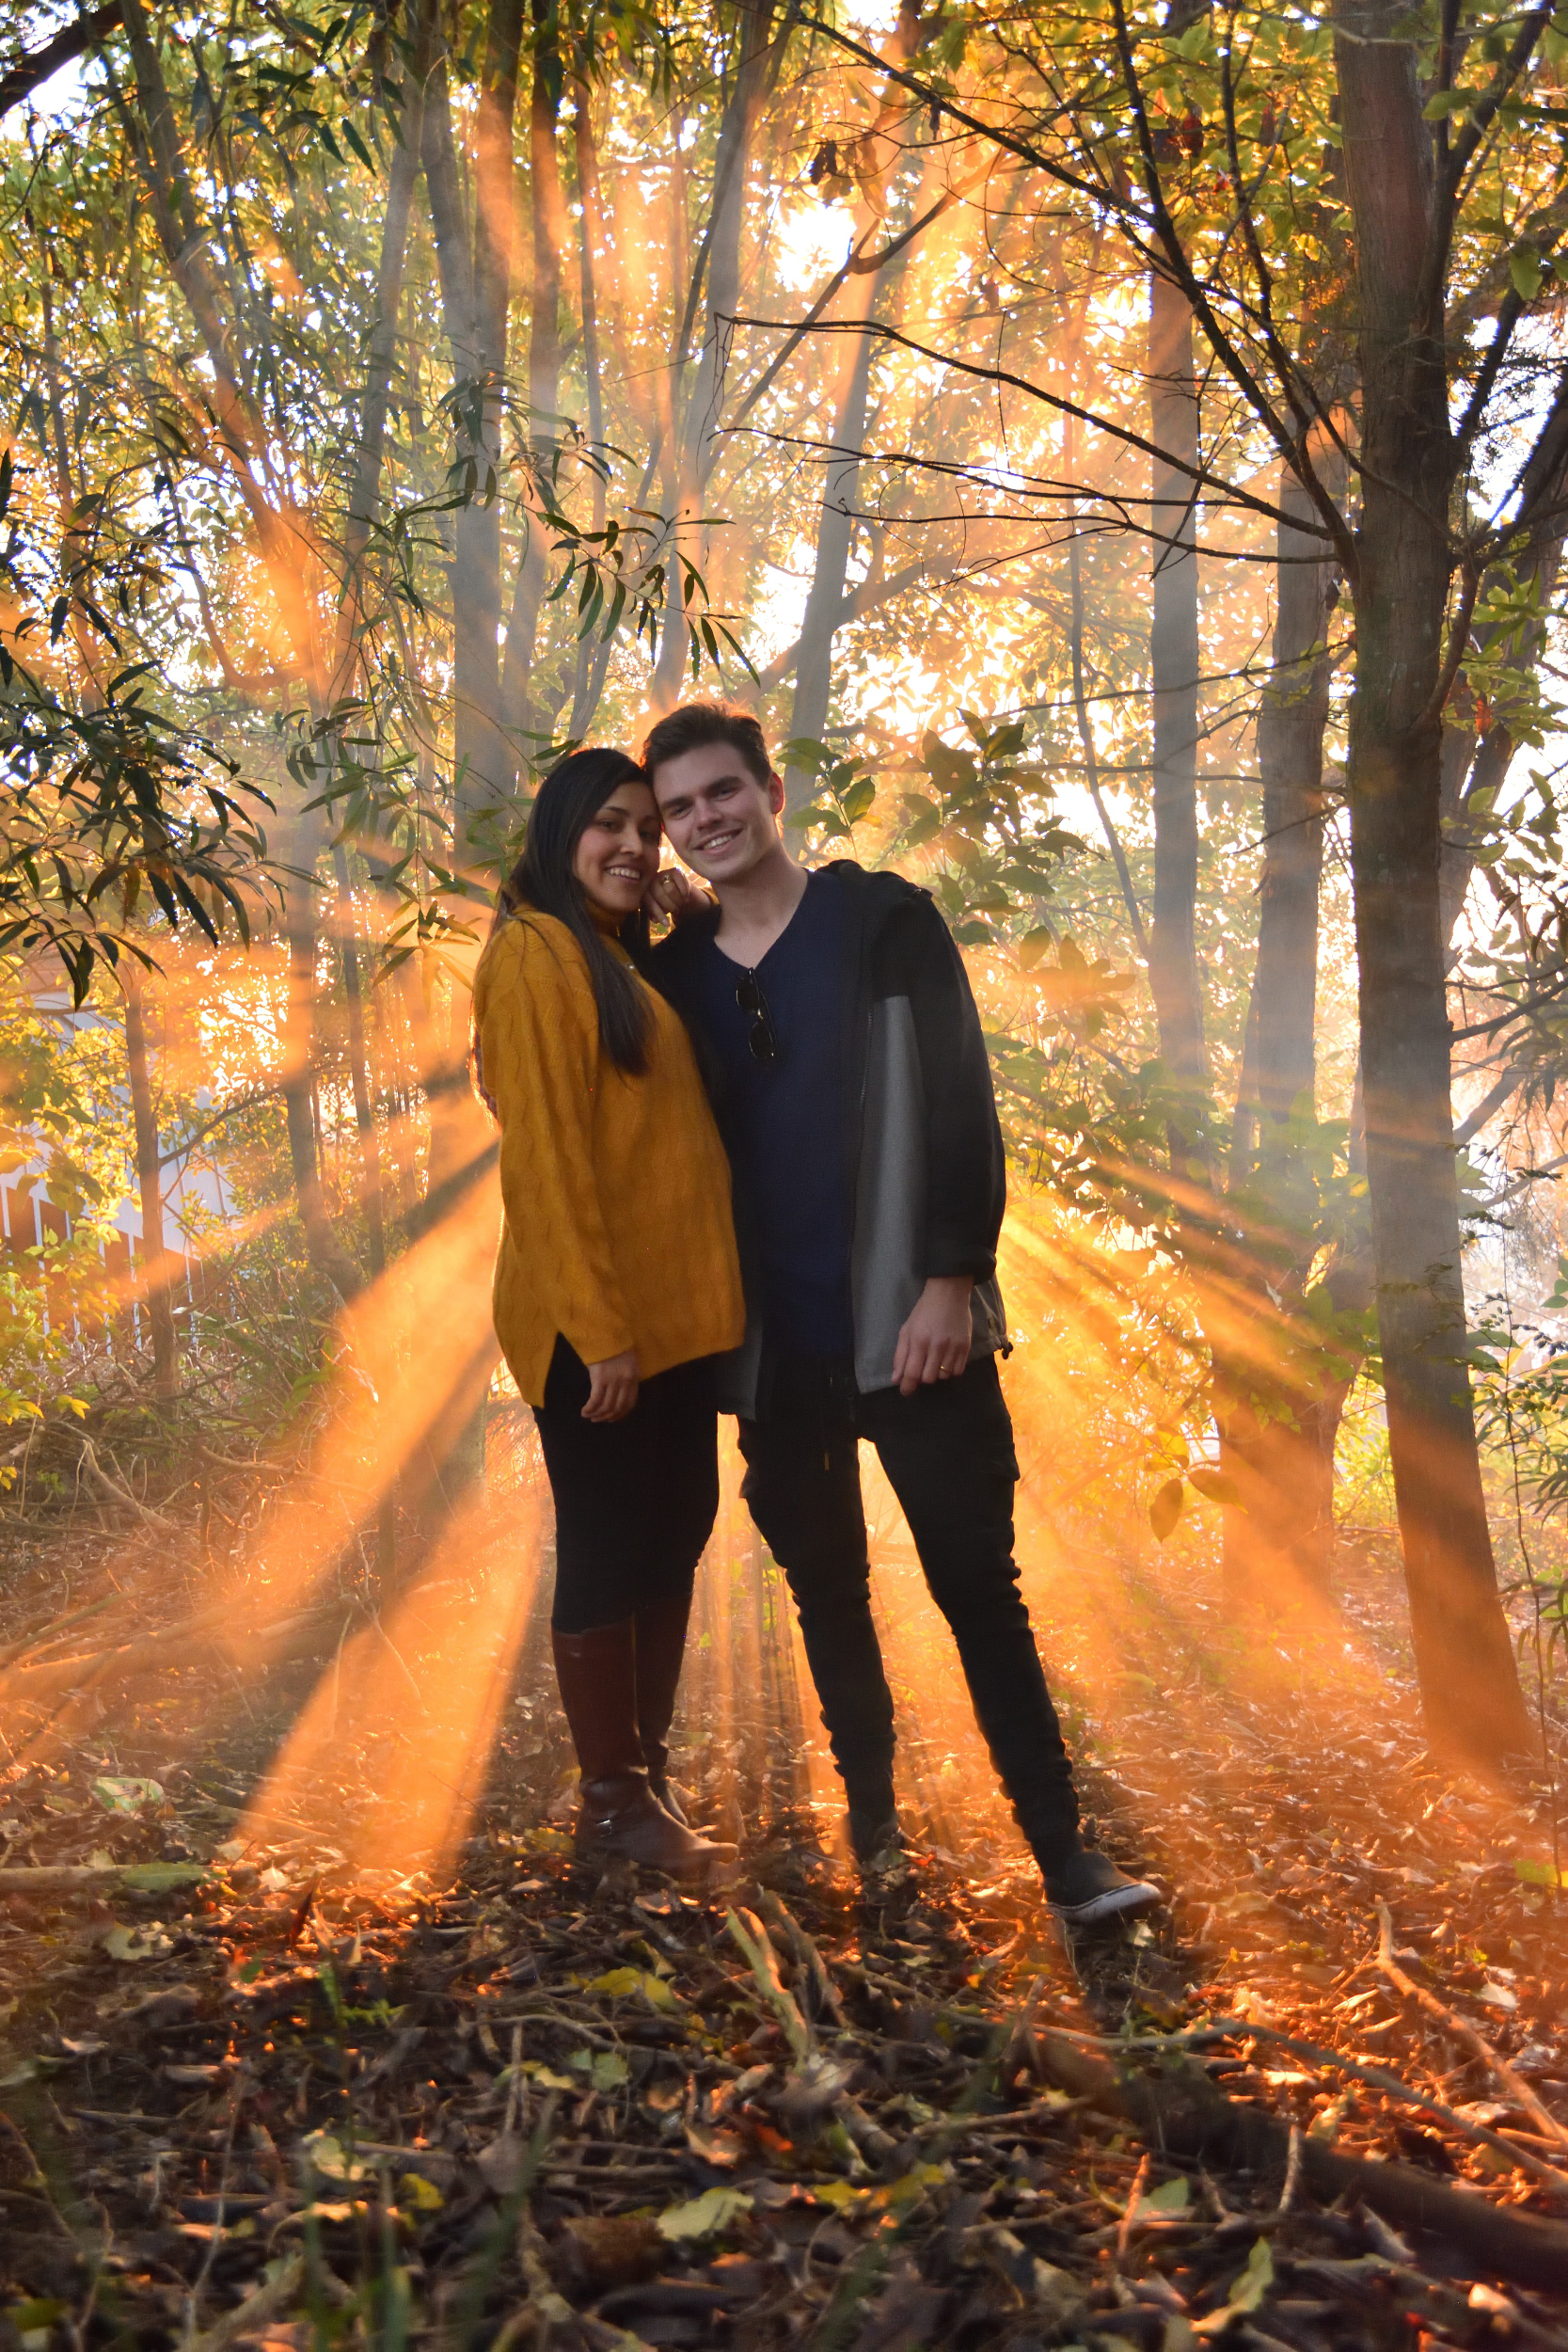
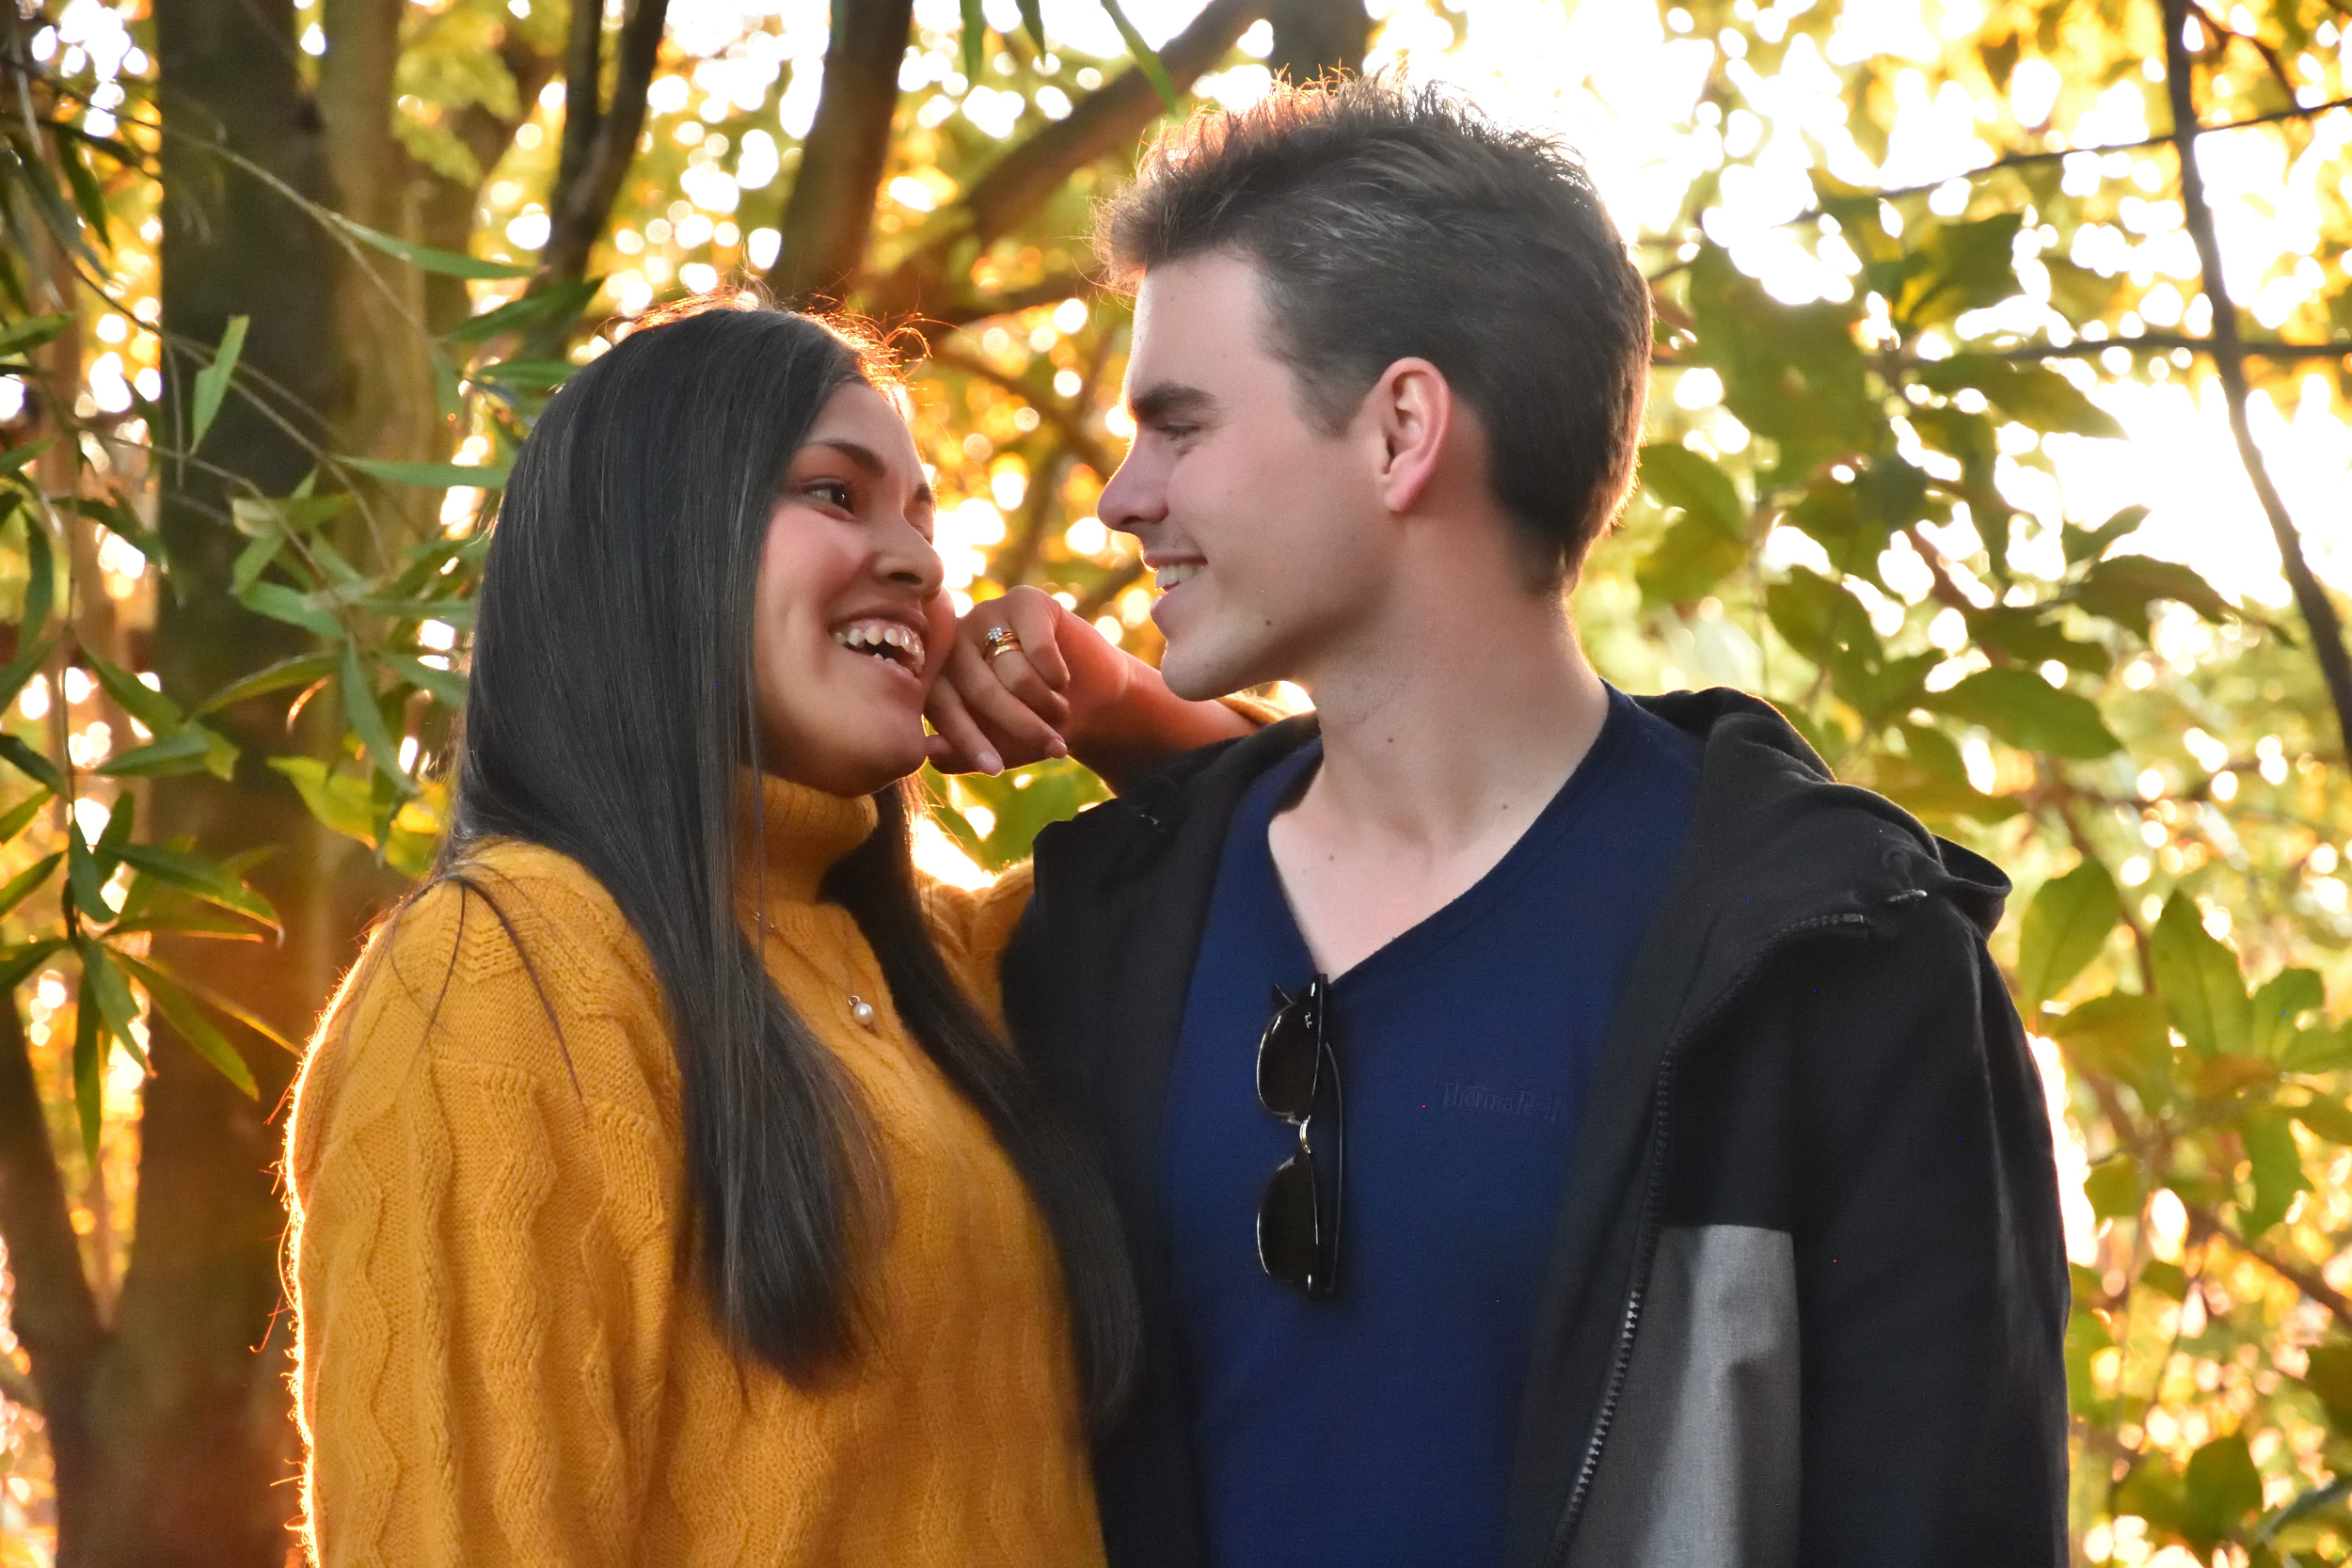
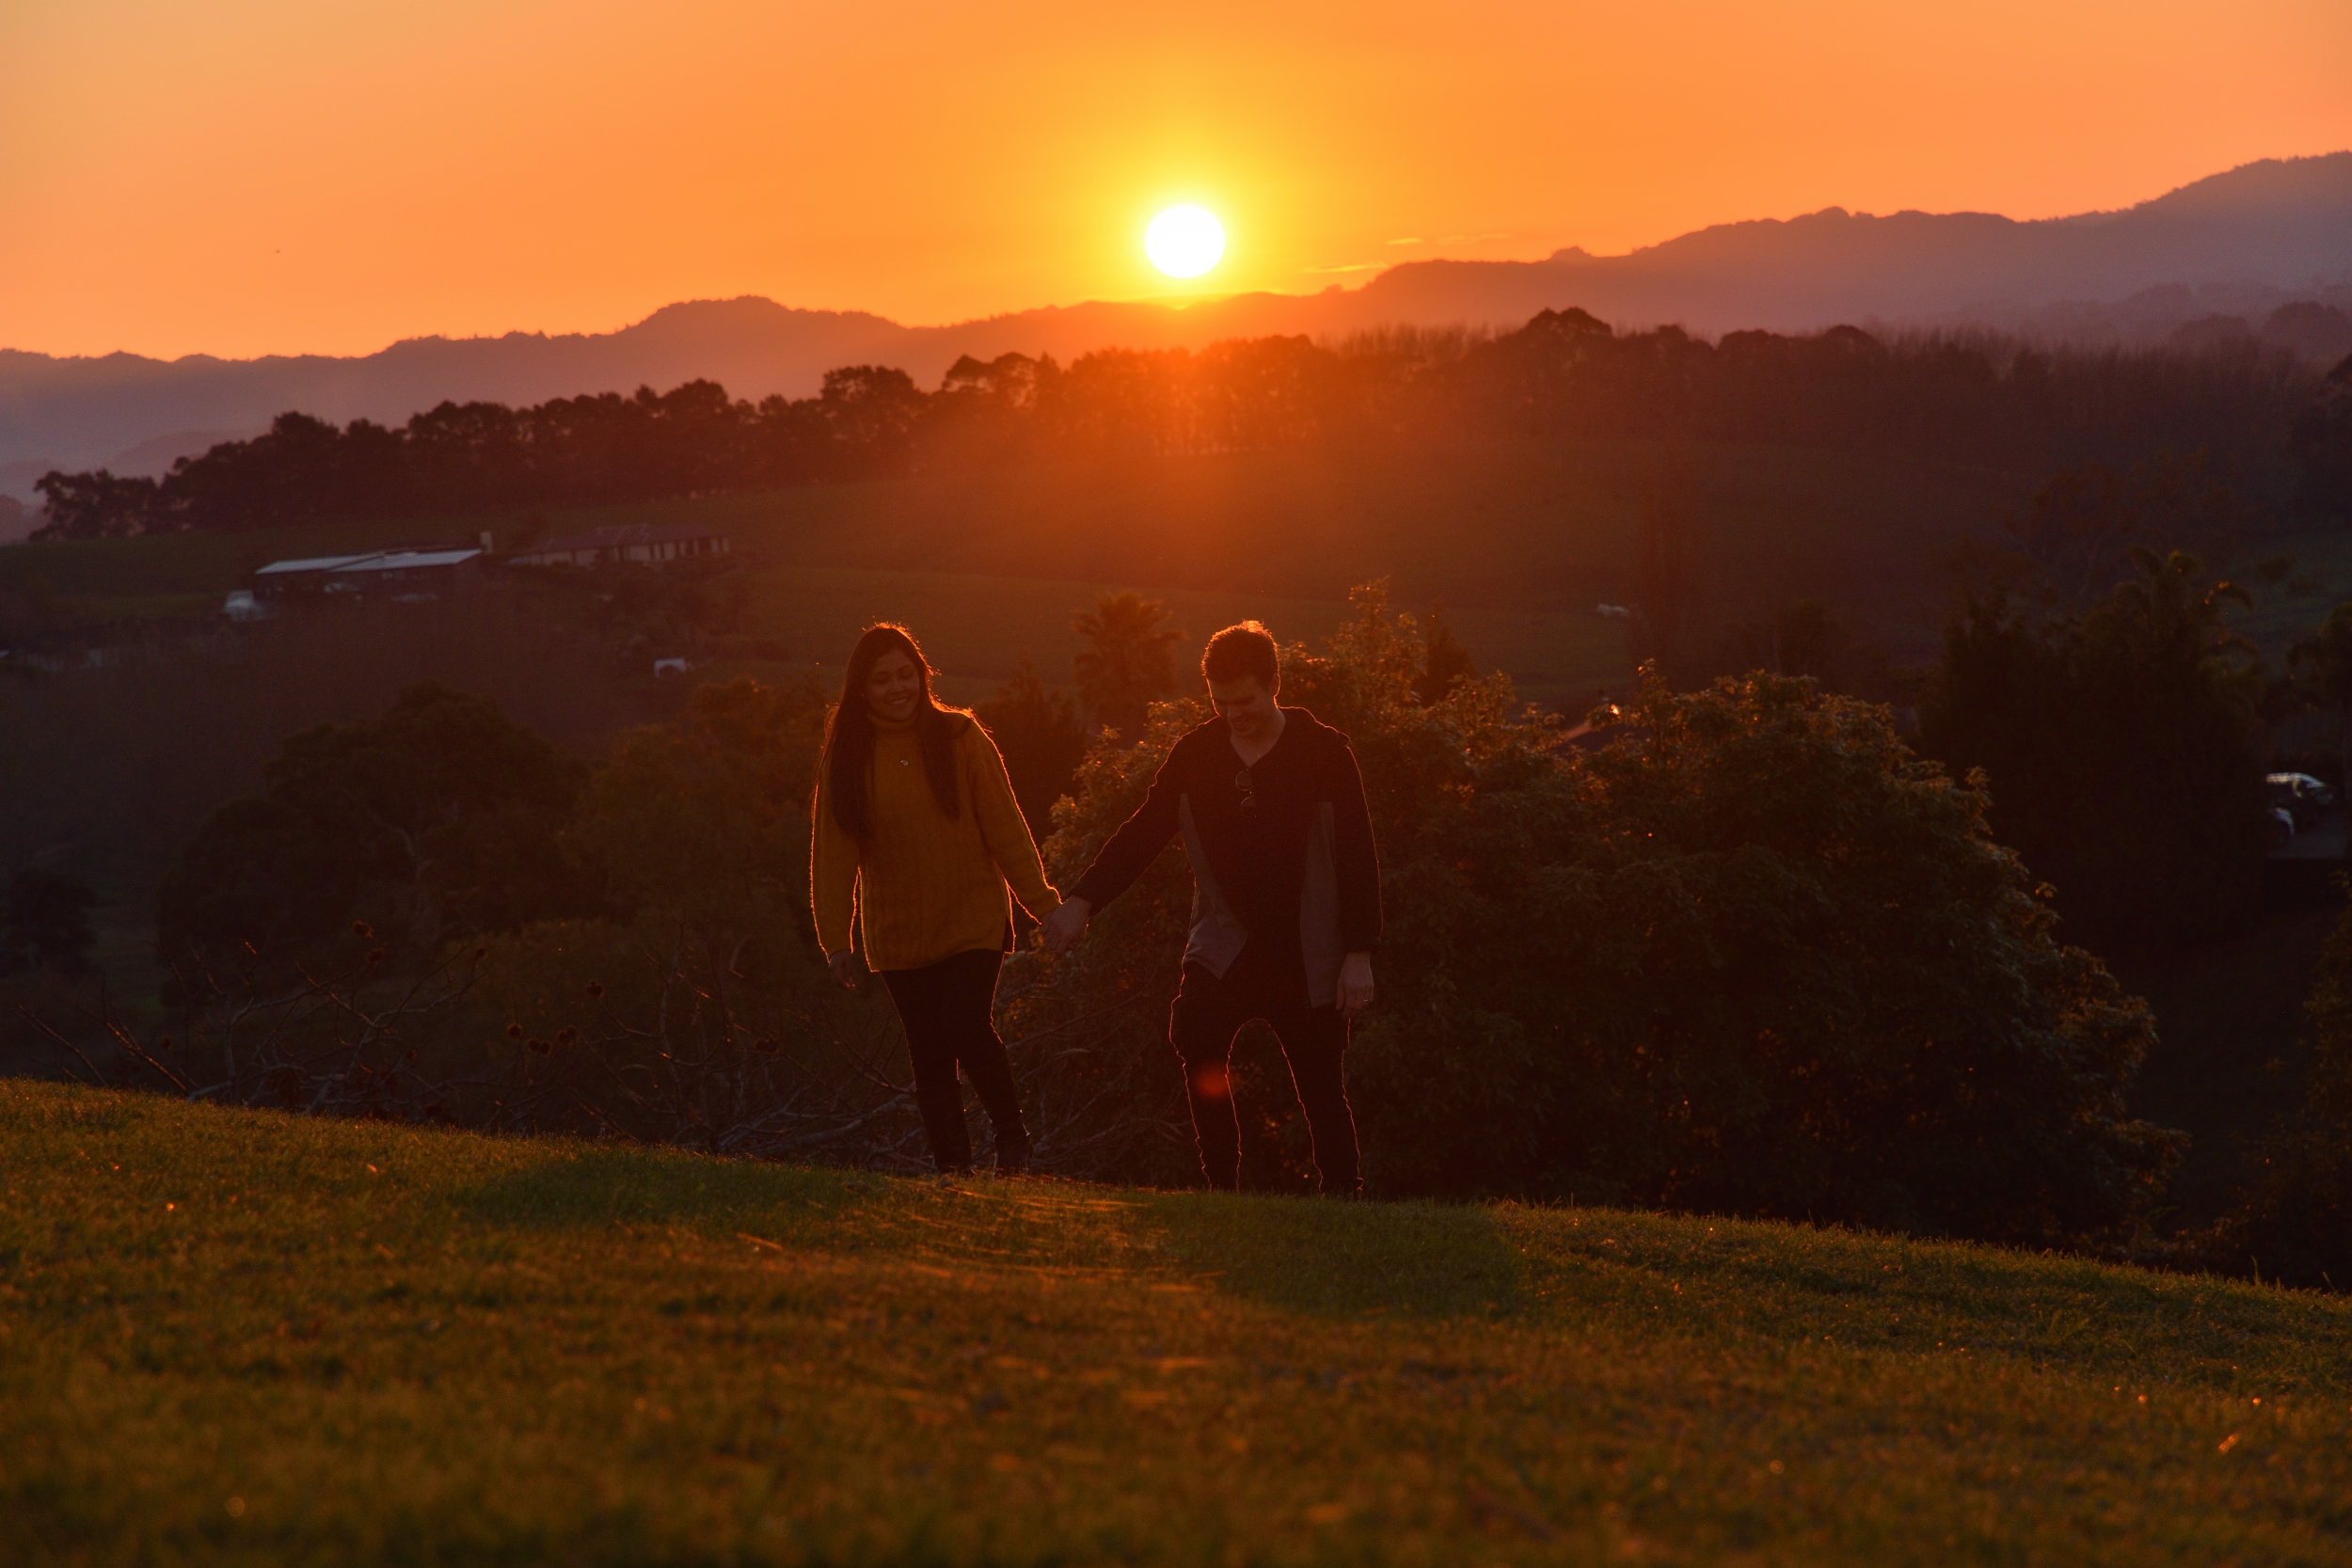
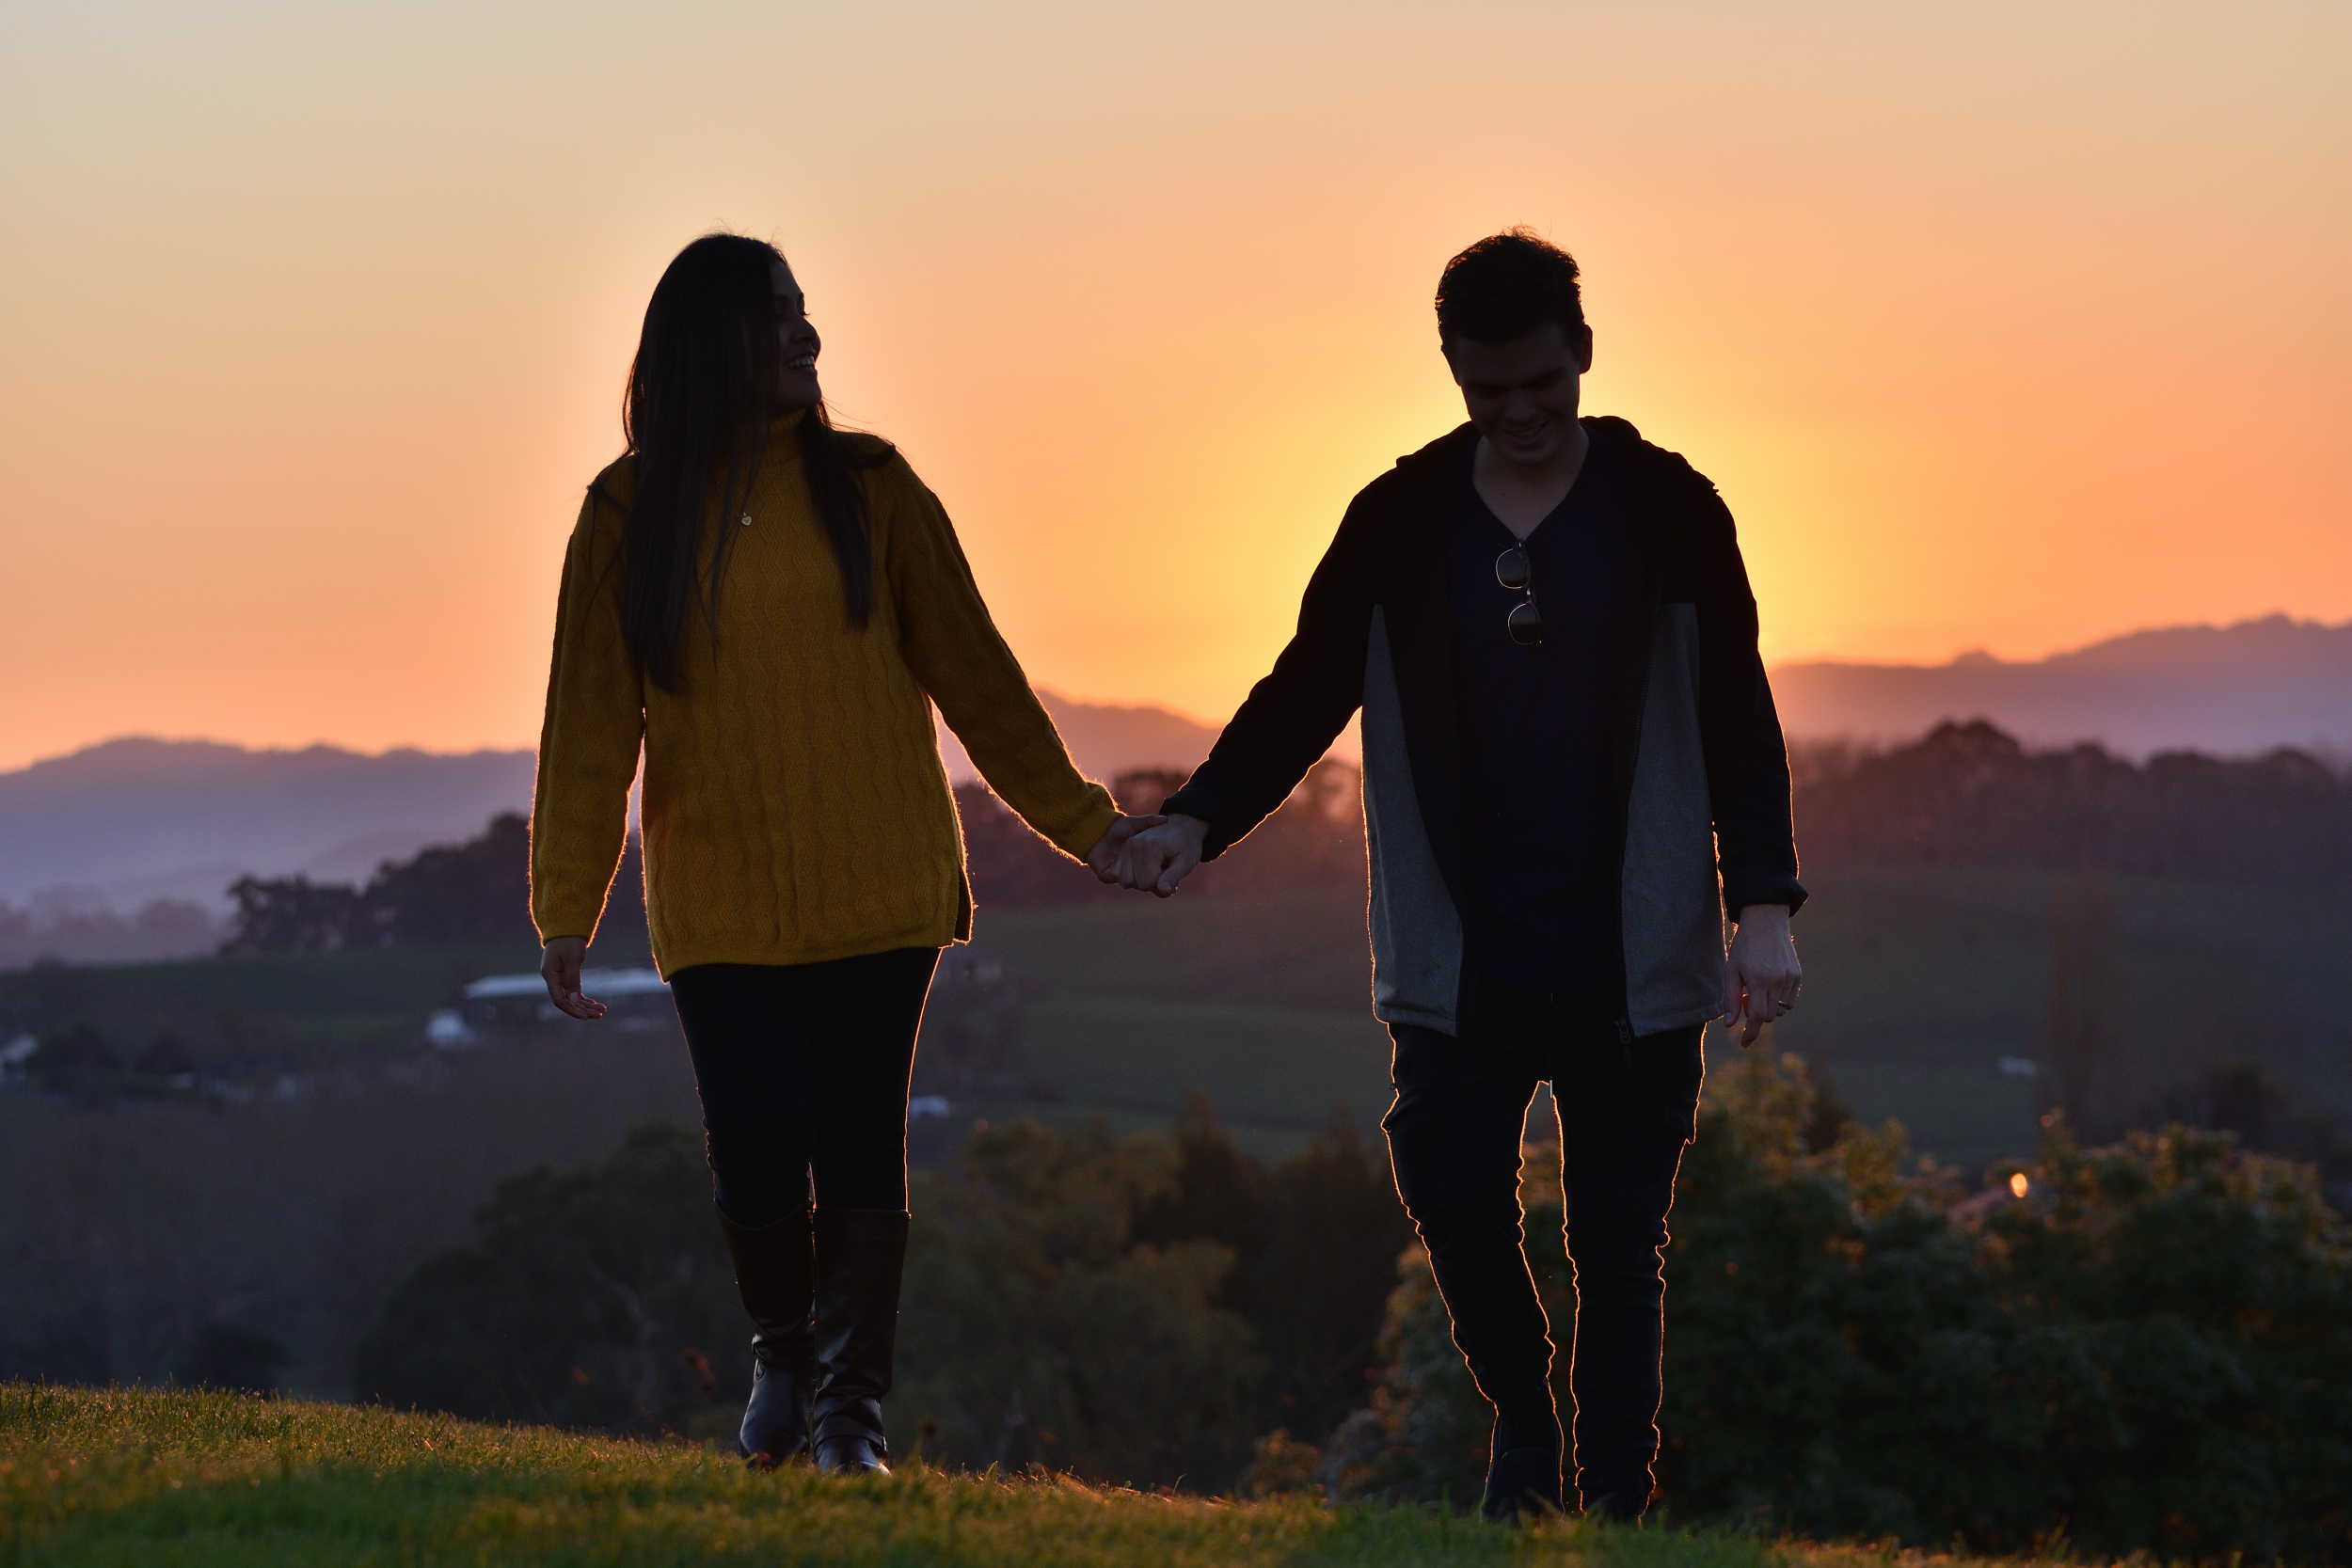
Over 18 months ago I was privileged to photograph a special wedding occasion after a man with Alzheimer’s forgot that he was already married for 38 years and proposed to his wife again - she went through with a second wedding. The story went viral and appeared in several magazines. Caters new agency asked us to go exclusive with them with promises of big payouts which neither of us received. That’s in the past and a good lesson learned. Today the story takes a nice turn - I was happy with the increased traffic to my website and hadn’t expected any payment anyway but this is an example of how a professional organisation conducts business with a photographer. I was contacted last month by someone else wanting to use some of the images from that special day.

“Hi Desmond,

I’m one of the photo editors for Guideposts; we’re working on a story about Linda Joyce for Mysterious Ways, one of our sister magazines, and I was hoping to license the photos you took on her and Michael on their wedding day?  https://www.springbokphotography.com/blog/2018/1/21/a-special-wedding-shoot. Their story is absolutely beautiful and touching, and I know our readers will enjoy reading it …………..”

This was my reply “Hi Katie, thanks for making contact. I think the story is worth sharing so let me know which image/s you would like to use and I will send you full size versions to use free of charge. :)
Considering how Caters ripped us off [ https://www.springbokphotography.com/blog/2019/1/27/caters-new-media-promised-me-thousands-to-go-exclusive-with-them?rq=caters%20 ]I'm just happy for a bit of traffic to my website”

I was taken aback by the reply which included “I’m happy to pay for image use Once we have the layout approved and the size of the image determined, can I invoice you for the one or two images we use?”

I replied that I’d be happy with $100. And was once again taken aback by a reply a few days later “we used 6 images please invoice us for $600”. I had hoped for $100 in total but they were offering $100 for each image. I began to wonder whether they were related to the Nigerian prince who has been wanting to transfer several million dollars via my bank account for some time. I sent an invoice still expecting that to be the last I heard of the subject but a few days later received forms from them for transfer of funds to a country outside the USA. I filled in the forms, sent them off and waited. Since many companies make payments at the end of the month I forgot about it for two weeks then today checked my bank account and realised that while i was talking New Zealand dollars they had paid in US$ and I now had $900 in my bank account for the use of 6 images.

Of course there are many companies just scraping by and wanting to use images in exchange for “exposure” but it’s great to know that there are one or two companies prepared to offer payment willingly and make it worthwhile for us.

Update 5/09/2019. I was contacted by Linda Joyce asking about the forms needed to be filled in to get payment from the company - I was pleased to find out she was also going to get a little more out of it after the experience with Caters. Once again they actually volunteered payment.

Screen Shot 2019-09-05 at 7.45.13 AM.png
aDSC_5864.jpg

Smokey portrait shoot.

JVan_00056.jpg

On Sunday we took the “insect fogger” up the hill as the sun was setting. next time I’ll plan with ahead for some off-camera lighting when we have more time but for this shoot I only had half an hour to get my gear ready and head up to the lookout.

‘Next time’ I’ll also try some shots in the other direction with the setting sun lighting the couple and the smoke to make it look like they are in the clouds.

Nikon D700 vs D7200

I recently got hold of a good used D700 at a really good price and decided to compare it with my D7200. According to dxo the D7200 is rated at a good iso 1333 and the D700 at 2303 making the D700 one stop better in low light. But the D7200 is twice the megapixels, has 2 ev more dynamic range and is 7 years newer in technology, so how do they really compare? Here are some sample images at various iso settings, all at f5.6 and the required shutter speed to get the correct exposure. I left both cameras on auto WB to test their performance in that regard as well. They were all processed in NX-D with sharpening at 7 and noise reduction turned off.

These are 100% crops of the images since people generally like to compare at 100% to judge image quality. With no noise reduction the D700 definitely does one stop better but in the one image comparing actual jpeg output of both cameras, when viewed as one would normally view an image, I’d happily shoot a wedding with the D7200. The D7200 also has two card slots and, though 12 megapixels is more than enough, twice as many megapixels which means more detail in good light.

The silent burnout

I’ve had an idea for a photo of a wedding car for a while and decided to try it out on a friend’s car this afternoon to see how it would look. You can get into a lot of trouble doing burnouts in New Zealand and I wouldn’t want to foul up the road anyway. But a smoke machine [/Insect fogger] makes it possible to get a pretty realistic looking result without upsetting anyone - well, excepting the South African neighbours on the right but they know the glycerine smoke is safe :)

Here are a few un-edited screen shots from the video. Of course at a wedding I’d be shooting stills with my camera but when I’m working on my own this is the easiest way to do it.

Social media login for cameras.

In 2010 I made some predictions about technology and photography. Some of them have happened but others, maybe due to these larger companies not reading my blog, haven’t . I’ll have to have a talk to them about that :)

So what’s next now that we even have animal eye detection by Sony [the most popular comment on that story being “this feature will be useful when photographing the mother-in-law”] added to the list of technological advancements? As per my previous blog I’m not saying any of these enhancements are necessary but will repeat what someone said to me nearly 20 years ago “as long as the technology is available people will find a use for it”. That was after asking a sales attendant how many people needed a 7 channel home theatre system. And as long as manufacturers can add these enhancements to devices they will have a selling point to entice people to buy the latest and greatest - and other manufacturers follow suit not necessarily because it’s a good idea but rather to keep up so their product “also has that feature”.

I see the future cameras using their connectivity, tied in to their “face detection” “smile detection” “blink detection” ”animal eye detection “ etc etc - to connect to social media and access all your contacts.

faceboo4.jpg

Do we need this? No, but as long as the technology is available people will find a use for it right? And perhaps for some it will be a selling point. “I bought this camera thinking I wouldn’t need the social media feature but after logging in to it just to try it out I photographed a wedding and the camera sent me a notification in the morning telling me that the bride had just left the hairdresser and was on her way to the make-up artists” - based on cellphone tracking which the bride and groom agreed to when they accepted your friend request and “limited date allocated social media connectivity via camera” clause. Of course there will be the bloggers who milk it and simply put up a controversial post about the feature to get more clicks [clears throat].

Meanwhile we stop to get a coffee on the way to the venue. After all the camera was sitting in its 12v car mount, recharging while acting as a gps and a minute ago the bridal car slowed down and stopped at the public toilets - that should allow a little time for a caffein recharge for those who don’t sleep too well the night before a wedding.

medialogin.jpg

When the Nikon D300 was released with wireless connectivity between bodies I imagined it being useful at an event, the camera sending thumbnail images to a remote laptop while someone monitors them and negotiates sales of the images with customers watching the images pop up on the display “That’s a good shot of my son, I’d like to order a print!” [swipes credit card and pays for image before it’s even downloaded at full resolution from the camera]. Now imagine two or three photographers at a wedding after you have done a “share contacts for 24 hours” function between the cameras, and you all have the same information. The second shooter takes a picture of a group of people, grumpy looking man with psychological condition approaches and mumbles “I told them I would only attend on condition no images of me are published!” - photographer shows him the image on the screen which has automatically blurred his face in the image “I know, facial recognition has excluded your face from the image as requested by the groom. Don’t worry, any images of you will immediately be blurred, every time your face appears on the screen with a red hue which tells me you are on the excluded list and it is automatically blurred or if it is far enough in the background the camera over-rides my settings and chooses a shallow enough depth of field for it not to be recognisable!”. Grumpy man nods his head and wanders off, then squints his eyes trying to work out how it recognised him when he didn’t think anyone had pictures of him…..

So, what about downloading a wedding shot list to the display then you can flip through them and get some ideas? BORING! This new camera will analyse the images you take through the day and pop up tips and suggestions as it recognises various scenes, and once it recognises the bride now has her dress on and is ready for the trip to the venue it will suggest shots you could take - based on geotagged data of wedding photos it googled while you were at the location, it will pop up the gps and show you a ‘suggested spot’ used 17 times previously at this particular location, which is worth checking 50m around the corner, an archway next to a fountain you didn’t know existed a minute ago. The same with the ceremony location - it researched photos with the most likes and pinterest links at that location and they all seem to have been taken from the right hand corner of the venue - possibly the lighting is better from there, or the background? Worth checking out when we get there I suppose.

After the ceremony we head off to another popular spot chosen by scouting out the location ourselves of course, after turning the camera off to walk there and fully expecting the camera to say “I was about to suggest this!” after it was turned back on. But as we set up the scene and preview the image on the display everything gets darker since the camera has a suggestion.

facebooklogi2.jpg

“A more dramatic image can be created by exposing for the sky and adding flash from the left side at 45 degrees to the couple. Sam Jones and Robert Smith have been standing doing nothing behind you for 10 minutes, ask one of them to hold the flash which will automatically go into wireless control mode when you remove it from the hotshoe”

facebookloginlogicundeniable.jpg

Oh well, it was worth a shot….

Photography exercises for beginners.

Under construction:

So you just got your first decent camera and now you’re overwhelmed by all the settings and options available to you. If you just want to go out and take some pictures before you know exactly what you are doing here are my suggested settings to start with. Camera settings for beginners. If you’re ready to start learning about your camera and what the various settings do here are some exercises for you to do:

Let’s start with Aperture. Set the control dial to “A” mode and turn the control wheel while watching the aperture change in the viewfinder. If you have a kit lens it will most likely by f3.5 at the widest angle of your lens and the widest aperture. You won’t see the changes if you look down the lens on your camera because it only closes down as you take the picture - to make it easier to see through the lens. If your camera has a “depth of field preview” button you will notice that when you press it “everything goes dark” if your aperture is set smaller than the widest it can go. That is because the camera closes the aperture to what you have set it at to show you how much of the image will look “in focus” when the picture is taken.

In the pictures below we have a 50mm f1.8 prime lens set at f2. As the aperture is changed manually you can see how the higher numbers restrict the amount of light coming in.

Set your camera to auto iso for now and and find a subject that can show a difference in depth of field, something like a fence. In my samples the iso stays at 200 but as the aperture changes and less light is being let in the shutter speed changes to compensate. if you can shoot at 1/2000th sec at f2 and change to f2.8 [1 stop “slower”, each “stop” being either twice as much light or half the light, depending which way you go.] the camera has to let the light in for twice as long - 1/1000th compared to 1/2000th. At f4 it chose 1/640th but should have been 1/500th to be precise - no camera meter is perfect and no camera gets it right every time, besides, it was a “patchy cloudy” day so there were slight variations in the light. At f5.6 we see 1/250th sec which is spot on - 1/4 the speed of 1/2000th because f5.6 is “two stops” darker than f2.8. If we’re cooking a meal [getting correct exposure] in our microwave then in this example f2 is full power which takes 1/2000th sec to “cook our meal”. If we go to f2.8 we have the microwave on half power and have to leave it on for 1/1000th sec to “cook our meal”.

Apertures work like “squares” 1, 1.4, 2, 2.8, 4, 5.6, 8, 11, 16, 22. Every second number is doubled. “1, 2, 4, 8, 16….”, “1.4, 2.8, 5.6, 11, 22”. If we start from 1 then 1.4 squared is close to 2, twice the area. 2 squared = 4, twice the area of 1.4 squared. 2.8 Squared is almost 8, half the area of 4 squared [=16]. You don’t have to understand the maths when making adjustments, it’s just good to have an idea what the numbers mean, then you can forget about it and concentrate on making good photos.

Now take another set of photos at various apertures focused slightly further into the scene. You will notice that the depth of field still changes quite a bit but not as extreme as when you are focused closer. The lesson? If you want the background ‘more blurred’ get closer to your subject. Notice also the two images shot of the building in the distance - almost no difference between f2 and f16 - this will be explained below.

To understand the difference between the depth of field when focused close and far we need to look at a lens. Scroll through the images and watch the difference from infinity, which is quite close to 3m, to the other end of the scale where it is focussed on 0.5m, which is reasonably close to 0.45m on the right, while 0.7m is quite far to the left. There is a lot of movement at the closer distances to change focus over a distance of a few cm. At the infinity mark we only have a small amount of movement to focus on 3m - which gives an idea why when we focus on something in the distance even the background is in focus.

Now let’s move on to Shutter speed. I chose the shadow of a fan spinning on full power for my tests. Set your camera to “S”/”Tv” depending on your camera. On Nikon it’s “S” for “shutter priority” and Canon uses “Time value”. Take pictures at various speeds starting at the fastest shutter speed your camera will allow at its widest aperture in the existing light. It’s best to do this test in sunlight, the more light you have the faster the shutter speed you can use. Pause and think about that, look at the resulting apertures at the various speeds. At f4 we can take the picture at 1/1000th sec. f5.6 is one stop smaller aperture and we get 1/500th sec, which is twice as slow as f4. Each stop that we close the aperture down means having to keep the shutter open twice as long as previously: If we turn the microwave down to half power we need twice as long to cook our meal - if there is less light we therefore have to use wider apertures and slower shutter speeds. A little like having half the electricity, then full power on our microwave [widest aperture] with half the electricity means having to keep the microwave on for twice as long as with a full electricity supply. If the sun were “1000 volts” for our microwave then the window light coming in to your house from the sky is about “20 volts” - you would have to have the microwave on 50X longer to “cook your meal”. Look at these two images, 1/5th for indoors, 50X faster for outdoors.

Screen Shot 2019-04-20 at 7.50.33 PM.png

That’s why people like using fast prime lenses like f1.4 when shooting indoors - a “fast” lens means it lets in more like so you can use higher/faster shutter speeds.

Besides Aperture and Shutter speed the other variable for exposure is iso. Let’s compare iso to the volume control on your radio in your car. You have the volume at a low setting [you’re an older person] and everything sounds perfectly clear. As you drive towards the bottom of a valley things start getting quieter, the signal isn’t as strong. You turn up the volume and it gets louder but there is some hissing as well- this is “noise”, you’re trying to amplify a weak signal and in turn you’re also amplifying weak signals that are not part of the music. With a digital camera sensor there are slight electrical signals on the sensor itself as part of the operation of the electronics, if the light is really weak and you amplify it a lot you also amplify these signals.

dpreview.jpg

Iso is something you want to keep as low as possible though cameras these days do pretty well at higher iso’s like 6400 - better to get the shot at iso 6400 than have a blurry image at iso 100 for the sake of “absolute quality”. Now you can either put your camera in Program mode and manually adjust your iso from 100 to its maximum and view the results on your screen or you can go to an excellent site like dpreview and find your camera model and use their interactive widget to view an image at 100% at various iso settings. Have a look at the review on the Nikon D7200, Drag the little square around to various parts of the scene and change the iso setting to see what it does to image quality. Starting from iso 100 to 25600, watch the image quality change - you will most likely see the biggest changes after iso 6400. You can also change the camera it compares with and see how other models compare. You can also change it from jpeg to RAW and see how the files differ and be impressed by the jpeg engine in the camera that processes the image to remove as much noise as possible. Something else to try - set your camera to iso 6400 in program mode and see what aperture and shutter speed it selects. Now set your camera manually to that aperture and shutter speed and take the same image at iso 100. The resulting image will be pretty dark, you are letting in 64X less light than necessary at iso 100 - the image at iso 6400 is also only getting this much light as per your settings - this will give you an idea as to how much amplification is actually taking place when you shoot at iso 6400.

Aperture samples

These images were taken while writing my ebook. These are the images used to show the difference between various aperture settings. This is the position that the aperture in the lens moves to when the shown aperture is selected and the shutter release is pressed.

Then I took some photos with the lens mounted on a body and set to the aperture I was using on the camera I was actually taking the photos with - so the aperture you see in the picture is also the aperture the image was taken at.

Here are some samples taken with the 70-200mm lens.

Here are some pictures of an older lens that shows aperture and depth of field at the various focal lengths and focus distances. Basically the white line shows the distance you are focused on and the other coloured lines match up to various apertures [the red line is for infra-red focus]. For example the “f22” is orange and there are two orange lines on either side of the white line. That shows what will appear to be in focus if you were to choose f22 to take a photo. Notice as well how the depth of field scale changes as the lens moves from 80mm to 200mm - less and less is in focus which is why the longer focal lengths give better blur in the background.

The older 50mm f1.8D has a depth of field scale as well if you look carefully at it. It doesn’t need lines like the 80-200mm because it doesn’t zoom. Looking at the first image - if we focus on 3m then at f22 the picture will look focused from infinity to around 2m. As we focus closer however the area in focus decreases and eventually at the closest focusing distance we only have a couple of cm “in focus” even at f22.

Here are some samples from the 50mm lens at various apertures with the focus point in the same place on a fence.

And some images taken with the focus point further away - when your subject is more than 20m away it’s hard to even tell the difference between f2 and f16.

Wedding photography poll.

Please reply in the comment below. What did you like and what did you not like about your wedding photos?

No need to say who the photographer is or even give your name, I’m just interested in hearing experiences and composing a blog post on the results to help other photographers who are interested, especially those just starting out, to understand what the customer does and does not like in wedding photos. Here is an example of wedding photos gone bad.

aCanDav_20090523_113546-1.JPG

The next flash design? Calling Godox!

Tired of heavy flashes making your camera top heavy? here’s an idea for the next step in flash design. How about having a grip shaped flash that mounts all the electronics and batteries under the camera like a battery grip - and a flexible flash head that can be adjusted just about anywhere! on either side. That will make it easier to carry the camera around your neck. When carrying two bodies it would make sense to use a system that hangs the camera from it’s original strap clips.

flashgrip.jpg

Someone mentioned that it would be good for macro shooters if there were two flash heads. Perhaps it could come with the option to interchange which side you have the flash head coming out - and the ability to buy an additional flash head and plug it in to the other side - it will be similar to having a larger light source and softer lighting for portraits as well.

dual.jpg

Nikon's forced upgrade path prediction for DX bodies.

Edit: People are asking where the full frame bodies and new mirrorless bodies fit in - they are a category all on their own - this chart focuses on dx bodies and their users. Also the “Dx1” may very well be a Z mount dx mirrorless.

Over the years of new releases there has often been a lot of debate about where a new model fits into the old scheme of model numbers. Quite often the newer models aren’t replacing anything but are rather ‘in between’ two models. The pattern suggests a form of “forced upgrade” mainly for the advanced amateur and semi pro shooters. After all, the pro shooters will most likely be buying the highest performing bodies anyway so they don’t need any pushing, beginners are usually just starting out and all they need is the cheapest model to lure them in. It’s the advanced amateurs who need a gentle nudge to spend more on gear and this chart shows how it is done.

Screen Shot 2019-03-27 at 7.46.16 PM.png

Things were a little ‘messy’ in the beginning when Nikon introduced their first full frame D3 because realistically it did not follow on from the D1 and D2 series. When the D3 was introduced there was no longer a pro dx body. You would have to upgrade to full frame for that, which may have been part of their strategy.

Let’s look at the other models. We had the advanced amateur D70, D80 and D90. Below that we had the D50 which disappeared and was replaced by the lower level D40 which lost the built in AF drive in the process - you would have to upgrade from the D50 to a D90 to regain that. The lower series eventually turned into the D3000 model that continues to this day - beginners need to be lured in, not quite forced to upgrade yet. The D5000 series with the tilt screen is a step above the D3000 series and an added incentive for beginners to spend a little more money.

The primary targets for forced upgrades were the D100,200,300 and D70,80,90. The first step was to introduce a replacement for the D300 which didn’t quite happen - then after a lot of waiting the D7000 was introduced ‘in between’ the D90 and D300. It wasn’t quite as semi-pro as the D300 but was definitely half a step above the D90 with the twin card slots and half a step below the D300. [forget about megapixels, that’s not an indication where a body fits, after all the 16 megapixel D4 is way superior to the 24 megapixel D3200. So all the D90 users now had to either drop to a D5000 series body and lose their AF drive or pay a little extra for a half a step higher body. The D300 users had to choose between a half a step lower D7000 or progress to the more expensive full frame models.

Then along came the D500, finally a replacement for the D300 - a semi pro dx body and the only way for semi pro dx shooters to get the features they wanted because the really good D7200 had no successor - what they named the D7500 was half a step below the D7200 because it lost the dual card slots that many pros require as a form of insurance for potential card failure.

What comes next? My prediction is that the D7500 series will lose a feature after a while and will most likely lose their AF motor and at the same time a replacement for the D2 series will finally arrive, the “DX1” pro body with a built in grip, the only way for an advanced amateur to have a built in focus drive and twin card slots, because by then the D520 will have lost a feature and perhaps only have one card slot. Perhaps in 10 years time only the pro and semi pro full frame bodies will have the built in af motor - unless they finally reserve that only for the pro body in each format.

Conclusion: Every few years those who have grown accustomed to a particular feature in a camera body will be forced to pay a little more to retain those features. Beginners cameras will always lack a built in AF motor and twin card slots so not much can be removed from them - but that doesn’t matter because the first step is to lure new users in and introduce them to ‘GAS’ [Gear Acqusition Syndrome - ‘NAS’ for Nikon gear] and advanced amateurs and semi pros will avoid those bodies anyway. This is not such a big deal to me - I paid the same money for my D70 15 years ago as I did for me D7200 recently and the D7200 is a HUGE upgrade. Along with the fact that so many photographers seem to feel the need to buy the latest and greatest that the market is getting pretty flooded with low shutter count pro and semi pro bodies and many of us are quite happy to shoot with last years’ technology - after all some photographers considered them to be amazing a few years go - and they still are, they didn’t degraded when the new model was introduced. But for those who must have the latest, be prepared for a little ‘shove’ to a higher level after a few years.

My advice for now is to stock up on D7200 bodies because they are the last of their kind, as was the D50 in its day.

Nikon 50mm f1.8G vs 16-80mm vs 70-300mm for portraits/headshots.

I spent a while stewing about whether I needed to have a prime lens on one camera body when shooting weddings after I shot the last wedding with an 18-140mm and a 70-300mm VR lens and it went really well. I mean when you do a search there are always all these reviews on prime lenses and how good they are, and essential to some people, for portrait shots. I wondered about the idea of using my new 16-80VR on one body while keeping a 50mm f1.8G on the other body [shooting with two D7200’s] so that the prime would add that little extra when I do portrait shots. It’s one thing though to read reviews that are all done using one lens but its another thing to be able to speak from experience, which is why I always like to do tests and see actual comparisons. If I were to give people advice I’d want to be 100% certain as to why I advise a certain approach to a shoot.

I had the Nikon 50mm f1.8G on my old D5200, the 16-80mm VR on a D7200, and the 70-300mm VR on the other D7200, all on aperture priority. Now there will be slight variations when shooting in straight aperture priority but I wasn’t about to go fully manual because it was a ‘patchy cloudy’ day with slight changes in the lighting. All of the shots are “sooc” or “straight out of camera” with no fancy tweaking, converted from NEF to jpeg in NX-D.

compared.jpg

My model “Iris” is part Borg, she still hasn’t had all her implants successfully removed.

I started with the 50mm and here are the photos. I stopped at f3.5 because that is what the 16-80mm starts at, at the 50mm mark.

Then the 16-80mm lens. I went straight to 50mm to “see what I’m missing by only being able to go to f3.5”. After that I took a step backwards and took a shot at 80mm f4. Not bad, I prefer 80mm to any of the 50mm shots. At 50mm with dx if the subject and I were to both extend our arms our fingers would touch which is a little close for comfort to me for portraits, which I imagine is why most people say that 50mm on dx is good for 3/4 portraits [rather than head-shots] where you can stand at a mutually comfortable distance and take ‘waist upwards’ pictures without making your subject feel uncomfortable.

I may be only one of a very limited number of photographers on earth who doesn’t like ‘tons of bokeh’ in the image at the expense of a soft subject. I don’t like it when the eyes are perfectly clear while the ears are out of focus except in a very limited number of creative images. There does tend to be some sort of mindset among a percentage of photographers that “since more expensive lenses can create more background blur it can be reasonably concluded that the more blurry your background the better your image will be”, after all, “it was taken with a very expensive lens!”. I very much like the cinematic look - in the movies you will notice that most of the time the background is pretty out of focus while the subject is totally crisp and in focus, often due to green-screen editing. But while doing these tests I noticed that the longer the lens you use, the more the resulting image is like that, clear subject, blurred background. If your lens has a distance scale you will see why. If you are focused on 0.8m then anything at 0.6m is way out of focus at f1.8, but when you are focused at 10m [on the 70-300] then infinity is not far off, meaning that more is in focus when you stand further away from your subject. Let’s look at the results from the 70-300mm lens keeping in mind that the background would change quite a bit as I moved further away to keep the subject the same size

I had done some tests previously in different light and will add them to show what I mean about blur on the subject. The pasted settings look a little small but you can easily tell the ‘creamy background’ in the f1.8 shot but look at the ‘hair/Borg-implants’ at the back which is quite well lit - all out of focus, I actually prefer the f5.6 shot due to the detail in the subject. As mentioned previously, I’m one of those weird photographers that likes to present detailed photos to my customers as opposed to “creamy background” artworks. It’s just that I’ve heard people complaining that their photographer made the background in their wedding photos “all blurry” when “my cellphone takes better pictures than that!”. I fully understand the occasional ‘artsy’ shot but have read many times on the forums “people like to look at artsy photos, but they don’t buy prints of them!”. For wedding photography I prefer the photojournalists “f8 and be there” principle - if you don’t have the time to get creative, at least capture the scene, that’s why they hired you, to capture memories of their big day - being ‘artsy’ comes second. After seeing the 16-80mm at 80mm f4 I’ve decided I won’t be using a 50mm f1.8G unless the lighting gets really bad and I have no choice.

I’m not saying here that the 50mm f1.8G is not a good choice for shooting weddings on dx or fx, just that personally it doesn’t suit my style. After cleaning up my gear I realized that regardless of what lens I use, Piggy doesn’t like the Borg model.

70300mm_00005.jpg

I recently received an older 80-200mm f2.8 push-pull lens and decide to try it out in the same situation. Many people seem to think that once you have an f2.8 zoom you are sorted for just about any situation. Realistically it’s one stop faster than the 70-300mm VR at the wide and and about 1 1/2 stops faster at 200mm. But of course the 70-300mm goes that much further than 200mm which is great for outdoor weddings. Then there is the VR on the 70-300mm which Nikon claims gives you 4 stops extra sharpness. In other words instead of having to shoot at 1/500th sec at 300mm you can shoot at 1/30th sec without seeing lens shake…. “in theory”. After taking several shots starting from f2.8 I decided that the photo I liked most was taken at f5.6.

80300mm_00008.jpg

The pictures I took from f2.8 we’re ‘iffy’ because when you have such a thin field ‘in focus’ the slightest backward or forward movement , or lens shake, results in a soft image. Of course this will depend on other factors like af abilities of the particular camera you are using. As mentioned previously I’m not into ‘ears out of focus’ headshots. Of course this doesn’t happen as much with longer lenses due to the depth of field as you get further from a subject but realistically, if I have to shoot at f5.6 for the results I want then I’d rather use the 70-300mm VR which will give me a two stop advantage over the 80-200mm with no VR. The 80-200 has a two stop advantage in light gathering at the longest end but the 4 stops of VR cancels that out and adds a two stop advantage to the 70-300mm. Of course this brings us back to the argument that the answer then, is a 70-200mm f2.8 VR lens… IF you’re ok with lugging that weight around all day.

Further reading on headshot photography.

Nikon 16-80mm portrait tests.

I was considering the option of having the 16-80mm lens on one body and the 50mm f1.8G on the other to have an option for better portrait photos. After doing the tests I decided that I liked 80mm at f4 more than any of the shots from the 50mm lens at various apertures, and it gives a better working distance.

You’ll have to excuse my model “Iris”, all her Borg implants have not been successfully removed yet.

Godox K-150A becomes a K-600A - sort of....

When I bought a Godox K-150A recently I found that it was weaker than my Nikon SB800 flash. Several years ago I made a turbo-flash by adding a 3300uf capacitor to an older hammer-head flash. I decided to try that with this Godox, after all, the flash tube on it is pretty big so should be able to handle the power. The instructions advise a 3 minute cooling period after 30 full power flashes in a row which suggest something obvious - flash tubes work off a duty cycle. In other words you could fire it 30 times at full power in maybe one minute, then let it rest for 3 minutes [180 seconds rest plus 60 seconds shooting = 240 seconds for 30 flashes] - OR you could fire it at full power once every 8 seconds, 30 X 8 = 240. I realised similar results on my previous modification because at the time the batteries I had weren’t very good and it took so long to charge I could fire it at 5X the normal power as much as I wanted because it got so much rest while charging.

When I opened the Godox K-150A to have a look at connecting some wiring for an external capacitor [Don’t try this at home! The capacitors can kill you!] I caught a glimpse of one of the 4 capacitors inside and it had “330uf” on the side - about 1300uf in total.

aDSC_4705.jpg

The capacitor I have is rated at 3300uf and 350v but I have charged it to over 500v previously and discharged it through an SCR to make a wire explode into plasma and split a glass jar full of water, so I knew it could handle the load. Adding the 3300uf capacitor should make it 4X as powerful in total so firing it once every 30 seconds should be perfectly doable without any issues - or maybe 8 times in a row every 240 seconds [hmmmm, maybe I should add a cooling fan?]. Either way most of the time we wouldn’t be using it at full power except maybe outdoors, then we could perhaps fire it at full power 5 or 6 times in succession and then give it time to cool down for a while. Besides, it’s an interesting experiment.

Here are the results of a comparison at iso200 f22 and 1/100th sec with my old Nikon D50 triggering the flash in remote mode with the built in flash on minimum power. I fired the Godox flash on minimum power, half power and full power each test. The interesting part is that the flash seems to charge a different voltage for each power selection so if you had it on full power, then turn it back to minimum, it fires at full power anyway then gets it right the next time because it can put in less charge.

Turbo K150A.jpg

I originally started with f11 on the tests but the turbo-flash was so much brighter that I went to f22. Afterwards I tried to find two images that looked similar. The light had moved at some stage so the images look slightly different but their histograms are pretty close. The original light at f11 was very close to the modified light at f22 which would give us close to 2 stops more power - or 4X the power as per my original estimate.

apertures compared.jpg

I have tried charging this flash with a $10 inverter along with a security battery and it works, which makes it a viable “poor mans outdoor light”. But don’t try it yourself or it could end up being a “dead man’s botch-up”

aDSC_4756.jpg

As mentioned previously, this could prove fatal if you don’t know what you’re doing. I discharge the capacitors before working with them and if you don’t know how to do that I’m not going to tell you or encourage you to do it.

At the moment it is all just taped together, after all why be a perfectionist about it before you know if it will work or not?!

DSC_3666.JPG
DSC_3667.JPG

I have disassembled it for now as it wasn’t practical. maybe for someone with no other options who had a spare capacitor lying around it would be an option, but as a DIY mod the capacitor would cost more than the light itself, and for that price you can buy the E300 which would be less bulky and also not worry about blowing your fingertips off in the process :)

Godox K-150A - weaker than an SB800.

DSC_4671.JPG

Godox have been producing some good value products lately, flashes, studio strobes, fittings etc. I bought an E300 studio strobe for around $75 a year ago and it has worked well in my ‘garage-studio’.

I recently purchased a Godox K150A on Aliexpress for around $40 which included shipping which is a VERY good price for a 150Ws flash/strobe IF it actually is that power. When it arrived it felt very light which isn’t always a bad thing with these days, things are getting lighter, smaller and more powerful with advancing technology. I fired it a few times and wondered if I was judging correctly because it didn’t quite look all that powerful at full power, so the only way to be sure would be to test it against my trusty Nikon SB800. I looked up the Ws rating of the SB800 and found this discussion and this one suggesting that it is about 75 Ws - meaning that the Godox K-150A should be twice as powerful.

One thing you need to remember with the K-150A is that is has a remote sensor that is ALWAYS on which can be quite annoying. If you compare its power with another flash you have to keep turning it off at its main switch so it doesn’t also fire when you fire the other flash. I imagine this would be a major nuisance to some users, maybe not a big deal for those on a budget.

DSC_4670.JPG
DSC_4672.JPG

The strobe tube itself looks like it means business as well and I imagine it could take a fair bit more energy than the smaller Nikon SB800 flash tube could. I decide to place them side by side in my garage and do a few tests to be sure it was a fair comparison - after all, the SB800 can zoom while the K-150A is a bare bulb flash.

DSC_4662.JPG

Please excuse the scene, the 'dark circle on the garage door is due to a potassium nitrate and wax smoke bomb explosion - it made quite a mess but I leave it there as a reminder to use an insect smoker rather. Here is the plain bounce flash test, both the same distance from the ceiling, camera settings D7200 iso100 1/100th f11 to give me an idea of the power it would have in daylight. [I know the sunny 16 rule but most days have enough haze to only require an aperture of f11]. Notice the power difference? The 75Ws SB800 seems to be more powerful than the “150Ws” K-150A! I used the Sigma 8-16mm lens at its widest setting on my D7200 to show all the light in the scene.

Bounce flash.jpg

Now for the direct flash test. The SB800 was at its widest setting and of course the K-150A only has one setting and fires at a much wider pattern. Here they look quite similar when you look at the ceiling, but when you look at the centre the SB800 is brighter - the K-150A is throwing most of its light outwards and upwards towards the left - the floor is darker as well.

direct flash.jpg
DSC_4666.JPG

Now we try to even things out a bit - I set the SB800 at full zoom and put a standard reflector on the K-150A. The K-150A still seems to fire upwards and to the left a bit more than expected.

zoom.jpg

Then of course the way most people would use it, with a softbox.

DSC_4668.JPG

The strobe head was battling to stay up with the relatively light weight on it - perhaps it’s best to use this strobe with a shoot through umbrella rather. It has a fitting that doesn’t have any means to tighten it - just a spring loaded clip that holds the shaft in place - for now, if it lasts. With the SB800 I used a hand-held S-mount adapter which holds the flash nice and central, and I had the flash at its widest zoom setting. Both lights are feeling the strain of trying to light a subject through double diffusion - but the SB800 still looks twice as powerful as the “150Ws” Godox K-150A.

softbox.jpg

Conclusion: The Godox K-150A is NOT a 150Ws flash, unless of course I got a dud. We’ll see what the supplier says when I contact them. On a few discussions it was suggested that because the K-150A spreads its light over a much wider area it would be superior in a softbox and not create hotspots as the SB800 would. So of course I had to try that, both at full power and minimum aperture to see how the softbox looked from the front. I’m afraid the SB800 wins again. After that I put it up against the Godox E300 and gave the E300 a 1 stop disadvantage to even things out a bit - the results weren’t substantially different but the K-150A was still weaker.

softbox hotspots.jpg
e300compared.jpg

While I had things set up I decided to do a few more tests with some fresnel lenses I bought. I’ve been thinking about how to focus the flash for when you are shooting in bright sunlight from a distance and diffusion isn’t practical - you may as well get as much power as possible focussed on the subject. Here are the two fresnel lenses, a rectangular sheet and a nice round lens. They were $3 and $7 respectively.

freznel.jpg
fresnel sheet.jpg

It’s not so much the shape of the lenses, rather the fact that they were different focal lengths that gives the different patterns. The round one had a 55mm focal length and the rectangular one is only advertised as “3.5X magnification” they don’t mention actual focal length but you can get the same results from either based on how far from the flash you hold them..

round fresnel.jpg

I held this round lens right up against the front of the reflector. I think it has real potential in outdoor shoots.

DSC_4669.JPG

$10 WS-25 slave flash failure

A while ago Godox released a cheap slave flash for about $12 The CF-18 which works very well. Recently I saw an even cheaper slave flash, the WS-25 , mentioned as “absurdly cheap” and for the price I though it was well worth trying one out.

Screen Shot 2019-02-24 at 9.15.37 AM.png

When it arrived I had a look at it and actually read the manual for a change. I shows how to install batteries and turn it on and beyond that doesn’t even mention the slave mode so I went back to my usual mode of ignoring the manual and working it out myself. I got it only for the slave function and didn’t try it on the camera. It charges up reasonably quickly and with the first few attempts didn’t respond to a 1/128th power flash from my SB800. They don’t say where the sensor is - it is most likely in the front because when it did work that is where I aimed the test flash. Eventually I raised a dispute on Aliexpress [I have always received a full refund with disputes which is why I deal with Aliexpress] I did a video of the tests I did and counted the fires vs misfires. I did quite a few tests first to make sure it wasn’t on S2 mode which ignores the pre-flash of TTL flash mode and then fires on the second flash. Not so, it is just totally irregular. It fired twice, missed 4 times, fired 5 times, missed 3 times, fired twice, missed once, fired 3 times, missed 4 times - and near the end of the test I was giving it a few extra seconds to make sure it was charging up [even though the ready light was on for each test shot I did].

Conclusion: The Godox CF-18 was a really good price for a slave flash, perhaps something to put behind the subject as a rim light when your main light fires. I may have got a bad sample but regardless of how much something cost if it doesn’t actually do the job it is absurdly expensive. Maybe others will have a better experience?

Caters news agency - promised me thousands to go exclusive with them.....

Just over a year ago I was privileged to photograph a special wedding shoot. A touching story involving a man with Alzheimers who forgot he was married and proposed to his wife again - they went through with another wedding which he thought was his first. Stuff.co.nz published the story that night with a mention of my name as the photographer and I spent the next few days receiving emails, facebook messages and phone calls asking for permission to use my images in news stories around the world. Caters news agency called and gave me a story about how much coverage they could provide and how beneficial it would be for me to give them exclusive rights to the images BIG$$$$$$$ blah blah blah. It all sounded good, I wasn’t sure how much I could believe but gave it some thought. Then an hour later Linda [the bride] called and told me how Caters had promised her all sorts of benefits by going exclusive with them and said how much she would love to go down that track. At that moment I decided we would be going exclusive with Caters. After all, I photographed the occasion for free just to be a part of it and make their day as happy as possible - I expected nothing in return - I did not expect to gain anything from it besides hopefully a few more hits on my new website and of course, it was the couple’s big day and not my place to put a damper on it all.

I will repeat for emphasis - I did not expect anything from the occasion, I am really happy with the amount of traffic it steered towards my website and I am not bitter at all, I decided to use the opportunity as a learning experience as well and I just want to share the results with anyone else who might one day receive such an offer…… as a warning!

Moving on: I called Caters back and told them we would go ahead with “going exclusive, lots of coverage BIG$$$$ etc.” and just had to ask “How much can I expect to earn?”. “Ohhh, upwards of $3000! …… but it takes a few months you know, people have to buy rights to use the images from our site” . Uh huh! Ok then let’s see how it goes. I had to fill in a contract which I faithfully adhered to though I received several other offers, one person ‘borrowed’ some images for their story then contacted me and asked for more and I forwarded their details to Caters and the next day I received a message “Looks like I won’t be doing the story, sorry but $1000 is too much to use the images!” - wow, so Caters must be making good money with my images then! Now what will I buy with my $3000 “over the next few months”?

This part is what I am really happy about, the Washington post published the story with a link to my blog that had a lot more photos and my website views shot up. Not exactly “viral” but 14.5K views over the last year.

Screen Shot 2019-01-27 at 9.21.17 AM.png

That, along with the happiness of the couple was more than enough payment for a few hours of my time and I am super happy about it. But of course, as mentioned, feel it worth sharing the monetary results with other photographers and people receiving similar promises from companies wanting to use their images.

Screen Shot 2019-01-27 at 9.21.44 AM.png

Over the next few days, then separated by weeks, then months, I checked into my BIG$$$ account with Caters expecting to see the results I was promised. To me “it takes a few months” means “more than two months, and less than a year” otherwise the statement should be “it takes more than a year [or two]” if someone were to be totally honest in their communication. I mean if someone were to ask me how much they could earn by doing this I would tell them that it will take a few years. Well actually based on current income and the rate things have slowed down, mathematically it will take a few centuries unless there is going to be some sudden surge in sales related to their anniversary - yeah right! I suppose based on inflation I would only need one sale in 100 years time to cover the amount - which should be able to buy a lens cap for the lens I could have bought today for the same money. Hmmmm, I think I’m beginning to understand the ‘honesty’ in their promise as would be explained by their lawyers in a court case. After all 100 years is “quite a few” months.

Anyway, after about 10 months I saw there was enough to ask for a payment. I went through the process of supplying my request and filling in bank details etc. and waited. I received no reply. A week later I sent an email to the person who had previously replied within minutes - no reply. I decided to just wait it out - after all it adds to the story of the kind of service others can expect from this company and I wasn’t going to starve without the money. About a month later I saw a payment in one of my accounts finally. Based on my sales over “a few months”…..

Screen Shot 2019-01-27 at 9.23.18 AM.png

This resulted in NZ$387 or US$265. Maybe their promises are in Zimbabwe dollars? I imagine in this case their lawyer could argue that I received a lot more than promised. This may sound silly and to most of us it is - but in a legal case this is the way arguments could go - after all they could say that they knew I came from South Africa and were explaining it in terms I would understand, and kind of proves how fruitless a law case against them could be for someone who was really upset about their promised deal.

Screen Shot 2019-01-27 at 10.16.54 AM.png

In conclusion, this was an interesting experiment. I went exclusive with them to make the couple’s day happier and didn’t care what I got out of it. The traffic to my website for a few hours work/fun was worth more than $3000 in payments for SEO possibly. But there is obviously a certain amount of disappointment involved in not receiving something that was promised - if they had simply said “we don’t know how much you will get” I would have still done it for the couple, but obviously they won’t be able to rope others into their deals so easily by being truthful now will they? Personally I can’t say how photographers should handle a situation of having media available for a potentially viral story, maybe someone can chime in in the comments, all I can say for those who are new to the situation is “Get it in writing or ask for the amount in advance” - don’t believe their promises.

Update: 30/01/2019, I just contacted Linda, the “bride” in this story and asked her how things went over the last year. She replied that the story has been published in two magazines and “was paid $600 all up [US$400] which is much less than expected but better than nothing I suppose”

Update: 30/05/2020, I was contacted a few days ago by a singer who informed me that a song had been written about the marriage “Deja Vu Wedding”. I made contact with Linda to inform her and sadly she informed me that just a few weeks previously, during the lockdown “Mickey” had ended up in hospital. She wasn’t allowed to visit because of Covid-19 and he passed away due to a heart attack.

Embed Block
Add an embed URL or code. Learn more

Insect fogger in the woods.

A while ago I bought an insect fogger and filled it with glycerin and water and got some really nice smoke effects. Today we visited Yarndley’s bush and took the fogger with - filled with pure vegetable glycerin this time.

It’s a 5-10 minute walk down a hill to the beginning of the forest which was preserved for posterity by some forward thinking people.

aYarndleysmoke_00038.jpg

The insect fogger is powered by a gas cylinder and is reasonably safe to use. There is a metal screen around the ‘flame’ area of the fogger and it sits pretty stable - but to be even safer I made sure I set it up on the solid walkway.

aYarndleysmoke_00058.jpg

The first thing to do is to check which direction the air is moving so after a few puffs I got an idea where to move to once the smoke was flowing. The results were quite satisfying. I’ve included some images with no smoke for comparison.

"Firespeed photography"

Tonight I tried something new. Light painting with fire mixed with high speed photography. Basically I used a 4 second exposure, after blocking off all the light from the window and underneath the door of our garage. I put a tarpaulin on the floor to catch [most of] the glass and set up my 'studio' in the middle of the garage. Ignore the shoes please - they were comfortable. In this scene I am clapping my hands to make the sound activated flash trigger fire.

aYfirespeed_00009.jpg

The basic principle is that if your background is dark enough then you can add as many exposures as you want as long as they don't interfere with each other. This can become quite challenging as you add new variables. The biggest variable here is the strength of the flame because it changes as it burns out. You think you have everything right, then you find out that after adding fluid to get your flame going again it is now too strong and exposes the garage door in the background.


afirespeed_00004.jpg

Then when you have your aperture and shutter speed right you give the board a spin and realise that the subject wobbles a bit and gives movement when this happens - which leads to the decision to shoot the bulb and trigger the sound activated flash trigger at the beginning of the exposure, before moving the flames.

afirespeed_00002.jpg

After you figure that out and get ready for a proper shot with the air pistol you're so excited that you spin the board too much and the flames go in front of the subject and "burn" the image out.


afirespeed_00003.jpg

Now you think "Well I'm glad I worked that out and didn't use the only clear bulb I saved for this shoot, I'll have it all perfected for this shot". That's when you realise the microphone is too close and the flashes fire before the pellet even hits the bulb - and it's too late, the bulb is destroyed.

afirespeed_00004.jpg

By this time the flames have burned down to a good intensity that doesn't light up the garage door and you get the spinning of the flames at just the right speed only to realise that in the time it took to remove the broken bulb and set this one up the flash has gone to sleep and you forgot to wake it up before firing the next shot. This was the test shot of the flames before I shot the bulb.

afirespeed_00007.jpg

By now the ground made crunching noises when I walked, there was broken glass everywhere. I got a few reasonable results and learned that 'next time' I need more space behind the subject so as not to light the garage door - or I need to make a shield around the flames to direct the light only at my lens, not behind the subject. I got a few 'keepers' but there is a lot of room for improvement.


aYfirespeed_00006.jpg
aYfirespeed_00008.jpg
aYYfirespeed_00005.jpg

Here's a short video showing how it was done.